How To Build A Wooden Box With Plywood,Pocket Hole Jig Ottawa Lab,Festool Sanding Discs For Wood Industry - Step 3
No account yet? Create an account. Edit this Article. We use cookies to make wikiHow great. By using our site, you agree to our cookie policy. Cookie Settings. Learn why people trust wikiHow. Download Article Explore this Article parts.
Tips and Warnings. Things You'll Need. Related Articles. Part 1 of All rights reserved. This image may not be used by other entities without the express written consent of wikiHow, Inc. Purchase an 8 by 4 feet 2. This material will become the sides of the jump box. You can pick up the plywood at your local home improvement store or order it online.
Measure and mark your plywood pieces. Since your plywood How To Build A Wooden Bench With Storage Rack is 8 by 4 feet 2. Use a permanent marker to mark the spots on the plywood where you want to cut. Cut out the rectangles using a skill saw or table saw if you have one. Run the saw along the pencil markings you made slowly and deliberately.
Place one hand on each side of the saw to firmly hold the wood in place. Cut out one rectangle at a time. This How To Build A Wooden Box Bench will make it easier to cut the rest of the rectangles. Call ahead to set up a time for you to go the hardware store. Part 2 of Put the box together by hand to see if the pieces line up.
Take one of the This will be the base of your jump box. Add the 28 by Apply the glue to every edge that touches a different edge. Apply Gorilla glue in a thick, even coat down the thin sides of the plywood. Work one piece at a time, then press the pieces together. Leave them to dry for minutes before moving on to the next piece. Drill wood screws into the edges of the rectangles to connect the pieces. Place these wood screws about 5 inches 13 cm apart and drill them into all 4 sides of the How To Build A Small Wooden Box With Lid top and bottom piece of plywood.
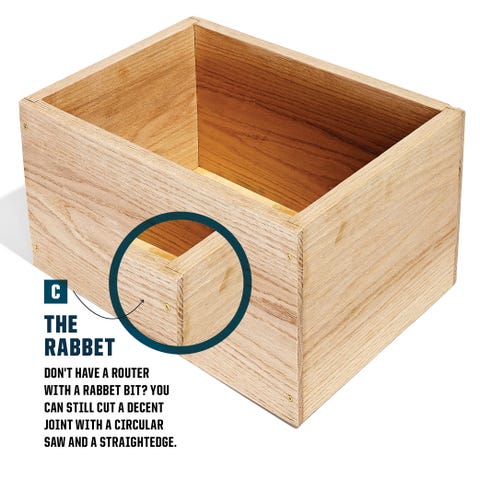
These are the sides of the box. Slide the fifth piece over the blade to miter it on all four sides. Lay the four pieces out flat on a worktable. Spread a thin layer of glue on all the miters with a glue bottle and your fingertip.
Stand the four pieces up on the side that you did not miter. Bring all four corner miters together. Wrap the box with two strap clamps and tighten. Wait one hour for the glue to dry. Remove the strap clamps. Spread a layer of glue along the top mitered edge of the box. Next glue up. Lay out 4 piece in the order that you want them. Put masking tape on the outside of the wood, you do not want to any space between the wood.
Fold up the side, so you get a box. To make a square out the wood, use the chop saw to cut width. Add a wood glue to the top of the box make sure that the glue is an even over the surface.
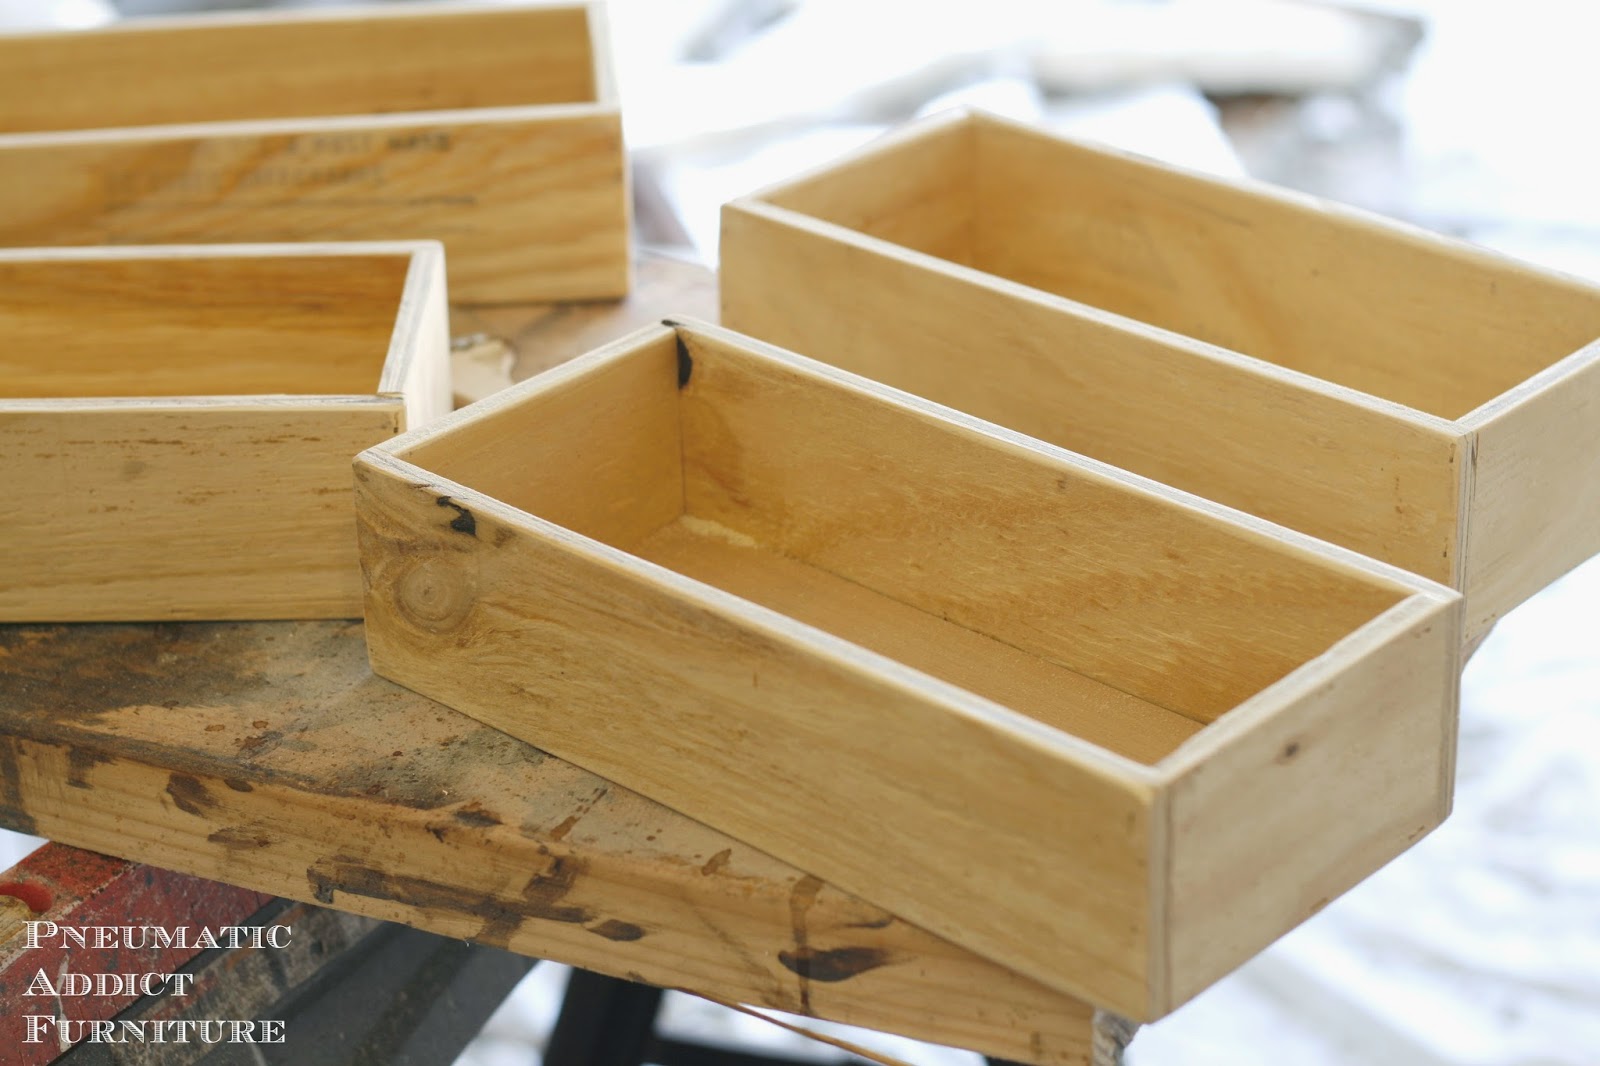
Router table. Set up router table with a flush trim router bit. With the box upside down, run the box around the bit. This will make the oversize top flush the sides of the box. Once the glue is all dry, you can cut the top off the box using the table saw. Hinges and handles are then easily attached for a very handy box. I made several of them over the years to hold my hand-held power tools.


|
Flush Cut Router Bit Home Depot Youtube Woodwork Bench Harbor Freight Radar Small Woodworking Projects For Christmas Videos |

Lifeless
19.07.2021 at 17:11:46
5544
19.07.2021 at 21:51:13
Gentlemen
19.07.2021 at 19:13:20
Ayan
19.07.2021 at 12:21:11
Reksane
19.07.2021 at 16:55:58