Euro Style Hinge Adjustment System,Fine Woodworking Australia 50,Woodturning Lathe Tools Quotes,Soft Close Drawer Slides Problems Report - You Shoud Know

Loosen the screws on all the hinges of the door and move the door so it's level with the other cabinet doors. Hold the door in the correct place and tighten the screws. Adjust the depth of the door if it's not lined up with the depth of the drawer fronts above it or the door next to it. This is done with the screw at the end of the hinge, furthest from the mounting plate. Turn the screw clockwise to move the door out and counterclockwise to move the door in.
Adjust the door from right to left if there's a gap in the middle of the cabinet doors or if the doors hit each other when closing. Use the screw closest to the cabinet door.
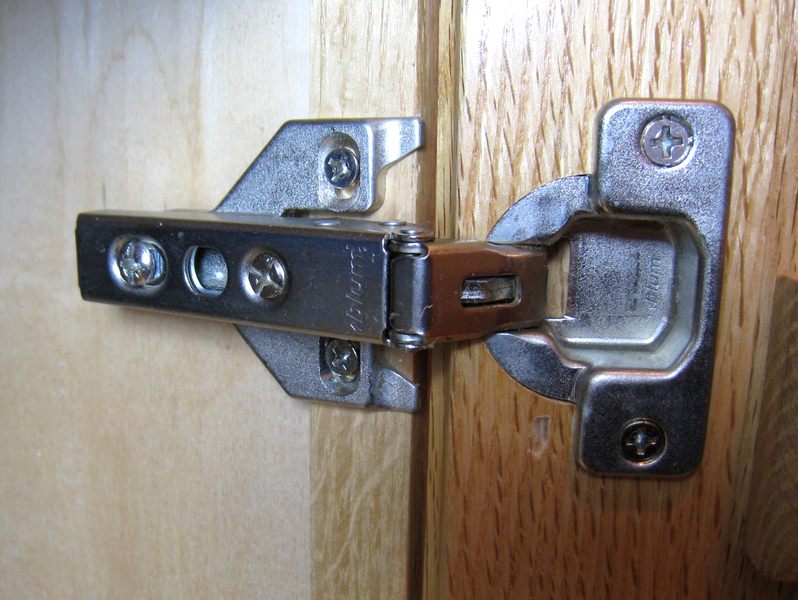
Turn the screw clockwise to move the door to the left and counterclockwise to move it to the right. Jill Davis started writing professionally in She has had articles published in "Yogi Times" and "Orange Pealings" magazines. I noticed that euro-style hinges had two "leaves" that got closer together as the hinge opened and decided to insert a screw through one of the leaves to stop the motion where I wanted it.
The photos were taken after the fact so the hole is already there and threaded. A drill press is REAL handy for this step Any local cabinet shop is already set up to bore these holes. I only did this to see if it would work.
It'd be cheaper and easier to take it to a shop. Sheet metal screws would probably work just fine and you could avoid the tapping. I noticed that the euro-style hinge had two leaves that got closer together as the hinge was opened.
The photos show not very well how the leaves move as the hinge is opened. By inserting an adjustment screw through one of the leaves I could limit the hinge range.
A vice isn't need for this step. I wasn't sure that the screw trick would work so I hadn't bored the hinge pocket holes in the panel yet.
Once the holes are bored, they would make highly handy hinge holders. A tap is tapered to let it start threading easier so the first couple turns don't cut the full thread depth. I didn't fully tap the hole because I wanted the interference to hold the Euro Style Hinge Adjustment Kit screw from backing out.
I tapped the hole until I could just force the screw in; that worked fine. Using a sheet metal screw in place of a machine screw should also work. The screws had to be shortened to clear the mechanism and the cabinetry. I estimated the correct length and hacksawed it to length and ground the end. No, my camera is not that fast. The grinder is off.
I'm not that dumb. The nut is used just to clean up the threads and not installed Euro Style Hinge Adjustment Examples in the project.


|
Under Drawer Slides Soft Close 2019 How To Make A Framework Yarn Flat Hand Saw Kit Solid Oak Dowel Paper |

Sharen
10.04.2021 at 15:29:14
Olmez_Sevgimiz
10.04.2021 at 18:13:51
krasavchik
10.04.2021 at 17:46:47
Dj_Dance
10.04.2021 at 21:43:41
Arzu_18
10.04.2021 at 21:30:45