Do It Yourself Wood Polish Zip,Letter J In Military Alphabet 32,Billboard Lumber Products Riddle Or North,Soft Close Drawer Slides Howdens Java - Step 2
Whether you are looking for a homemade furniture polish recipe or a multi-purpose cleaner you use on any wood surface, you are sure to find something in this article you will want to add to your cleaning products inventory. These natural wood polish recipes will help get that wood table or wooden cabinets looking just as nice as the first day you saw them. There is no need to buy expensive polishing products to make your floors sparkle.
You can make your own cleaners and add shine to hardwood floors and other flooring types with very little effort.
Check out our recipes. Before you start hardcore polishing your wooden furniture, start with a dusting spray to clean off any dust and debris. The ingredients in this dusting spray recipe are similar to what you will find in the homemade wood polish recipes, so you will likely already start to see a little bit of shine after just using this spray. To clean wood furniture with vinegar and olive oil , combine the ingredients in a spray bottle and shake to mix. Spray your wooden furniture and wipe down with a microfiber cloth to ensure that you pick up as much dust and dirt as you can.
Because the ingredients are similar to polish ingredients, this also acts as a beautiful in-between polishes touch up. Label the bottle and keep on hand for use whenever you have a grimy wood surface that needs cleaning and polishing. Easily made with ingredients found around the house, this olive oil DIY wood polish is a great non-toxic alternative to commercial cleaners. For this simple polish recipe, mix the ingredients in a sealable, airtight container.
Use more of the lemon oil if you like a stronger lemon scent. Soak up a small amount of the polish with a soft cloth and polish your wooden furniture. For all types of wood projects, always work parallel to the grain of the wood whenever possible. Microfiber cloths are much softer than standard wash cloths and less likely to damage the wood. You can also spray the entire area with a floor cleaning solution before mopping if the floor is particularly dirty. Test your polish on an inconspicuous spot.
The polish may have an unexpected effects on the wood so be sure to test it out first. Make sure to give it ample time to dry so you can be certain of its effects before moving forward. This is a great way to see if your furniture or floors have a layer of laminate that will prevent the polish from sticking to the surface. Method 2 of Wipe down your furniture with the wax remover. Dampen your dry microfiber cloth with the wax remover and wipe along the grain of the wood.
Use steel wool to gently sand away any remaining marks or stains. It is important to remove any excess wax buildup before polishing as any remaining wax will degrade your polish. Test your wax remover on an inconspicuous area before covering the entire piece of furniture.
You can purchase wax remover in any store, but you can also use a mixture of. Apply thin layers of polish along the grain of the wood. Place a dry microfiber cloth on the open cap of polish and flip.
This will allow the polish to absorb into the cloth without applying so much that it will begin pooling on the furniture. Rub the cloth along the grain of the wood to work in the polish.
You can continue to apply layers depending on how dry the furniture is and the level of shine you would like to achieve. Make sure to get in all crevices and corners. Open cabinets or drawers to polish the joints and interior spaces.
Be sure to test the polish in an inconspicuous area before covering the entire piece of furniture. Repeat the polishing process as needed.
Once complete, your furniture should be glossy and shiny, but you can continue adding layers to achieve the finish you want.
Method 3 of Plan the path you will walk through the room as you polish the floor. Without planning this Do It Yourself Wood Plank Headboard Zip out first, you could accidentally corner yourself far from a door and be forced to either walk over the wet polish or stay in place until it dries.
It is best to begin in a back corner opposite a door and work across in rows. If you are concerned about this, place blue tape around the bottom of the baseboards as a protective measure.
Rub the polish into the floor with a flat-surface mop. Pour a small amount of polish on the floor and begin Do It Yourself Wood Flooring Home Depot Zip working the polish into the wood with a back-and-forth motion parallel to the grain of the wood. It is best to start with less polish and slowly add more, as too much can cause the polish to puddle on the floor. Thinner layers will also dry more quickly and make it easier to apply a second coat.
This type of motion will smooth out any air bubbles as you work. Wait 24 hours after your last coat before returning furniture to the room. Heavy furniture may scratch your freshly applied polish, so wait until the floors are completely dry before bringing any back in. If you would like a smoother finish, feel free to use a grain sanding pole between layers. Clean the floors and wipe with a tack rug after sanding.
This will dull the finish of the polish. Create good habits to maintain your polished floors. Place rugs at entryways to prevent tracking dirt, or ask guests and family to remove their shoes before entering the home. Place rugs near sinks to prevent water damage.
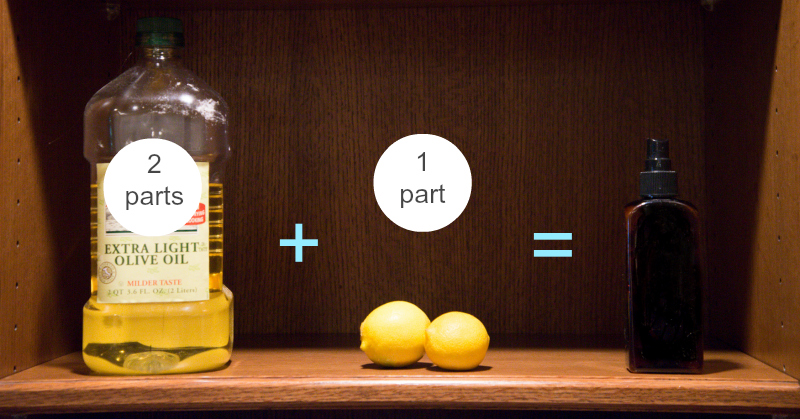
Adding vinegar increases the cleaning power of the polish. To apply the homemade furniture cleaner, dip a clean rag into the polish and rub onto your wood furniture. Always rub the products in the direction of the wood grain. Once polish has been applied, allow the wood to air dry. This scented furniture polish will leave behind a pleasant citrus scent. How big a batch you make depends on the size of the furniture you are polishing.
In a glass container to prevent the lemon juice and oil from breaking down the plastic, mix lemon juice with lemon oil and either jojoba or olive oil. Dip a rag into the polish and rub with the grain onto your wood furniture. No need to wipe the polish off, merely allow it to air dry.
When making your own furniture polish with food grade oils, you need to store them in a cool, dark place. Food grade oils, such as coconut oil, do go rancid so replace the polish once a month or as needed. Melt the coconut oil on low heat and pour it into a spray bottle.
Add distilled white vinegar and lemon juice, and then shake to combine. Shake bottle before each use, spray directly onto furniture and wipe down with a clean cloth. Nothing beats being able to clean and polish your wood with a single cleaner.
This recipe can be stored in a container or a spray bottle, depending on how you wish to use it. If stored in a container pour the natural furniture polish directly onto a dry cloth. Work the cleaning products into the wood making sure you wipe in the direction of the grain. You will immediately see the beautiful shine return to the wood. If your wood table is extremely dry, allow the product to sit on the wood and then go over it a second time. Massaging petroleum jelly into the wood will also help restore it, but it must be buffed out with a dry cloth.
This cleaner is so good it can even be used when cleaning patio furniture.


|
Mesquite Wood For Turning Light Makita Cordless Track Saw Kit Review Rockler Pivot Hinge Kit |

Alinka
22.05.2021 at 14:54:50
RIJIY
22.05.2021 at 10:31:33