Build Your Own Go Kart Frame 64,Titebond Ultimate Wood Glue Uk Mini,Woodturning Texturing Tools Uk 10,Jet Planes Leave Trail Joint - You Shoud Know
Aluminum Wheels Item No:. Add Engine and Clutch to complete kit. Add Engine 6. Aluminum Wheels, Live Axle, Tires, Single Seat, 6 in. Drum Brake. Add the Titan Engine to complete the kit. Great Project. Nylon Wheels, Live Axle, Complete Drift Trike Kit.
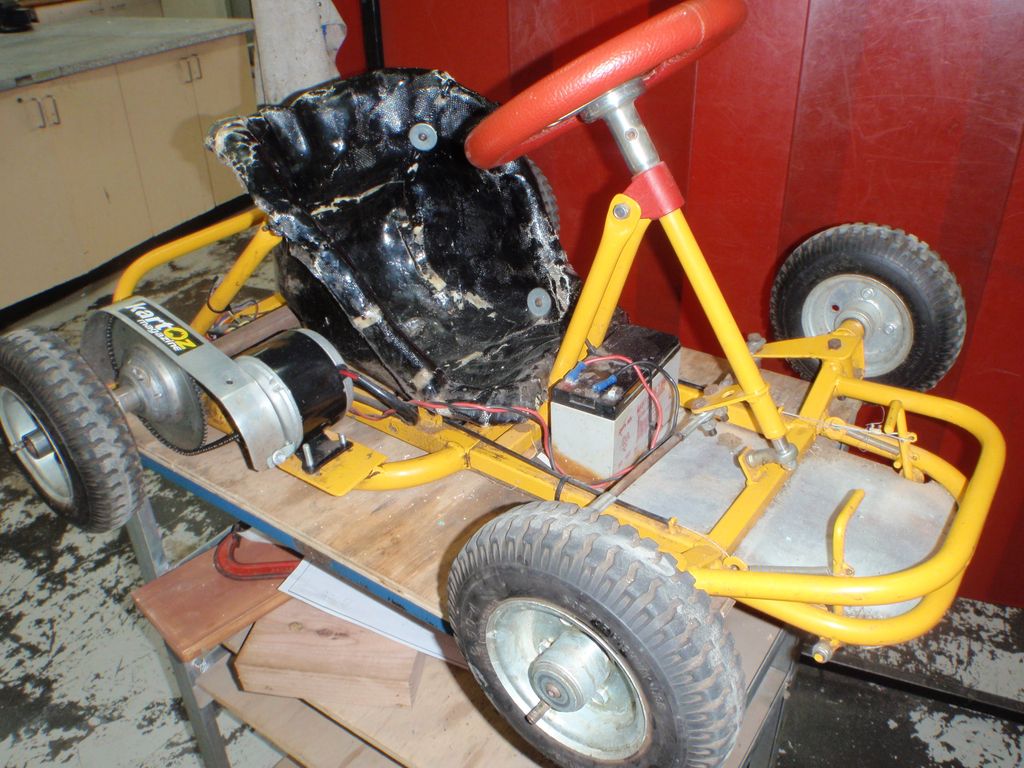
All you need to start your drift trike project today. Stay Updated. Join our mailing list and be the first to receive all the latest updates, sales news and offers from GoKarts USA. Enter email Your privacy is respected. Our Company. The reason why I did this is because as you weld, the tubing will warp slightly at the weld. Bracing the frame will prevent warping and keep everything square. The next step is to tack weld the frame into place. Tack welding the go kart frame is easy.
First, make sure the tubing matches up notice how I used a straight edge in the above picture to make sure the tubing was on the same plane. Next, make a small tacks at the tubing intersections. I made four tacks at each tubing joint. Finally, remove the nails. Welding the tubing joints between the tack welds will give you great results as the go kart frame is already stiff.
To avoid warping, focus on one joint at a time:. Do the same bracing, tacking, and welding as before with the bumper. These holes will serve as the pivot point for the brake and throttle pedals. I do not advise grinding any welds down on the main part of the frame. However, for aesthetic purposes, its ok to grind down the bumper welds to smooth out the edges. First, I ground down the welds with a grinding wheel on my angle grinder, then used a sanding wheel to polish and smooth out the grind marks.
The end result was great! Love this site, thank you so much. The longer you make it, the harder it will be to turn. From the Base frame image that has the drawings, what is the inside dimensions of the rear portion. For now I would like to build a live axle with disc brake go kart. Maybe later add the torque converter. If I build the deluxe kit frame with live axle and disc brake, what other part will i need to make the frame work? Larger rear tires? The torque converter does not need this reduction.
Your plans for a standard-live-axle has 2 problems that need to be fixed, or more explanation needs to be given:. Can you please clarify these two issues? Tips and Warnings. Related Articles. Article Summary. Part 1 of Draw up detailed plans for the go-kart you want to make. Go karts can be many different sizes, shapes, and designs. These homemade vehicles are amenable to any design elements you want to throw into it. Look at other go-karts for inspiration and learn from kart-makers who've been there before.
Alternatively, you can find schematics and plans online for many different types of models, if you'd rather let someone else do the planning. Use a template and modify it as you see fit. Size the go-kart appropriately. The size of the go-kart should depend on the age and size of the driver. Make sure you plan the go-kart accurately and using specific measurements, in order to fit the correct materials into the kart.
There are three sizes of karts, measured from the center of the King Pin to the middle of the rear axle: Baby kart: Ages , Frame size: to mm Cadet kart: Ages , Frame size: mm to mm Full size kart: Ages 12 and up, Frame size mm. Gather your materials. If you're short on cash, visit a scrap yard and see if you can pick up any low-cost parts. Or, you may be able to salvage parts from an old riding lawnmower or a junk go kart found at a yard sale.
Ask lawn mower repair services for spare parts or junked out riding lawnmowers and used 4 cycle engines in the 10 to 15 horsepower range, with horizontal shaft and a drive clutch assembly.
Here's what you'll need: For the chassis: 30 feet 9. Obtain a welder. If you've got no experience welding , you will have to hire a welder for this project. The most essential part of the go-kart is a solid chassis that'll hold you onto it while driving and house the engine. If you don't have experience welding, don't start by putting together a go-kart. Start with other smaller projects if you want to learn. Consider buying a go-kart kit.
If you're not interested in welding and designing your own go-kart, purchase a no-weld kit that you can put together with simple tools, featuring detailed instructions and schematics to make the job a snap. Part 2 of Cut the metal tubing. Cut your lengths of tubing to the appropriate lengths, given your design or schematics. For most designs, the front end will feature a camber angle, narrower than the rear, which will allow the wheels room to turn, allowing the chassis to twist slightly.
To do this, mount a King Pin at the front corners where the wheels will be, Build Your Own Go Kart Frame Control to allow for easy twist. For an easy eye-guide, consider marking up the floor of the garage or the area you're working with sidewalk chalk of the appropriate measurement, to keep you from having to remeasure repeatedly.
You could even draw out the whole design on the ground and start laying it on top. Make a jig for your kart optional. A jig is a flat piece of metal with slots for clamps to hold down the tubes. This will help you weld the tubes in the right place! Weld the frame together according to your design. Use concrete blocks to keep the frame elevated while you work, making sure all your connection points are solid and the chassis is secure.
It needs to be strong enough to hold your weight and the weight of the engine, so it's not the time for a shoddy weld job.
For more strength, use gussets at all corners. Assemble the front stub axles. Build your axle with a straight piece of 0. Use washers and cotter pins drilled through the axle to keep the assembly in position.
Install the front stubs that'll allow you to turn easily before messing with the steering column and attach your King Pin, to the steering arm. You'll need to have at least degrees of angle on the front wheels, so plan accordingly. Install your rear axle and wheel assembly. You'll likely need to assemble an axle carrier with a bearing bracket for the rear axle, meaning that the axle itself can be welded to the frame while also spinning freely and snugly. Rather than making your own, you can also purchase these assemblies, sometimes called "Pillar Bearing Units.
Build your seat out of plywood and bolt it to the frame. Drill holes in the plywood and install T nuts within the holes to provide support when bolting the seat to the frame. Cover the plywood with 2" high density foam, then cover the foam with marine vinyl. Secure the vinyl to the seat by stapling it to the underside or back portion of the plywood.
Alternatively, you can try to salvage an old go-kart seat or an appropriately-sized car seat from the junk yard to save money. Leave enough room for the steering, engine, and other controls. Part 3 of Install the engine mount. Place the engine on the plate, and mark the holes for the mounting bolts so that the engine pulley lines up with the drive pulley on your axle.
Attach the drive pulley on the axle prior to mounting the axle in the bushings. You can either use a set screw to hold it in position, or weld it directly to the axle, but it should be aligned with the pulley on your engine.
Assemble your steering linkage. Use the 0.


|
Fine Woodworking Association Wa Key Makita Portable Planer Review Small Cabinet Hinges 60 Raspberry Pi Best Os For Embedded |

BOY_FIESTA
30.05.2021 at 21:18:10
Bakino4ka_fr
30.05.2021 at 13:50:41
Natcist
30.05.2021 at 12:22:24
centlmen
30.05.2021 at 20:22:44