Wooden Jointer Plane Plans 10,Steam Generators For Wood Bending Notes,Vodacom Router Login 360 - Step 2
Thank you for making this possible. All rights reserved. Designed and developed by Underscorefunk Design. This site uses affiliate links. Given this, please assume that any links leading you to products or services are affiliate links that we will receive compensation from.
However, there are millions of products and services on the web, and I only promote those products or services that I would use personally. The Wood Whisperer abides by word of mouth marketing standards and holds integrity in the highest regard. Should I ever be compensated to write, I will make full disclosure.
I always give honest opinions, findings, and experiences on products. The views and opinions expressed on this blog are purely our own. Any product claim, statistic, quote or other representation about a product or service should be verified with the manufacturer, provider or party in question.
All content on The Wood Whisperer is copyrighted, and may not be reprinted in full form without my written consent. Necessary cookies are absolutely essential for the website to function properly. These cookies ensure basic functionalities and security features of the website, anonymously. The cookie is used to store the user consent for the cookies in the category "Analytics".
The cookie is used to store the user consent for the cookies in the category "Other. The cookies is used to store the user consent for the cookies in the category "Necessary". The cookie is used to store the user consent for the cookies in the category "Performance".
It does not store any personal data. Functional cookies help to perform certain functionalities like sharing the content of the website on social media platforms, collect feedbacks, and other third-party features. Performance cookies are used to understand and analyze the key performance indexes of the website which helps in delivering a better user experience for the visitors.
Analytical cookies are used to understand how visitors interact with the website. These cookies help provide information on metrics the number of visitors, bounce rate, traffic source, etc. Advertisement cookies are used to provide visitors with relevant ads and marketing campaigns. These cookies track visitors across websites and collect information to provide customized ads. Other uncategorized cookies are those that are being analyzed and have not been classified into a category as yet.
This is placeholder text. We use cookies on our website to give you the most relevant experience by remembering your preferences and repeat visits. Manage consent. Close Privacy Overview This website uses cookies to improve your experience while you navigate through the website. Out of these, the cookies that are categorized as necessary are stored on your browser as they are essential for the working of basic functionalities of the website.
We also use third-party cookies that help us analyze and understand how you use this website. Clamp one of the pin blanks to the stopblock, and check that it is perfectly centered under the drill chuck.
Install the plug cutter in the drill and use it to cut the tenon. Stop the cutter just before it reaches the shoulder kerf, then remove the blank and use a sharp chisel to clean up the shoulder. Repeat the process for each tenon.
Check the fit of each tenon in a test hole drilled in a piece of scrap lumber. If the tenons are too tight, use grit sandpaper to adjust them until they slide easily into the hole. It is important that the tenons are snug, but the pins need to be able to rotate to adjust properly to the angle of the wedge. Use a rasp, file and sandpaper to round the top pin surfaces as shown in the plans. Prepare one of the plane bodies for glue-up.
Next, apply glue to one face of each of the body blocks and place them on the cheek. Position the crosspin in the opposite cheek and spread glue on the remaining surfaces.
Assemble the parts and drive the screws to ensure that the parts are aligned. Clamp the assembly, and allow the glue to set for at least an hour before removing the clamps and scraping off excess glue. Repeat the assembly process for each plane. Use a band saw to cut off the waste portion at the ends of each block.
Transfer the side profile of each plane to its blank and cut out the shape. Mount one of the plane bodies in a clamp and use a rasp to shape the back-end profile. Keep in mind that the plane should be comfortable in your hand, so test its feel as you shape it. Now is the opportunity to personalize your tool. Finish shaping the back using a file and sandpaper.
Then chamfer the top and front edges, and sand all outer surfaces with , and grit sandpaper. For a plane to be useful as a flattening and straightening tool, it is essential that the sole be perfectly flat.
If your assembly has gone smoothly, your tool is probably pretty close to being flat, but it still needs some work. The easiest way to flatten the sole is to stick a strip of self-adhesive sandpaper to the table saw table and repeatedly pass the plane over it.
Apply pressure only on the forward stroke, then lift the tool to bring it back for the next stroke. Examine the sole of the plane frequently as you work. You will be able to see if there are areas that still need work. Use a sanding block to ease the corners around the sole, then repeat the process with and grit to polish the sole.
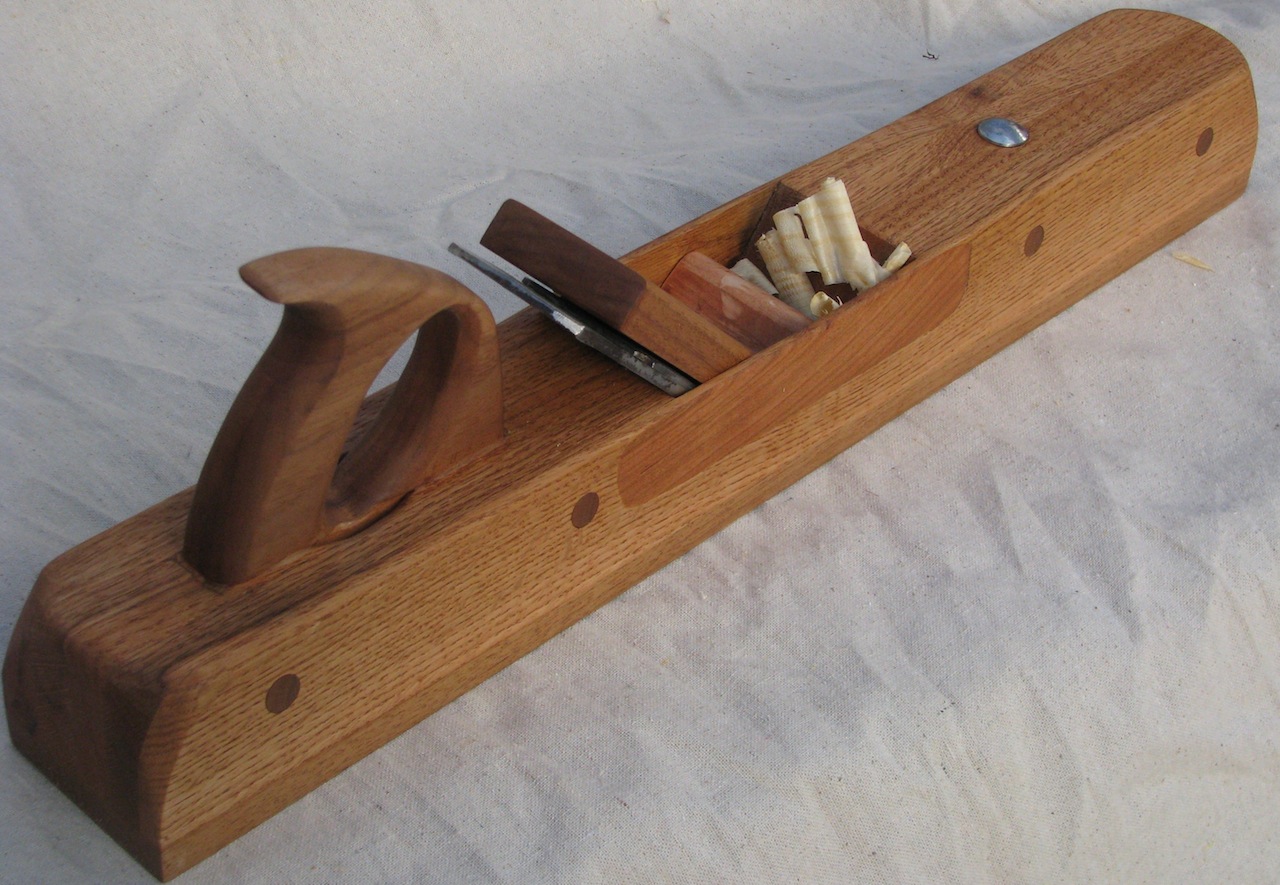
Rip a strip of wenge to width for one of the plane wedges, place a piece of masking tape on one edge and lay out the wedge shape. Then cut the inside surface of the wedge.
Slide the iron and cap-iron assembly into the plane and test the fit of the wedge. Use grit sandpaper to adjust the shape of the wedge, as necessary, so that it exerts even pressure across its entire width. You will know when the fit is correct when you see an evenly burnished line across the wedge face at the point where it contacts the crosspin. Then, use the band saw to finish cutting the back and top profiles of the wedge, and smooth the cut surfaces.
To seal the wood we applied a penetrating finish of several coats of boiled linseed oil. Use a rag to completely soak all surfaces of the plane and wedge, let the oil absorb for about a half-hour and then wipe off the excess.
After overnight drying, repeat the process. Apply at least three coats using this technique. You can then apply a light coat of wax to the sole of the plane to further reduce friction.
Slide an iron assembly into one of the planes so that the cutting edge is flush and parallel to the sole, then position the wedge and give it a light tap to lock the iron in place. To increase the depth of cut, use a small hammer to tap the iron lightly.

|
Pocket Hole Jig Without Clamp Evo Kreg Pocket Hole Jig 520 Pro Wall |

farida
03.08.2021 at 12:40:37
FroSt
03.08.2021 at 15:24:36
Ramil_Seferov
03.08.2021 at 20:20:39