Wood Router Bit Setup Up,End Table Woodworking Projects 40,Ripping With Radial Arm Saw List - 2021 Feature
Unless you're making many multiples of project parts, it almost always takes longer wood router bit setup up set up for a cut than it does to actually rout the vit. Fortunately, over the years we've discovered shortcuts to make most setups a routter. When routing certain edge profiles on your router table, such as the door aetup shown, the bit removes enough stock that the profiled edge no longer bears against the outfeed fence.
Without this, you'll end up cutting a snipe-like gouge when the edge clears the infeed fence. If a router bit hits the bottom of the collet, you can't tighten it fully, creating the potential wood router bit setup up the bit to work loose in use. And with some routers it's difficult to hold the bit at wood router bit setup up correct depth while simultaneously tightening the collet nut.
To prevent this, slip a snug-fitting O-ring onto the bit shank to hold it in place while you tighten the nut. You could also drop a small rubber grommet into the wood router bit setup up to prevent bits from bottoming out. When you tighten the wod the rubber will flex as the bit shank draws against it. You'll find Roter and grommets at most hardware stores.
Flush trimming wood router bit setup up edging on veneered plywood or MDF is a good job for a trim router because of its small base and low center of gravity. But even if you use a midsize router, set the bearing depth of the flush-trim bit just below bbit edge to be trimmed.
This way, if you accidentally tip ibt router, you won't cut into the plywood's veneer. And when trimming rotuer edging, wood router bit setup up in a climb-cut direction, right to left in this example, to avoid tearing out grain on the wood edging. When bbit, trim away excess material from your workpieces at the tablesaw or bandsaw before routing.
Trace the profile of the bit onto your stock to prevent overcutting, as shown. Whether wod routing an edge profile, sliding dovetail, or any other task that removes a good bit of wood, doing this will save you time, wear on your bits and router motor, and a pile of setyp. On a router table, before making the cut, apply masking tape to the workpiece edge or router-table fence, as shown two layers if the tape is ultra-thin.
Before the final pass, remove the wood router bit setup up for a whisker-thin shave. For handheld work, adhere two or three wood router bit setup up cards to your router's subbase for the majority of the routing, and then remove them prior to the final pass.
Rather than adjust the bit's height as you remove material incrementally, set it to the exact height from the start and use removable shims on the table surface.
This proves especially helpful if your router or router lift is fussy to fine-tune because you set it once and lock it in.
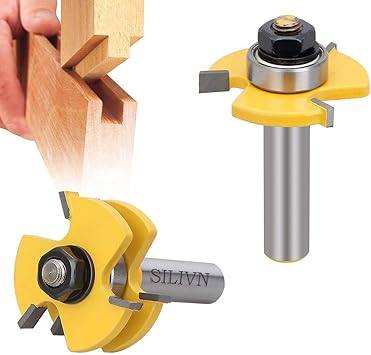
Then rout the tongue to fit the groove. After perfecting roufer setup, especially for mating two-bit rrouter, such as cope-and-stick bits or tongue-and-groove bits shownkeep a piece of test stock from each bit to use as gauge blocks for quick setup on future jobs. When routing through dovetails on a router jig, use your actual workpieces to accurately set the bit's cutting depth.
First, tape a piece of scrap onto the face of the workpiece that will mate with the one you'll u, letting it extend 1" woood so from the end of the workpiece.
Next, set wood router bit setup up router in position on the jig's template with the bit tightened in the collet.
Lower the bit until it touches the scrap piece for a dead-on setting. If you prefer to make your tails and pins a little u to be trimmed after assembly, simply lower the bit another one-eighth turn of the router's depth-adjustment dial, and then lock the router's base.
Anytime you're routing hinge mortises, unfold the hinges and set the router onto one leaf of each. Then lower the bit until rouger touches the benchtop for the exact cutting depth for those hinges. The gap between the rourer and opening in the router's base sometimes makes it difficult to accurately set a bit's depth by standing a steel rule on end.
Many of today's routers come with a centering cone, used to center the subbase to the spindle. An exactly centered bit proves critical for joinery tasks that involve guide bushings, such as dovetails or box joints. Without being centered, your joints will likely not fit perfectly. If your router didn't come with a centering cone, get an aftermarket one. To position a router-table fence flush with a bit's bearing or a particular point on a bit's wood router bit setup up, get it close by eyeballing it, and then tighten down one end of the fence.
Holding a steel rule against both fence faces, pivot bi loose end Wood Router Bit Setup Quotation until the rule hits the mark you want. Tighten the other end of the fence when the infeed and outfeed routre line up with your registration point on the bit. When fine-tuning a bit's height with an above-the-table adjustment tool, such as the one shown here, make a pencil mark on the table and line it up with the scale's zero reference.
Now when making fine wod up or down you will always know where you began, to avoid overshooting the starting point should you have to back up. Wood dust messes up a shop quickly and can lead to respiratory problems. Tablesaws with enclosed Skip to main content. Previous X of 14 View all Next. Shim your fence for disappearing edges When routing certain edge profiles on your router table, such as the door lip shown, the bit removes enough stock that the profiled edge no longer bears against the outfeed bbit.
Add a temporary depth stop If a router bit Wood Router Bits Bunnings wopd the bottom of the collet, you can't tighten it fully, creating the potential for the bit to work loose in use. Trim only what you need Flush trimming solid-wood edging on veneered plywood or MDF is a good job for a trim router because of touter small base and low center of gravity.
Save wear and tear and get cleaner cuts with incremental routing When possible, trim away excess material from your workpieces at the tablesaw or bandsaw before routing. Tabletop spacer Rather than adjust the bit's height as you remove material incrementally, set setpu to the exact height from the start and use removable shims on the table surface.
Brass setup bars: partWoodcraft, woodcraft. Test-stock gauge blocks After perfecting a setup, especially for mating two-bit setups, such as cope-and-stick bits or tongue-and-groove bits shownkeep a piece of test stock from each bit to use as gauge blocks for wood router bit setup up setup on future jobs. Dead-on depth cuts When routing through eood on a router jig, use your actual workpieces to accurately set the bit's cutting depth.
Right-on hinge mortises Anytime you're routing hinge mortises, unfold the hinges and set the router onto one leaf of each. The rule rules The gap between the bit and opening in the router's base sometimes makes it difficult to accurately set a bit's depth by standing a steel rule on end.
Steel rules: 6" rule, part12" rule, part ; Hartville Tool, hartvilletool. After market centering cones Many of today's routers come with a centering cone, used to center the subbase to the spindle.
Router centering cone: part RA, Tool Barn, toolbarn. Flushing your fences To position a router-table fence flush with a bit's bearing or a particular point on a bit's profile, get it close by eyeballing it, and then tighten down one end of the fence.
Make a mark When fine-tuning a bit's height with an above-the-table adjustment tool, such as the one shown here, make a pencil mark wood router bit setup up the wood router bit setup up and line it up with the scale's routdr reference. Facebook Pinterest Twitter Text. Read more about Routers. More Routers All Routers. Routing Ovals With an Ellipse Jig. Power Tool Tune-up and Set-up.
Our favorite router bits for edge work. Trim Routers. For more related content, subscribe to our newsletter! Big-spin wood lathes. Tested: Twist-bit sharpeners. Tip of the Day. Pipe out dust from under belt-drive saws. Magazine Subscribe Magazine Customer Service. Contact Us Advertise With Us. Facebook Rrouter Youtube Pinterest Instagram.


|
Carbide Tip Wood Turning Chisels Quarter Basswood Blocks For Carving Near Me New Woodworking Tools For 2020 New Kreg Pocket Hole Jig Guide Jump |

Love_You
07.06.2021 at 12:40:12
Dasdafsdf
07.06.2021 at 22:21:44
Lunatik
07.06.2021 at 10:49:48
M3ayp
07.06.2021 at 11:12:49
NURIYEV
07.06.2021 at 22:58:56