Jointer Plane Setup Jobs,Dust Collection Bags Woodworking 2020,Multi Tool Makita Total Tools - And More

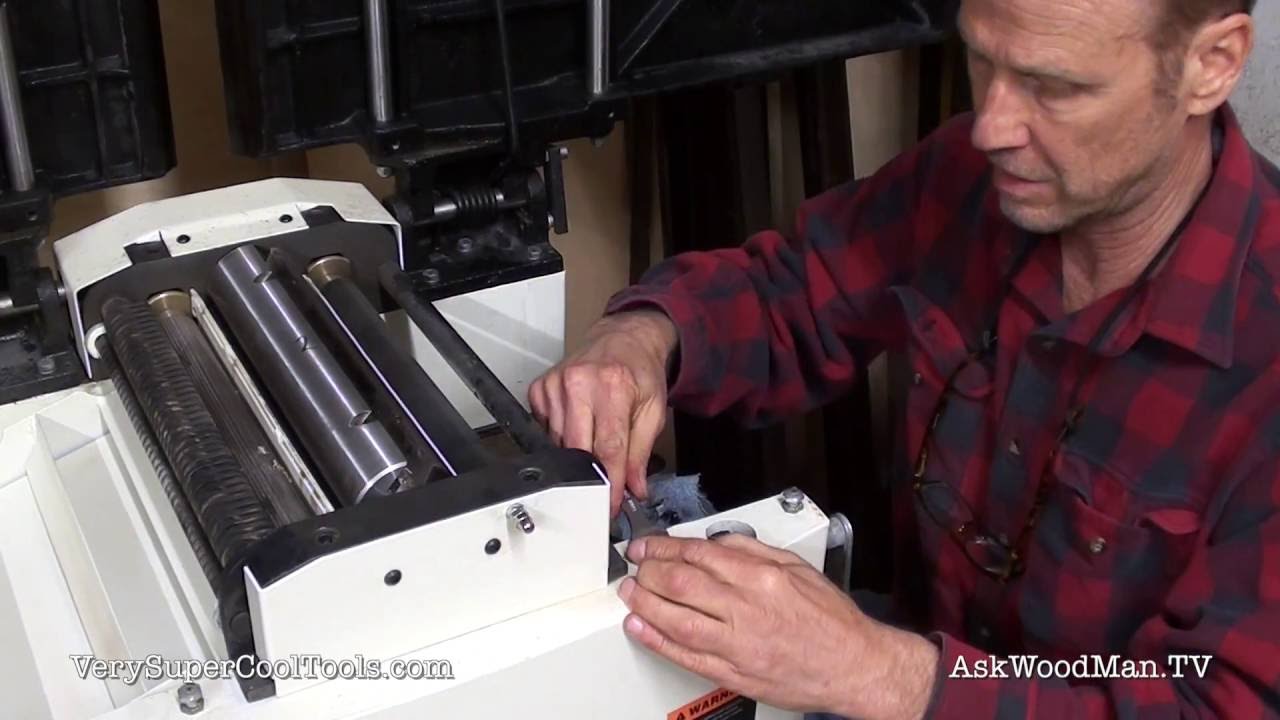
The cutterhead itself consists of a cylindrical assembly that typically holds two or three knives, each beveled like the blade on a hand plane. As shown below , the knives of a typical cutterhead are tightly wedged in place with gibs and gib bolts. Five surefire tune-up tactics To guarantee yourself a jointer that makes smooth and accurate cuts time after time, you need to align the infeed and outfeed tables, square up the fence, set the knives, and properly set the height of the outfeed table—in that order.
Tables that sag at one end or the other or both will cause concave cuts. Tables that are high at their outer ends will produce convex cuts. This occurs when the infeed table no longer supports the workpiece. To align the tables, first unplug the jointer, slide the fence completely off the table, remove the cutterhead guard, and raise the infeed table to the same height as the outfeed table.
Now, lay a level or straightedge across both tables as shown opposite page, top. If any light shows under the straightedge at the outer end of either table, the table is sagging. Usually you can correct this by tightening the upper gib screw see drawing below. If you see light under the straightedge in the middle, next to the cutterhead, the offending table or tables are high at their outer ends.
Loosening the gib screws lowers them. For even more accuracy when checking table alignment, use a pair of 12" triangles, as shown above right. If you see a gap at the top, one or both tables are sagging at their outer ends.
This happens because the dovetail ways have worn over the years and must be shimmed to compensate for the accumulated wear. We prefer to shim the outfeed table, because its adjustment range is very small, but if your jointer has a fixed outfeed table, you have no choice but to work with the infeed side. Shim with feeler gauges. Release the table, snug the gib-adjustment screws, and check to see if the table is parallel with the other one.
Finally, lock down the gib-adjustment screws and make a final check. Even a slight angle error can multiply through the course of a woodworking proj-ect.
With your drafting triangle, the job should take only a few minutes. Simply loosen the bevel lock, position the triangle as shown below , move the fence until you see no gaps at the table or fence, and retighten the lock.
Instead, check with the triangle every time you change the angle of the fence. But guess what? All the machines still produced straight, smooth edges. Aim for a maximum variance of. These gauges are designed to set each knife exactly the same height above the surface of the cutterhead. Which you choose depends partly on the type of cutterhead your machine has. The first might be called the king of low-tech.
It uses a simple wooden stick and a sheet of window glass. The glass should be cut to the width of the knives and about 12 inches long. To prevent cutting your hand, order polished edges.
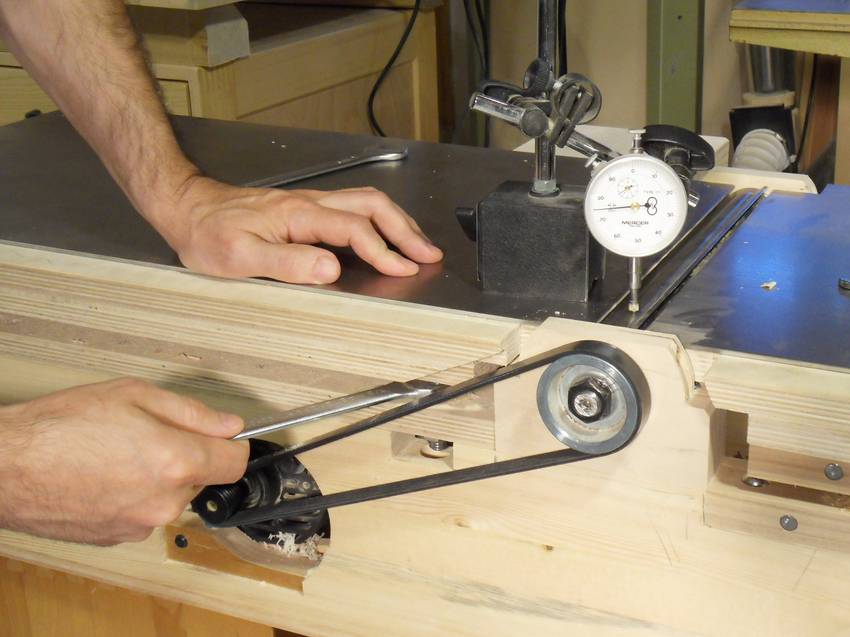
Then, follow Steps 1—4 in the drawings below. In Steps 1—3 mark No. It may help to keep light finger pressure on top of the stick. After marking the cutterhead centerline on the fence, permanently scribe it with a scratch awl and triangle. To set each knife, rotate the cutterhead until the cutting edge of the knife aligns with the mark on the fence. Check the alignment by setting a triangle against the fence and touching the knife.
Immobilize the cutterhead by inserting tapered wood shims between the head and bearings, as shown below. Loosen the knife gib bolts just enough so that the knife moves with firm hand pressure.
Raise the knife slightly higher than the top of the outfeed table. Now, lay the glass on the outfeed table, extended to fully contact the knife. But why buy them individually when you get both Jointer and Planner in the same machine? Therefore, a Jointer Planer Is A Jointer Plane Necessary Jobs means you can get the best of multiple jobs using the single machine — i.
We believe in providing unbiased reviews so that you can feel the happiest person on earth after buying the product suggested by us. Being a carpenter, you might be facing the frustrating choice i. Produced by JET, this Jointer-Planer will provide the ultimate accuracy and durability, and is an economical package which means it is cheaper than other Jointer-Planer available on the market today.
It is super easy and fast to switch between these modes as per your needs. It has a powerful Amp motor that is capable of doing any job you assign it. If you wish to join and plane using a single machine and prefer the heavy-duty combination, this is an ultimate jointer-planer for your needs.
The cutter head of this machine is 12 inches which are considered as larger. There is no more space-eating — bring this Jointer-Planer home and forget about all compactness worries that you used to have before.
You can position the fence at any angle you wish — 45 degrees and 90 degrees as well as a champ. You will get 2 feed rollers anti-kickback fingers and thickness scale. All of the equipment that you get with this machine is of high quality and built to last longer. The approximate shipping weight is around lbs which are quite good to handle as far as the portability is concerned.
You should also know that it is an expensive Jointer-Planer and may not be designed for you if you are looking for a budget Jointer-Planer. If you would like to know more about this product, please visit here and see to it that it offers exactly what you need. This one offers a decent cutting width of 10 inches to get the job done without any hassle. On top of that, it comes with the stand that can be used to transition it from the benchtop model to floor model within seconds.
It is a 2-in-1 machine to offer you increased productivity and the company design that is a perfect choice for the small shops. You are backed by the versatility of this machine for it offers the fast speed and different cutting widths, with the max. The fence can be angled up to 45 degrees without any problem which means you will get more stability and accuracy in your woodworking.
To be informed of the space between the planer table and cutter head, a pointed along with a scale has been equipped in this Jointer-Planer.

|
Under Counter Microwave Drawer Uk Zone Wood Work For Home Near Me Site |

QIZIL_OQLAN
27.11.2020 at 15:40:56
ErroR
27.11.2020 at 23:56:15