Gluing Wood For Turning 100,Ridgid R4512 Router Table Insert Vba,Furniture Pulls 3 Inch Off,Diy Wood Drawer Guides Apk - Reviews
Does gluing wood together for your first project intimidate you? Wood is a great material to work with as most wood species are easy to glue up. Wood is porous and glue can grab onto it. In fact in some strength tests, the glue held and it was the wood fibres that broke and caused the joint to fail. However beginners usually find the glue-up process to be stressful and difficult. Glue sets up quickly and if you are not prepared, will dry before you have a chance to put the two pieces of wood together.
Clamping also seems to be gluing wood for turning 100 worry — do I gluing wood for turning 100 enough clamps? And having glue squeezing out everywhere is messy and can make you lose it as you try and clean up before the glue dries. There are many glues on the market especially for woodworkers. Yellow carpenters glue is readily available, easy to work with and cleans up with water.
There are different formulations depending on where the glue is used and how much working time you need. The other recommendation is to also have a bottle of gel-type cyanoacrylate adhesive CA glue more commonly known as super glue or crazy glue on hand. This comes in handy for trickier glue joints which you might not be able to clamp easily. You can add a few dabs of CA between the wood glue to have it temporarily grab until the wood glue has a chance to set. The mistake most beginners make is not using enough glue and not distributing it evenly.
Then what you end up with is what is called a starved joint. You basically want a thick enough coat of glue so that when you apply clamping pressure, you get a bead of glue squeezing out consistently along the length of the glue-up. The best way to find out how much is too much or too little is to experiment. Grab two pieces of scrap wood, apply glue to both surfaces and clamp it up.
Check to see what kind of glue bead you get. Too much glue will mean that you get huge drips gluing wood for turning 100 glue. Apply glue also requires using the right tools. When you move to other glues you might be tempted to do the same but with stickier results. The cheapest and most readily available tool is still an old toothbrush! With it you can easily spread the glue. Other alternatives if you want to spend some money are rollers and special silicone glue brushes that you can easily clean dried glue from.
Special bottles with different attachments make certain glues easier but keep in mind that these need to be cleaned each time you use them. The saying goes that you can never have enough clamps. Clamps apply pressure to a glue joint so that the entire joint pulls together and the glue can bond to both pieces of wood. So you do need to make sure that the wood is straight and the joint closes tightly by itself without clamps.
There are so many types of clamps. For the beginner I would recommend using quick adjustable clamps. They come in various lengths. For larger projects you should get some bar clamps or gluing wood for turning 100 clamps. When clamping up, remember to use some scrap wood to protect your project from the clamp ends. Butt joints are when you gluing wood for turning 100 butt up two pieces of wood, usually at a right angle to each other.
These are cheap and are really designed to hold the joint together while the glue dries. They mainly keep joints from moving laterally apart. They can be set into the wood and then filled with a suitable wood filler to effectively hide them. These are a step up from nails and the advantage is that they resist pulling forces quite well. These are harder to hide.
Often plugs are used, either matching the grain and colour of the wood in order to hide them or in a contrasting wood to emphasize the plugs.
These are all types of hidden fasteners. Getting alignment right is difficult unless you use the right tools. Dominoes and biscuits are best installed using dedicated power tools that are expensive so not the best for the first time woodworker. There are two types of splines. Ones that sit inside the joint, mostly hidden from view and those that are on the outside of the joint and considered decorative as well as reinforcement.
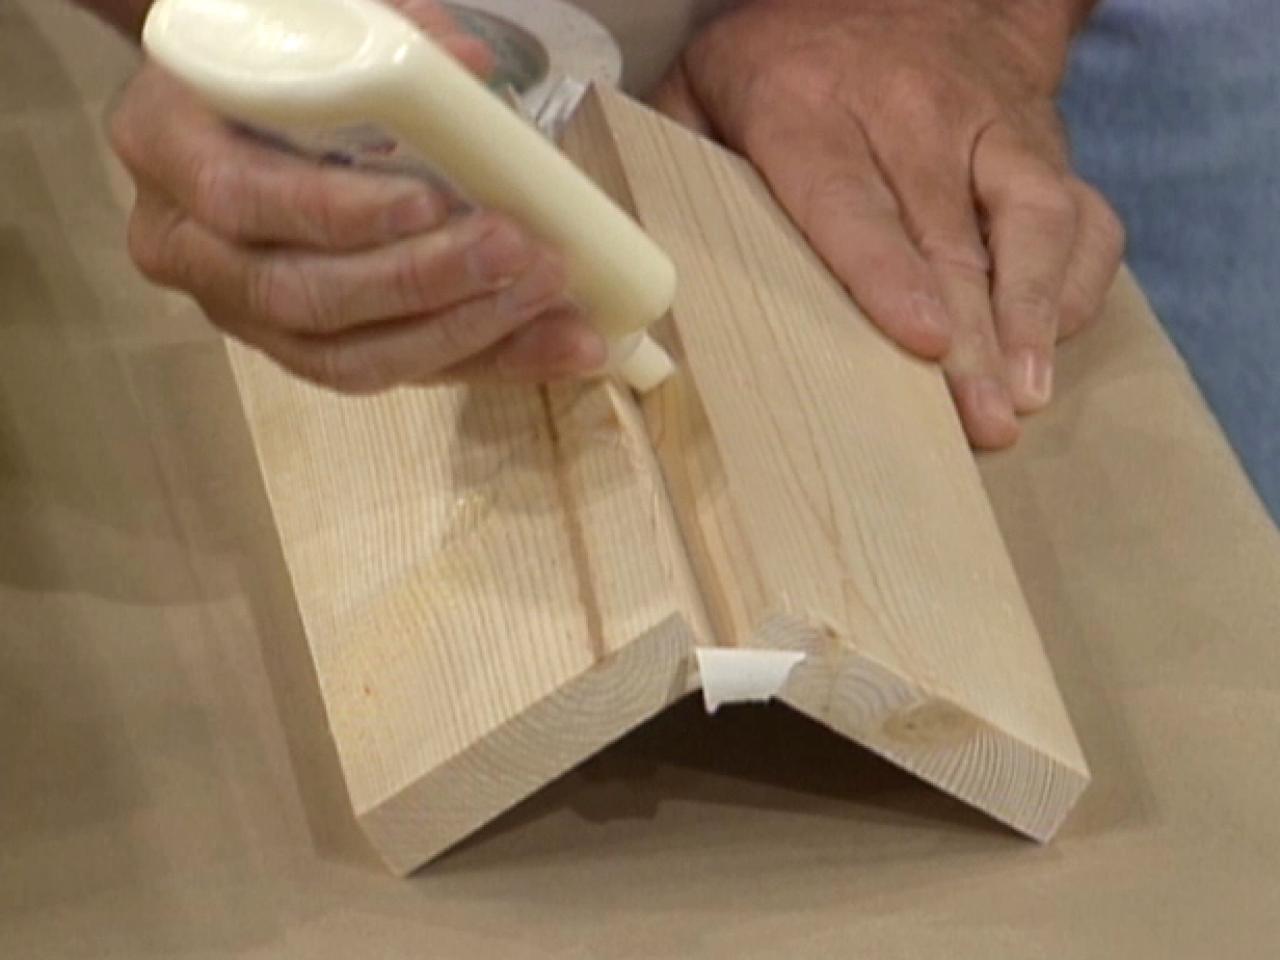
Often used on mitred joints as these involve end grain to end grain glue joints that are inherently weak. A slit is gluing wood for turning 100 into the joint and then a thin slice of wood is glued into the slit. Using a dark wood for the spline with a lighter main project wood or vice versa adds a decorative element to your project.
Once you have done the glue-up and while the glue is still wet, you can remove the tape and have a relatively clean joint. Some woodworker prefer to simply wait until the glue is completely dry and then gluing wood for turning 100 a plane or hand scraper gluing wood for turning 100 scrape off the glue. This works but can gluing wood for turning 100 in tearing off wood fibres along with the glue. Or if you are doing a panel glue-up and have access to a jointer and planer, you can use these power tools to clean up the excess glue and at the same time flatten the panel.
However this can gum up jointer and planer blades and can dull the blades over time. Gluing up wood projects gluing wood for turning 100 intimidating at first but with a bit of practice should become easier over time and less stressful. Necessary cookies are absolutely essential for the website to function properly.
This category only includes cookies that ensures basic functionalities and security features of the website. These cookies do not store any personal information. Any cookies that may not be particularly necessary for the website to function and is used specifically to collect user personal data via analytics, ads, other embedded contents are termed as non-necessary cookies. It is mandatory to procure user consent prior to running these cookies on your website. For the beginner I suggest keeping it simple.
Use enough glue The mistake most beginners make is not using enough glue and not distributing it evenly. Use other forms of fasteners for butt joints Butt joints are when you literally butt up two pieces of wood, usually at a right angle to each other. So in addition to the glue, you need to use some other type of fastener. Nails These are cheap and are really designed to hold the joint together while the glue dries.
Screws These are a step up from nails and the advantage is that they resist pulling forces quite well. Dowels, gluing wood for turning 100, dominoes and biscuits These are all types of hidden fasteners. Splines There are two types of splines. This website uses cookies to improve your experience.
We'll assume you're ok with this, but you can opt-out if you wish. Accept Read More. Close Privacy Overview This website uses cookies to improve your experience while you navigate through the website. Out of these cookies, the cookies that are categorized as necessary are stored on your browser as they are essential for the working of basic functionalities of the website.
We also use third-party cookies that help us analyze and understand how you use this website. These cookies will be stored in your browser only with your consent.
You also have the option to opt-out of these cookies. But opting out of some of these cookies may have an effect on your browsing experience. Necessary Necessary. Non-necessary Non-necessary.


|
Diy Woodworking Coffee Table Lamp Precision Woodworking Marking Tools Not Work Free Project Plans Zero |

BEZPRIDEL
24.01.2021 at 19:59:40
Nacnoy_Snayper
24.01.2021 at 13:27:27
QAQAS_KAYIFDA
24.01.2021 at 16:15:39
Prodigy
24.01.2021 at 15:13:29