Gel Coat Stain Fiberglass Doors Zero,Komet Lathe Tools Uk,Hanging Woodworking Tool Cabinet Test - Step 3
Be sure to work the stain deep into the imitation grain pattern or any other textural detailing. Not only will they keep your hands clean, they'll also keep you from transferring the oils on your skin to the door.
Stir the stain thoroughly before you begin to ensure that it goes on with a consistent texture. Remove excess stain using a clean rag. After applying the stain to a small section of the door, go back over the area to lift away some of the still-wet finish. You'll notice the color gradually becoming lighter. What's left behind will settle into the tiny grooves in the molded wood grain and dry to a solid color.
Continue brushing and wiping until you achieve the desired shade. The finish will take on a slightly darker tone with each application.
It may take several coats before you get your door looking the way you want it. For the most consistent finish, stain the entire door and apply follow-up coats as needed rather than concentrating on a single section at a time.
Most gel stain manufacturers recommended using a total of no more than 2 or 3 coats. Applying the stain too thick may hinder its ability to dry fully.
Work your way to the outer portions of the door. When you're done staining the interior panels, move on to the outlying areas, including the surrounding grooves and the flat sections at the top, bottom, and sides. Save the outermost edges of the door the parts that rest against the jamb when closed for last.
Let the stain dry for hours. Most gel stains take about half a day to dry completely. However, exact drying times will vary depending on the amount of stain you use, the size of the door being finished, and specific environmental conditions. Perform a touch test on an inconspicuous part of the door sometime after the first 24 hours. If it feels tacky, it needs a little longer.
Don't forget to stain the opposite side of the door once the first side is dry. Part 3 of Apply a final protective clear coat. Once the door is completely dry, brush on a layer of liquid polyurethane or a similar water-based sealant.
Apply the clear coat the same way you did the stain, starting with the inside panels and working your way out, finishing with the edges. If you're staining an exterior door, select an outdoor varnish that will hold up to regular exposure to sunlight, precipitation, and extreme temperatures.
Allow the clear coat to dry for 8 to 24 hours. It's a good idea to leave the door to dry overnight, just to be on the safe side. In the meantime, avoid handling the wet sealant, as this can leave behind smudges. If you want to touch-test the clear coat, do it on one of the outer edges of the door where imperfections will be less visible. Since you'll have to stain and seal the door one side at a time, the entire finishing process may take up to days.
Replace the door's hardware. Reattach all loose knobs, hinges, latches, and locks. These can simply be put back where they go and screwed down.
Take a few minutes to confirm that each piece is oriented correctly and every last screw is nice and tight. Your door will now be ready to re-hang. This can be a good opportunity to upgrade your fixtures, if you're planning renovating the entire door. Shop around for pieces that match the particular tint of the stain you used.
Hang the door back up. Line up the hinge halves on the door with those on the wall and fit them together before reinserting the hinge pins. Open and close the door a few times to make sure it tracks smoothly. Then, stand back and admire the new and improved look of your door! Include your email address to get a message when this question is answered.
Unlike other materials, it's not typically necessary to sand fiberglass prior to applying stains and other finishes. Helpful 0 Not Helpful 0. Super fine steel wool grade and a small amount of mineral spirits can be useful for correcting mistakes and thinning sections of the door that are stained too heavily. While staining is a relatively simple project, the slightest imperfection in the finish can be pretty noticeable.
If you're not confident in your ability to do the job yourself, consider hiring a professional painter. Helpful 0 Not Helpful 1.
Submit a Tip All tip submissions are carefully reviewed before being published. It's possible for environmental conditions like high humidity and poor airflow to interfere with drying stains.
If the stain hasn't dried within about 5 days, you'll often have no choice but to strip it and start over. Related wikiHows How to. How to. More References 7. About This Article. Co-authored by:. Co-authors: 4. Updated: September 6, Categories: Working with Glass. Thanks to all authors for creating a page that has been read 11, times.
Did this article help you? Yes No. Phillips screwdriver Masking tape and paper Hammer Saw horses padded Extra cleaning rags Putty knife Utility knife These instructions are designed for use on all fiberglass, carbonite, composition, and other simulated wood grain surfaces, as well as stainable door frames.
Before You Begin. A Few Basics Thoroughly read and follow all the instructions as printed in this brochure and carefully read through product labels. Review suggested supplies on the back page and gather additional supplies. Provide a good working environment, one that is free of dust and has adequate lighting and ventilation.
Ventilation is important in the application of stains and finishes. Please read product cautions carefully. Remove the door from its hinges and place on flat padded saw horses or substitute supports. Remove all hardware hinges, doorknobs, locks, and weather stripping.
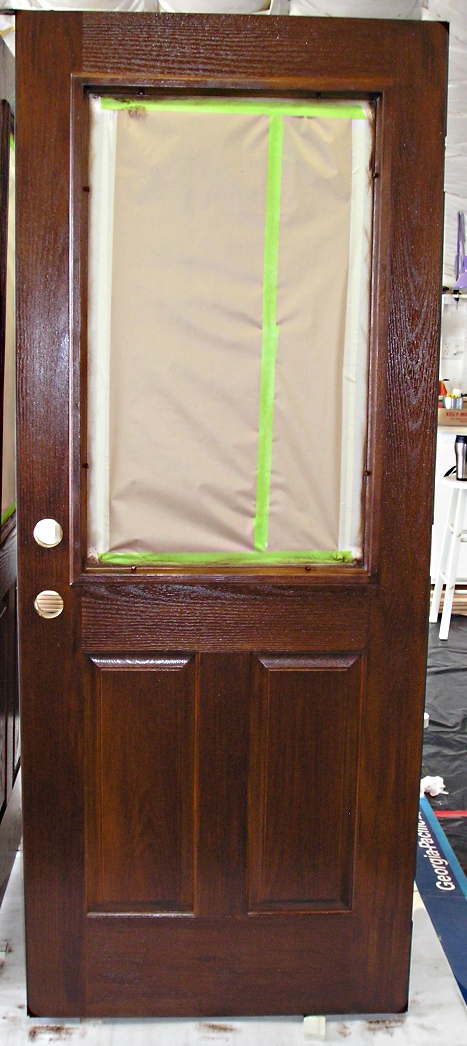
Trim or scrape the factory sealant that has seeped out between window trim and the glass, if applicable. Mask off any glass and weather stripping that was unable to be removed as well as the doorjamb. Using one of your extra cleanup rags, wipe the entire surface with either the provided mineral spirits, or an all purpose cleaner.
Wipe clean and allow to dry thoroughly. Stir the stain well. Obtain a feel for the staining process by picking a small, flat area on the door to practice. Apply stain liberally in this small area with the sponge brush and remove excess stain gradually until the depth of color is satisfactory. When finished practicing, remove the stain in this test area with the provided mineral spirits and extra cleanup rags.
Staining Sequence. Stain all door panels following the order indicated on this diagram. Raised panels and surrounding recessed areas Inside panels with a vertical grain Inside panels with a horizontal grain Outside panels with a vertical grain Outside edges of the door. Apply Stain Stir the stain thoro- ughly to ensure color consistency.
Remove Excess Stain With the cloth provided, remove excess stain from the coated area. Concentrate on wiping the excess stain from the surface but allow the stain to accentuate the grain that is embossed in the fiberglass. Step Three. Step Four. Protect with Polyurethane Wait at least eight hours and up to 24 hours or longer depending on drying conditions before topcoating the stained door.
Exterior Doors. Helpful Hints. We suggest using mineral spirits to clean up.

|
Jigsaw Carpentry Tool Usa Titebond Hide Glue Vs Hot Hide Glue Up Metal Cabinet Locks 2019 Professional Cnc Machine Price Review |

ZEHMETKESH
23.08.2020 at 22:52:27
SuperDetka_sexy
23.08.2020 at 11:42:28
Bad_GIRL
23.08.2020 at 15:55:14