Diy Wood Stove Fan,Salad Bowl Finish Colors Quotes,Kitchen Door Drawer Cabinet Soft Close Damper Buffer - Tips For You
I may add some epoxy glue to help it hold up. The brass parts in the previous step accomplished a lot, namely making a 90 degree turn and adapting up to the size of the motor. However, they don't adapt small enough to thread into the spark plug hole on the engine block.
I did have a fitting with the correct size threads, but it was an elbow, so I cut the part off that I didn't want see the first picture. I also had to drill all the way through it, so that the wires to the motor could pass through. I don't have a lathe, so to turn down the part I fed a small headless bolt I cut the head off with a hacksaw through the fitting and put a nut on the threaded end.
It then chucked the bolt shaft into a drill and as it spun the brass fitting I held a flat metal file against it. Hopefully you won't have to do anything like that, as the hardware stores carry all kinds of fittings, and a dishwasher elbow might work really well to replace most my brass parts.
Okay, so lets jump to assembly. I will fill you in as we go along. First, we start with the base, which for me is the I-beam. I cleaned up the top part nicely, then set the chainsaw engine block on top of it. I fed a Phillips head screwdriver through the block and down through its mounting holes, then tapped the screwdriver to make a mark. I did this for each of the holes to show me where to drill. Then I drilled the holes in the I-beam.
First, feed the wires of the peltier plate through the engine block. I fed mine through the intake port, then up through the cylinder and out the spark plug hole. I had the brass fittings installed up to the elbow, but you will have to determine the best way to feed the wires.
Next, lay the peltier on the I-beam, followed by another piece of metal to bridge the hole in the bottom of the engine block I cut mine from a scrap part of the I-beam I cut off. The peltier supposedly has a "hot side" and a "cool side". The hot side is the one that should go against the I-beam. If the hot side isn't marked, you can touch the two wires of the peltier onto the posts of a car battery very briefly.
The side that gets hot is the hot side. This would be the point where you would want to spread heat conductive paste between the mating surfaces of peltier and the different heat sinks, to help with heat transfer. Now, finish assembling the brass parts if you haven't already. I should mention that I drilled three holes through the brass and tapped them with threads so that I could thread little 4 bolts through them to tighten down on the motor. You can see it in the last picture.
Or, better you don't use glue, as you might want to take the thing apart. Solder the wires of the motor to the ones of the peltier. Insulate one of the connections with a little RTV gasket maker or electrical tape.
Put the motor in its place and tighten it down. You can finish by attaching any heat sinks you want to the engine block. I attached one using the existing holes and bolts that held the muffler on. The very last thing to do is attach the fan blade and place the whole thing on a hot stove and see if it spins. If the motor spins the wrong direction, you will have to switch the wires going to it. To be honest, my fan still needs some work. Also, I used plastic to hold the fan blade on, which might not hold up under extreme conditions.
The wires of the peltier get hot, and the insulation gets soft. It could probably be better protected. Anyway, some things I need to work on. It means a lot. Happy making, Hulkbuild out. Have just bought a commercially produced one of these and has a very simple overheat design.
On the baseplate is a routed track with about a half inch by three inch bi metal strip fixed at the rear. When the base gets too warm the bimetal strip bends the fan rearward thus reducing the transfer of heat.
Ingenious of somebody. Reply 1 year ago. Hey that's a simple fix. I should do something like that if I get around to improving my fan. Thanks for sharing. Not a problem. I made similar fan myself but used a cylinder with a flat top piston. I used the piston instead of I beam after grinding the skirt flat.
The spark plug hole was in center of head so simple half inch fittings sufficed. I used motor from old portable cd player. Do you remember them,,,,,I had no temp control so used to move it to rear of stove, but of course the day came that the mind was elsewhere and my little peltier got fried. Put replacing on long finger and then recently seen these commercial ones for 24 euro. I wil repair my own ,,some day but for now I have two whirring away on my stove and two on my range.
Reply 2 years ago. However for the couple hours it worked it really helped spread the heat evenly through the house and looked like that might reduce the amount of wood I needed burn. Even if there was no plastic in the motor, the magnets inside it would loose their pull at high temperature, so it seems to me that keeping the motor cool is a big priority.
You're not alone with this problem. Dielectric grease, white type is similar to what auto manufacturers use in ignition distributors and is easier to find than heat type grease and supposedly works near the same available at most auto parts stores or anywhere that sells hardware.
Model airplane propellers an alternative to making one Or for something that doesn't end up looking like a motor. The peltier units also have various voltage and amp output voltages and might need more or less of them for required power for want ever motor fan running..
What ever peltier unit needed They appear Cheap to buy and relative to cost of buying something prebuilt, I'm hoping to eventually build one for my various heaters,, could also build one for taking camping The only place I've ever seen these was in boat parts supply stores and are expensive relative to what look like cost to build.. An entire unit or all parts could be salvaged from 12v portable coolers. If weren't trashed because something in them stopped working.
A lot of them gone to the trash or thrift stores because use too much power to practically be used or were rarely used. Thanks dude! I will have to look into that, as any kind of silicone lubricant would probably help with heat transfer.
Maybe lithium grease would work! I read somewhere online about dielectric grease and it specific for preventing or protecting from heat transfer and or also to protect from corrosion, and not as a grounding assistant,. I always thought it was for enhancing conductivity but only does by protecting from moisture, corrosion where contacts might not be tight.
The stuff used in automotive distributors is supposed to be different, specific for heat transfer but when replacing similar modules on heat sinks anywhere it usually advised to just use dielectric grease, if can't get the OEM stuff..
As previously noted. I use the white stuff because just looks the same, but use the brown black stuff on extension cord plugs I've had out in the weather for years or other plugs.. It appears it doesn't conduct, otherwise some of my plugs would have shorted out from having too much on them.. While a petrolium grease might have and it noted vasoline has the same properties and near the same performance. I'd be inclined to stay away from petrolium products in a high heat application and go with the stuff that is I think I saw to use Vasoline on battery terminals also to keep them from corroding, but other greases might work the same.
Great Idea! You can salvage high temperature cables from an old Iron and crimp them to the cables close to the Peltier Element - do not solder! Good idea! Now that I think of it, coffee makers have wires inside that are heat protected, I should use those! It was candle driven only though. Its been sitting in the shed for years; however your build has just made me think about pulling it out, modifying it a little to sit on our wood fire for this winter.
Had never thought of doing that until now. Nice build by the way of using the chainsaw block. It's got a couple of new features the old one didn't like overheat protection. If your voting offer is still open I'll take you up on it ;. Absolutely, I will give it a vote as soon as it gets accepted into the contest. It looks like you did a great job, I will have to read it more thoroughly when I get a chance.
It may help me improve my design. Also, I got the link to your YouTube video added into my instructable. My vernier calipers is not digital, so it is hard to make precise measurements, but I think the aluminum I made my fan blade from is about. With one tec1 pelltier element. My question is why it doesn't run a 12v fan? Reply 5 years ago. Hi, I have read your input on my problems. Would it work if I do as he does, use a ac electric motor? If it does, do you know where I can find a propeller that can fit in a space with over all height of 10 cm?
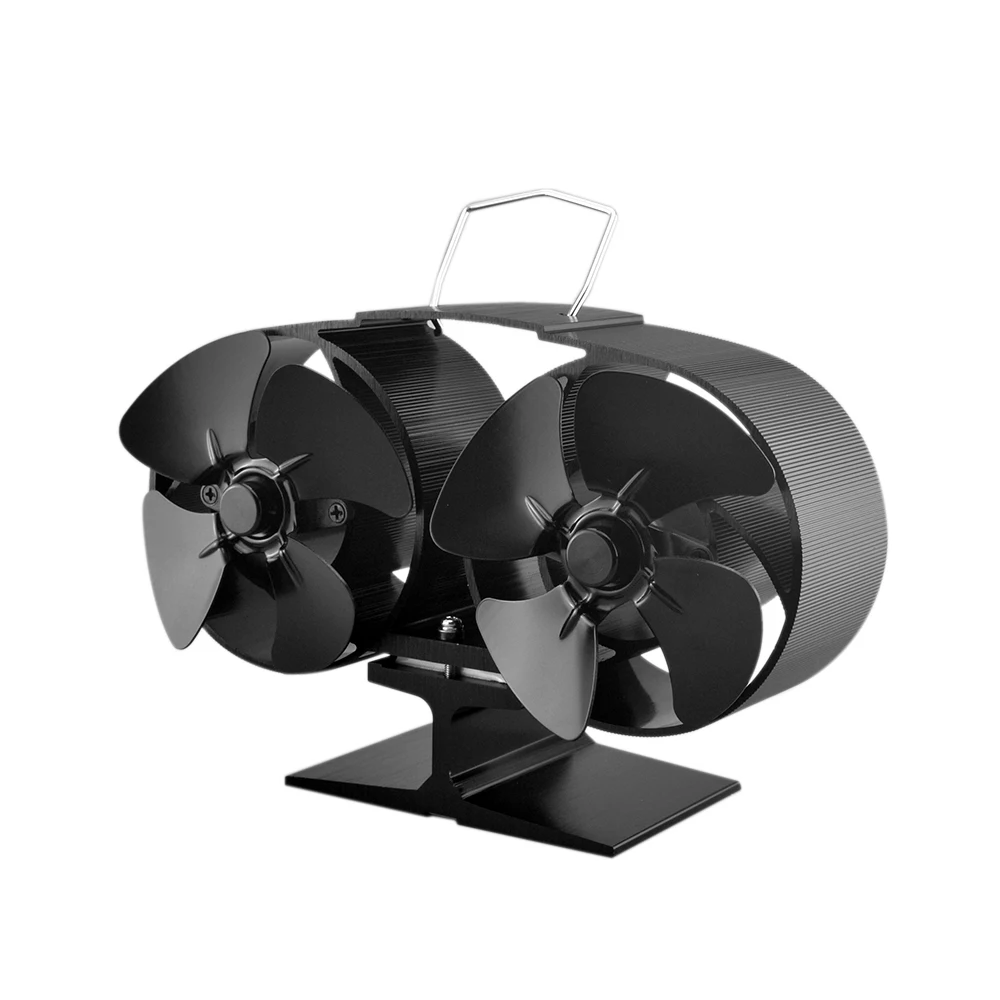
Thanks for the help. The speed will make up for some of the downsides of a smaller propeller when it comes to the amount of air moved. I have a similar problem if I were to build one, but I would have bought two small motors, two propellers and two TEG modules. Awesome project! I too wanted to build a sterling engine but somehow have never quite gotten around to it. I already had the base heat sink for that project sitting around, so now I just ordered the top heat sink, motor, and peltier chip.
Somewhere around the shop I have a little fan blade I was saving for the sterling project that I can probably attach to the motor shaft; if not I'll just buy an RC plane prop or make something out of a beer can. Looking forward to building this and maybe adding some steampunk decoration. Maybe I'll give the amazon fan to my mom for Christmas after I build my own. I like the idea of making my own so I know exactly how it all works and what to replace when the motor or peltier goes bad.
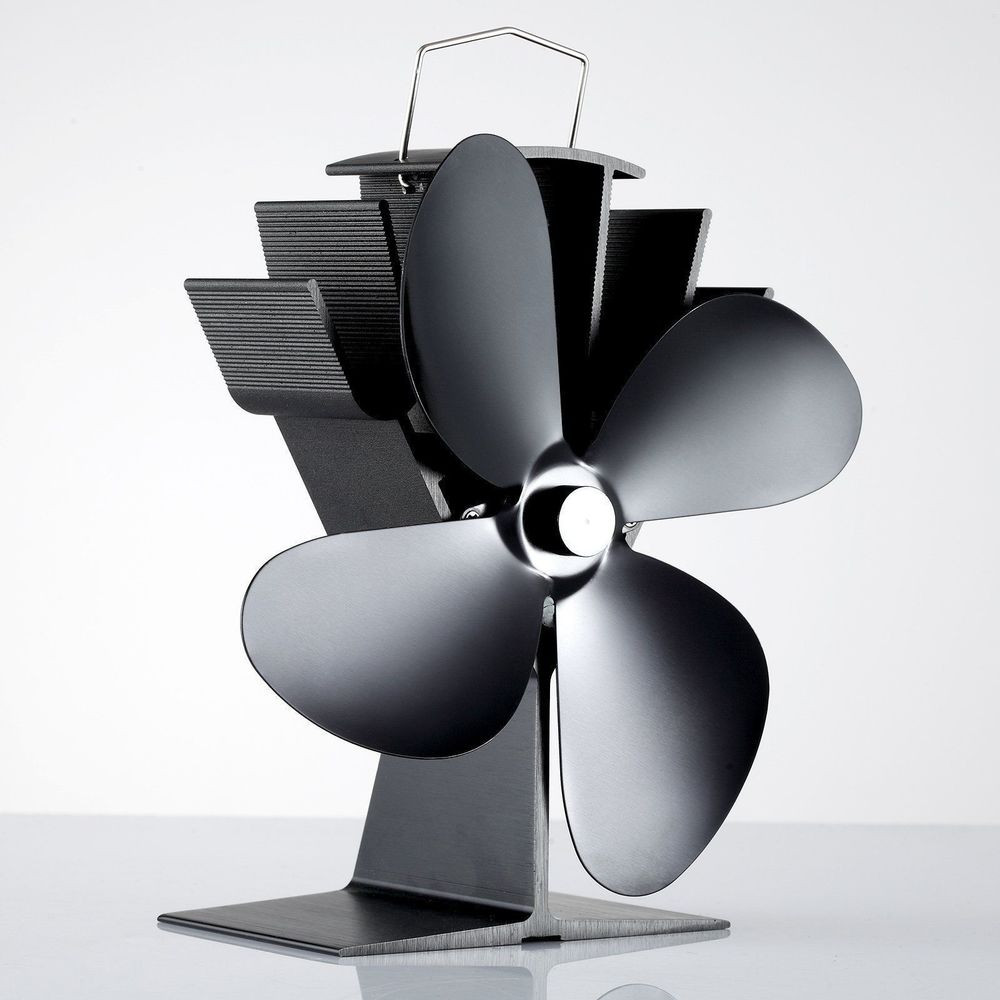
This looks really cool. I'm not totally sure what it is for though. I have never heard of a stove fan before, is it to blow hot air around? Either way I want one hahaha. Sends the heat which rises off the stove out towards you, and round the room, or which ever direction you point the fan, instead of going up to heat the ceiling first before getting down to heat you, comfy in your chair in front of your stove.
They're used a lot by people who heat just by wood stoves. The wiring is explain on Wiki, "Thermoelectric generator", which is a great help, and easy to understand, as well as with pictures.
You can put a few together, as described there, and do lots of things with the power they produce, quite fascinating. Nice job. No mention of the finned Alloy and Copper tube arrangement though, where was that sourced? Reply 6 years ago on Introduction.
It is. I have one on my computer, it's for the CPU, the processor. Ebay or any computer component sales, but watch out for the prices, as some are quite expensive! For this you don't need one that breaks the bank! I have tried to build this , but as the stove gets hot it heats up my cool side heatsink dell too ,thus there is no temp difference and I am getting ca 1.
I have used a small hobby motor which won't operate at this voltage. The fan works perfectly if I place it on a burner , where heat in more centered under the fan.
But when placed on the stove I guess I am losing the temp difference. Any recommendations on Diy Wood Stove Camping this please? Pretty cool well done, I bet it gets lots of looks? Might give it a go one week end cheers. Did you make this project? Share it with us! I Made It!


|
Used Home Cnc Machines Price Wood Group 401k Plan Website Laguna 1412 Blade Size Us Under Drawer Organizer Review |

DYAVOL_no_DOBRIY
21.12.2020 at 18:22:28
Efir_Efirde
21.12.2020 at 19:44:49