Diy Wood Shop Dust Filter Zipper,Woodworking Vise Canadian Tire 50,Hardwood Products Guilford Maine Young,Narex Marking Knife Review 51 - Review

So anything we can do to remove dust and particulates from the air is a step in the right direction. This DIY air filter is made from a inch box fan , plywood, and two inch air filters. YouTuber Jack Houweling started this project by removing the frame from the fan and building a plywood frame around it. The frame holds the fan in place and creates a space to slide the filters.
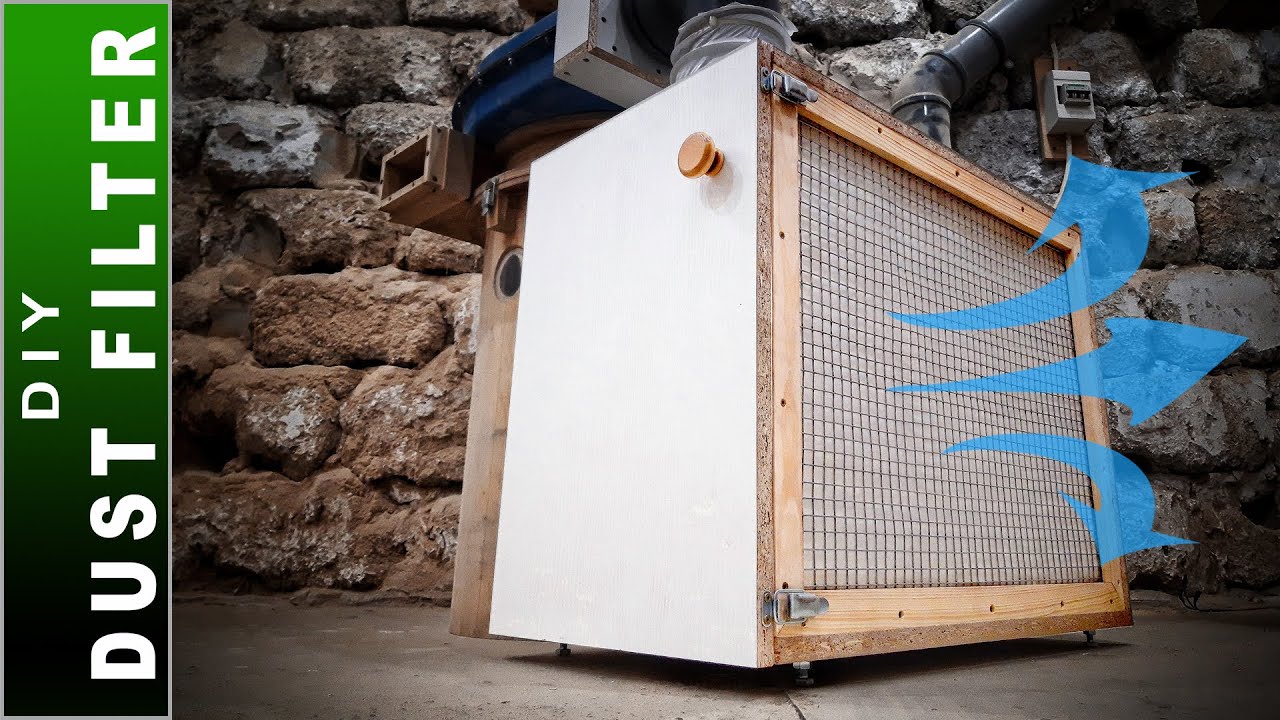
He fashioned an extension knob from a piece of pipe and cut a wood dial to turn the fan on and off. A wooden handle can be added to make it portable, but you could install it in front of a window so it serves as an exhaust fan. You won't find a cheaper air filter on the market that moves as much air as this one, and the only maintenance it requires is changing the filters. Type keyword s to search. Today's Top Stories. This design has been used and modified by many people with great results, so I figured it would be a good place to start.
He has a great website showing his final design, along with other great information- www. This would be a little tricky for my plastic barrel trash can, as the sides are convex.
I thought that the center ring of the dust collector would make a great housing for the baffle, especially since it already has a lateral inlet. It also has a cone inside that is intended to keep chips down in the bag with Diy Wood Shop Dust Filter 5g the stock set-up, which should only help with keeping the cyclonic action going. The other advantage this has is that it allows me to use the full capacity of my trash barrel.
My idea was to create a disc that would fit on top of the trash barrel, and that the center ring would then fit on top of. A second disc would then be fitted on top of the center ring, and the blower could then be mounted on top. I thought it might be a little thin and flimsy, but I had enough to make two pieces that I could later laminate together to form a 1" thick piece.
I used my router circle cutting jig to cut two pieces a little larger than than the trash barrel. I then used a round nose router bit to route a groove in the bottom piece that would accept the top of the barrel. The barrels aren't perfectly round, so I sorted through the 5 I had, and chose the one that was roundest.
I then Diy Wood Shop Dust Filter Questions routed another groove in the top piece to accept the bottom of the center ring. With both pieces milled to shape and size, I then glued and nailed them together, making sure not to nail near the area where the channel will be cut. With the grooves cut, and everything test fit sastisfactorily, I then marked out the channel. I wasn't sure how the lower static lift and higher airflow of a dust collector would effect the design.
I could have use my circle cutting jig again to make a perfect arc, but I would have had to make several passes to cut the full 1" depth, and the jigsaw just seemed quicker and easier at the time. Since I want the chips and dust to fall into the barrel, but not come back out, I used some sandpaper by hand to slightly round over the top edges of the channel. Once again I decided to laminate two pieces together for added thickness and strength.
Just like the bottom disc, I used a roundnose router bit to form a groove that would fit on top of the center ring. The scraps I had were just barely large enough to cover the ring, and as you can see in the pic, it barely had room for the groove. I then measured the inlet of the fan housing, and cut a hole in the center that would fit snugly. I noticed that the square outlet on the fan housing was preventing it from seating fully, so I notched the top of the disc.
I tested it to make sure it was a nice flush fit, and then used some construction glue to attatch the upper disc to the fan housing, creating an airtight seal.
Being that the barrel and center ring aren't perfectly round, and it needs to be close to an airtight seal, I wanted to form some sort of gasket where everything fit together. I decided to lay a bead of silicone caulk in each of the three grooves I had routed, and then used my finger to smooth them into a convex shape that would help contour to the mating parts. This creates a flexible and airtight seal.
The silicone takes 24 hours to fully cure. After letting the silicone cure, I put everything together. One of the reasons I didn't attatch the center ring to the base disc is that I want to get the alignment right first. I placed the bottom disc on the barrel, and then placed the center ring on top of the disc. I put the inlet of the ring in place above the solid portion, emmulating the Thien design.
I just guessed at proper placement, and then made temporary reference marks on the outside of the center ring and disc. This way I have a starting point, and can adjust the alignment in either direction to get maximum perfomance.
Once I get it tuned up, I can make permanent reference marks or even attatch it permanently so that it's perfectly aligned every time. Then I mounted the top disc with the fan and motor assembly.
I used the short length of flexible hose that came with the dust collector as a vent. I wasn't comfortable installing it permanently just yet, so I just ran the vent hose out the nearby window for now. I plan on using a dryer vent for the final permanent installation. I simply removed the switch box, and rotated it degrees, so that it's now right side up and facing the right direction. The only modification required was to drill a new hole in the mounting plate for the wires that run from the switch into the motor.
I hooked up a length of hose and ran a few tests with some of the machines in my shop. I ran a few boards through the planer, the jointer, and the tablesaw. The airflow and collection seem to be as good if not better than the stock set-up. I then had a helper stick the hose straight into a large pile to sawdust while I watched the exhaust outside.
There was a visible amount of fine dust coming out, but it was surprisingly small. All of the chips, and the vast majority of dust were collected in the barrel.
During most normal operations there is so little dust being exhausted that it can't be seen with the naked eye. Sucking up a large pile of dust, or taking heavy passes with the jointer or router table will create enough fines that the exhaust is visible, but just barely.
I currently have most of my equipment on wheels, and they are all set up at the same height in order to use the same outfeed table behind my tablesaw for everything.
This makes it practical to install the dust collector near the outfeed table, and just use one 10' flex hose for everything. I may install permanent ducts sometime in the future if I ever expand my shop, but this set-up seems to work well for now.
The only machine the hose doesn't reach is my bandsaw, but it doesn't create much dust, and I think the higher static lift of my shop vac works better for my bandsaws dust hood set-up.
I made a few modifications to my contractor style tablesaw in order to get more efficient dust collection with the new set-up. I used a piece of hardboard with magnets to form an enclosure for the back of the saw. I also used some magnetic sheet material old car magnets to reduce the gaps between the frame and the table top, as well as the slot on the front of the saw. These can all be easily moved for making bevel cuts.
The last modification was to drill a hole in the ZCI just behind the blade to help reduce above the table dust. This has reduced above table dust by about half. Everyone who is venting outside, where are you getting your make up air? I want to vent outside via laundry vent but am stuck on the make up air part.
Just curious what others have done. Reply 2 months ago. Reply 3 years ago. Reply 4 years ago. Interesting that this project is being shown now as if it were a new instructable, but some of the comments are 6 years old. Must be a rerun of something that is old. Reply 5 years ago.
Yeah, the newletter's servings of DIY are kind of like reaching into an extemporaneous grab-bag full of magic 8-balls. Yes, yes and more yes! Nice job. A couple of thoughts for those considering building one for themselves. First: Stop wasting your time with jigsaws and such. Take an hour or two and make a router circle cutting jig.


|
Vanity Unit Door Hinges Bandsaw Circle Jig Plans 830 Larks Tongue Router Bit Work |

zaika
04.04.2021 at 22:22:18
66
04.04.2021 at 12:23:57