Diy Wood Napkin Rings Zones,Freehand Router Sign Making Table,Asus Router Sign On Error - Plans Download

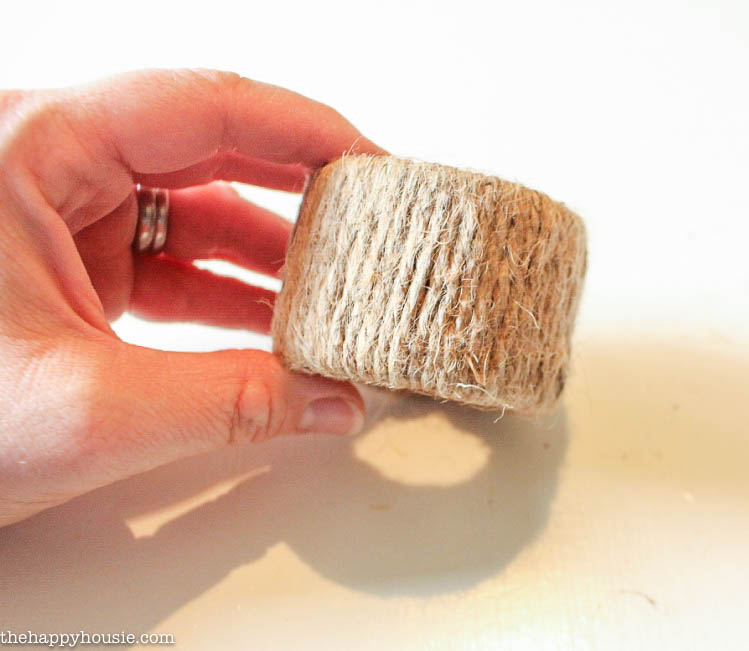
This idea Diy Wood Napkin Rings 01 is pretty great and we love the end result, so you should definitely try it out too, especially as it will certainly draw the attention of your guests. Everything ready? Unravel quite a bit of twine and cut the piece with your scissors. Plug the glue gun in and add some hot glue to the wood.
Then, start wrapping the hemp twine around the ring. Once more, add hot glue every now and then. We recommend you do it every two turns and just add a bit more glue to it, so all the twine is covered. Make sure to pull the rope tight as you go around the ring, up to the end, maintaining the tension. Get the wood slice and add it on top of the glob of hot glue. There you go! Make sure to maintain the pressure for a little while so the whole thing properly sets.
Bring in the moss and press it over the glue. Also, make sure to maintain the pressure for a few seconds. Grab one of the decorative mushroom, apply some hot glue to the wood ring and gently and carefully place the mushroom on top.
Make sure to keep it pressed for a few seconds. Especially since this is a bigger piece, it needs more time to set. What a perfect application of an oddly learned skill! Start by cutting off a small length of 2x4 or using a scrap piece you have lying around. This will be your guide piece.
I like to point my elbow away from the drill, creating a right angle to the drill with my arm. This is a great way to protect your wrist from getting tweaked. High speed, light pressure. Once the hole saw starts cutting, you can apply more pressure and may need to in order to continue making progress. Just continue to be careful of kickback, and relieve pressure if the saw seems to be getting stuck.
Depending on your specific board, and the newness of your hole saw, it may be fairly smooth cutting through, or you may hit a lot of snags.
It just takes some practice to know whether a snag can be fixed with a little more pressure or a little less, or with removing the drill altogether and then returning. Every so often, cutting with a hole saw, my drill will overheat and the battery will shut down for a minute or two. Clamp in place. Sand napkin ring smooth with a piece of sandpaper. I tried using an electric sander, but I found it very hard to hold the napkin ring firmly in this process.
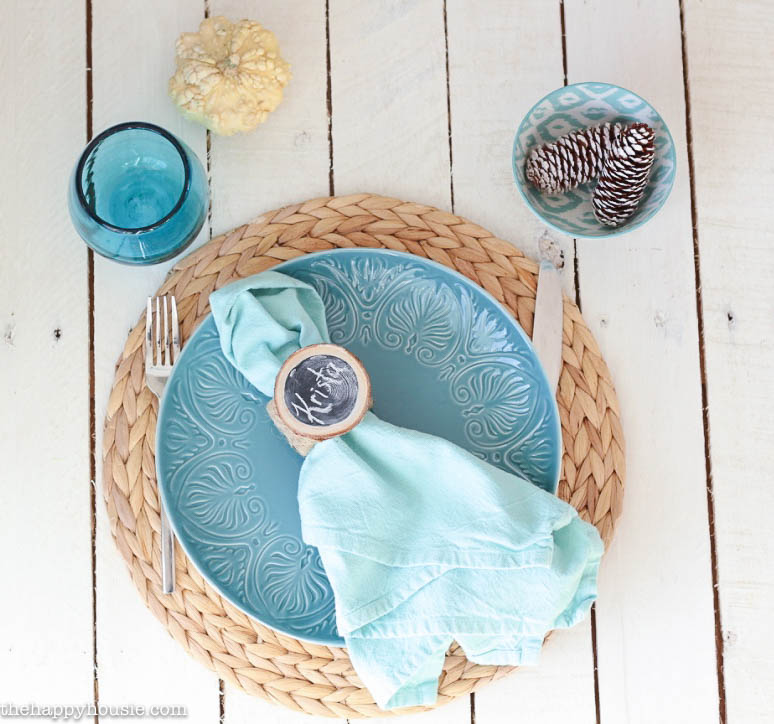
I recommend starting with to grit sandpaper and working up to grit. What better way to procrastinate cleaning my home for the dinner than to make DIY wood bead napkin rings?!
Begin making your DIY wooden bead and tassel napkin rings by making the twine tassels. I used cardboard to wrap my tassels as that is what I had done in a previous project with my kids. You can also easily use your fingers instead of the cardboard.
Sometimes a video is worth a thousand words so here is a great video tutorial on how to make a tassel. If you prefer written instructions, follow these directions:. Begin by wrapping the twine around the piece of cardboard or four fingers not too tightly to your desired tassel thickness. Mine were seven wraps. Once you are finished wrapping, cut the twine. Slip your pencil or whatever long thin object you chose between the cardboard or your fingers and the twine.
Use a piece of twine to tie a knot below where your pencil is holding the twine.

|
Cheap Craft Ideas For Adults Quotes Rockler Pro Lift Router Lift Ii |

Anar_sixaliyev
04.02.2021 at 10:19:22
Vefasiz_Oldun
04.02.2021 at 18:10:28