Diy Wood Hand Planer,Delta Router Table Extension Qs,Makita 18v Brushless Oscillating Tool Amazon - How to DIY
The Bosch PL features a 6. It comes equipped with a dual-mounted fence with a protective shield which combines well to help plane door edges easily. Setting depth adjustment is also a very easy, as the planer is equipped with a metric scaled depth adjustment knob which is very easy to read adjust. That is why the Bosch PL electric planer handle is optimally-angled to ease the forward motion of the tool and reduce fatigue for anyone working with it.
As common in most electric hand planers, the Bosch PL features a spring loaded stand which you can use to elevate the tool when you need to set it down and prevent damaging your material or the cutterhead blades. For added safety, the Bosch PL not only comes with a lock off button to prevent accidental startup, but also a lock-on which is very useful for prolonged usage. A very nice feature of the PL is that the cord swivels at the end to make it very easy to position the power cord and to prevent damage.
Another great feature I like about the Bosch PL is the ability to control the directions of the shavings. You can switch the dust port from left to right depending on the direction you want the shavings to go through.
The Bosch PL planer work perfectly, but the carrying case can definitely use some improvement. You need to disassemble the edge guide in order to fit the planer into the case, and then assemble it again when you have to use it.
The DWK electric planer comes equipped with a powerful 7. This provides enough power for you to plane very hard lumber with it easy, and produce very smooth and consistent results. One thing that electric hand planers are mostly used for is making rabbets for rabbet joints. That is why the DWK is specially fitted with a precision machined shoe which you can use to produce perfectly squared rabbets for your rabbet joints. Three precision machined guides at the front of the planer also come very handy for chamfering edges and making beveling channels.
The planer comes equipped with reversible carbide blades which you can easily sharpen when they become dull, or you can reverse the edges to start using the sharp edge. Making depth adjustments is very easy as the DWk comes equipped with an innovative and easy to use calibrated depth adjustment knob.
The Dewalt DWk is quite powerful for its size and will chop through any type of wood you have to work with. The hard carrying case is also a huge plus. Very good for storage of the tool, and for moving it from jobsite to jobsite. No dust collection adapter and dust bag. Without the adapter and dust bag, working with it really turns the whole place into a huge mess with dust and wood chips flying all over the place.
Planing really large and rough lumber will require a few more passes if you go for other planers with lower width and depth capacity. The blades are high-speed steel blades which complements the powerful motor to ensure it chops through whatever type of wood you ply it through.
Adjusting the cutting depth of the Makita electric planer is very easy as it comes equipped with a depth adjustment dial with easy depth settings which are very clear and easy to read.
A good handle is necessary for power tools like this, and Makita did not disappoint in this aspect as the B electric planer comes equipped with an ergonomic handle which is very comfortable to hold and work with. Another important feature is the lock-on button which you can use to keep the planer running as long as you want to plane with it.
This Makita planer is ideal for you if you carry out professional construction framing, fine woodworking as well as window and door installation.
Above all, what really matters when it comes to electric planers or planers of any kind is how smooth and polished is the resulting work after using the planer? The Makita B electric planer performs exceptionally well in that aspect as well. One thing you should expect though is that B is heavy, and that should not even be a surprise considering the its size and design. This is not just any electric planer. This electric hand planer from Ryobi is one ergonomically designed to help you work comfortably even as you tackle difficult projects with it.
It comes equipped with a 6 amp motor producing up to 16, revolutions per minute, allowing you to tackle a wide range of woodworking projects with it. For convenience and ease of use, the planer features a 6 foot cord which provides you a wide range of space and allows you to cover a large area with the planer without the need for an extension cord.
For safety, the Ryobi HPL52K also comes equipped with a lock-off button which prevents accidental activation of the machine, and the consequent damage to the workpiece, the planer machine or even yourself.
All in all, this Ryobi electric hand planer comes with every feature you need to handle any kind of hand planing project you have at hand, and it provides excellent results. When you buy the Skil PL electric hand planer, you get the planer machine, a parallel guide, a rebate fence, dust bag, spanner and adaptor. With this, you have everything to tackle any wood planing and flattening project in your workshop. The planer comes equipped with a 6.
The planer comes equipped with a smooth kickstand that allows you to rest the hand planer on the workpiece without scratching the finished surface.
A dual exhaust port allows you to collect dust and chips from any side of the planer, making it very easy to operate. Overall, this electric hand planer from Skil definitely stands among the best, because it has everything you need to work on projects both on and off the jobsite. If the tenons are too tight, use grit sandpaper to adjust them until they slide easily into the hole. It is important that the tenons are snug, but the pins need to be able to rotate to adjust properly to the angle of the wedge.
Use a rasp, file and sandpaper to round the top pin surfaces as shown in the plans. Prepare one of the plane bodies for glue-up. Next, apply glue to one face of each of the body blocks and place them on the cheek.
Position the crosspin in the opposite cheek and spread glue on the remaining surfaces. Assemble the parts and drive the screws to ensure that the parts are aligned.
Clamp the assembly, and allow the glue to set for at least an hour before removing the clamps and scraping off excess glue. Repeat the assembly process for each plane. Use a band saw to cut off the waste portion at the ends of each block.
Transfer the side profile of each plane to its blank and cut out the shape. Mount one of the plane bodies in a clamp and use a rasp to shape the back-end profile. Keep in mind that the plane should be comfortable in your hand, so test its feel as you shape it. Now is the opportunity to personalize your tool. Finish shaping the back using a file and sandpaper. Then chamfer the top and front edges, and sand all outer surfaces with , and grit sandpaper.
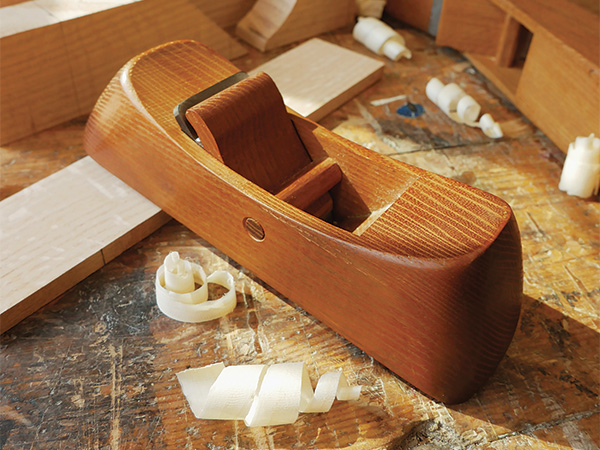
For a plane to be useful as a flattening and straightening tool, it is essential that the sole be perfectly flat. If your assembly has gone smoothly, your tool is probably pretty close to being flat, but it still needs some work. The easiest way to flatten the sole is to stick a strip of self-adhesive sandpaper to the table saw table and repeatedly pass the plane over it.
Apply pressure only on the forward stroke, then lift the tool to bring it back for the next stroke. Examine the sole of the plane frequently as you work. You will be able to see if there are areas that still need work. Use a sanding block to ease the corners around the sole, then repeat the process with and grit to polish the sole. Rip a strip of wenge to width for one of the plane wedges, place a piece of masking tape on one edge and lay out the wedge shape.
Then cut the inside surface of the wedge. Slide the iron and cap-iron assembly into the plane and test the fit of the wedge. Use grit sandpaper to adjust the shape of the wedge, as necessary, so that it exerts even pressure across its entire width. You will know when the fit is correct when you see an evenly burnished line across the wedge face at the point where it contacts the crosspin.
Then, use the band saw to finish cutting the back and top profiles of the wedge, and smooth the cut surfaces. To seal the wood we applied a penetrating finish of several coats of boiled linseed oil. Use a rag to completely soak all surfaces of the plane and wedge, let the oil absorb for about a half-hour and then wipe off the excess.
After overnight drying, repeat the process. Apply at least three coats using this technique. You can then apply a light coat of wax to the sole of the plane to further reduce friction. Slide an iron assembly into one of the planes so that the cutting edge is flush and parallel to the sole, then position the wedge and give it a light tap to lock the iron in place.
To increase the depth of cut, use a small hammer to tap the iron lightly. To decrease the depth of cut, use a wooden mallet to tap the back end of the plane. After each adjustment, you should check the tension on the wedge, as it may need tightening.
Type keyword s to search. Today's Top Stories. Or Even Holes.


|
Miter Clamps Harbor Freight Jacket Task Force 10 Band Saw Blade On |

KETR
28.07.2020 at 15:44:55
Lapula
28.07.2020 at 13:52:54
R_i_S_o_V_k_A
28.07.2020 at 10:41:55
ILGAR
28.07.2020 at 23:38:50