Diy Easy Wood Vise,Wood River Plane Setup Design,Diy Wood Reindeer Pattern With Reference Vector - Plans Download
Just make sure the overhang on the rear jaw is the same on both sides before transferring the lines. This will create an oval hole that will allow the front jaw to pivot so you can clamp angled or tapered parts. This is what the marks on the front jaw should look like:.
Now you can easily scribe around the nut knowing it Easy Wood Diy Gifts 91 will be in the right location. The nut is being recessed on the inside face of the rear jaw. Now just use a chisel to hog out all the waste! This part was really fun! All the hard parts are done! Just a few small little details left! I cut a bevel on the top front face of the front jaw. This is so that I could use a handsaw for cutting things like half blind dovetails without the jaw getting in the way.
I just chose a random angle at a random distance that I thought looked good…. The steel in this kit is untreated so it might rust if left in a humid shop.
I sprayed some WD long term corrosion inhibitor on all the parts to prevent them from rusting. To make lining up the vise with my workbench easy, I screwed on some tabs that will be used as a positive stop. The tabs make it easy to line the inside face of the rear jaw with the edge of the workbench and you can fold them away if you ever need to. Thread a nut onto the rod and place it in the holes that were chiseled out on the inside face of the rear jaw.
Keep threading the rod until it is protruding out the back of the rear jaw and lock it down with a washer and another nut. Collapsible Bandsaw Bowls. Feel free to Easy Diy Woodworking Projects Us adjust the length to whatever works for you and your bench.
Back at the table saw I lowered my blade to just under the recommended hight for the dovetail groves. This little gauge that Im using comes from Microjig and shows you the depth that the sliding dovetails will need to be cut.
I adjusted my blade to just under the recommended hight and cut relief cuts where my dovetail grooves will go. This will make the dovetail cuts cleaner and will reduce the wear and tear on my dovetail bit.
Notice while setting up for the vertical cuts I used a scrap piece of wood as a spacer between the board and Diy Woodworking Bench Vise the fence that I remove before cutting. This method helps to reduce the chance of a kick back while making the cut. At the router table I set up my Microjig dovetail bit and began to make the dovetail cuts using the relief cuts as a guide. I needed to cut a cleat to attach to the bottom of my workbench to increase the width and give me something extra to screw the face of the vice to.
I cut a piece of 2 inch thick ash to roughly to same length as the vice face and about 3 inches wide. I predrilled holes in the cleat and then attached it to the bottom of my workbench using 3 inch screws.
Next I used a counter sink bit to pre-dill for the screws on the vice face and then secured it to the bench and cleat. The cleat added the extra thickness that I needed for the second set of screws which gave this vice the strength and stability it needed. Ensure that that the dovetail clamps slide easily through all of the dovetail slots after completion.
With that the vice is ready to be used and as you can see the Microjig clamps slide freely through all the slots. This vice is exactly what I was wanting and needing and will be extremely handy in my shop. Source Image: woodarchivist. Visit this site for details: woodarchivist. Standards, thrillers, as well as going to bed tales alike will certainly feel comfortable in this pleasing wood shelf. Set up a structure from scrap wood, attaching the base assemble utilizing timber glue as well as brad nails.
Affix the beveled-edge roof covering to the top, fill up any kind of nail openings with timber filler, and also sand the rack smooth. Paint if wanted for a fairytale-worthy outcome. Source Image: gifted42cvur0. Visit this site for details: gifted42cvur0. Branch out! Twigs use an ideal and also stylish replacement, as well as you can securely trim them from neighboring trees without creating any type of damages.
Clip a couple of most likely twigs, after that repaint them as well as screw them onto a wood board to style a functional drop area for day-to-day bonus. Trim a couple of likely twigs, after that paint them and screw them onto a wood board to style a practical decrease area for day-to-day bonus. These or else practical platforms offer themselves beautifully to countless embellishing tasks, and also can offer your room an excellent rustic feel. Turn remaining wood or old pieces of furniture right into DIY redeemed timber tasks!
Timber is just one of my preferred materials to collaborate with. The possibilities are endless and also they provide such a homey and also relaxing feeling to any kind of rustic residence. My husband, Dave, and also I occasionally also go the extra mile and sculpt our initials on a little place. It s our own way of making our DIY job a lot more personal! Right here s a listing of some of our preferred DIY recovered timber projects!
Here are 9 DIY timber wall therapies that celebrate the all-natural warmth, appeal, as well as charm of wood. Construct a frame from scrap wood, linking the base pieces together using wood adhesive and also brad nails. Turn remaining wood or old items of furnishings right into DIY redeemed timber tasks! Transform remaining timber or old pieces of furniture right into DIY redeemed wood projects.
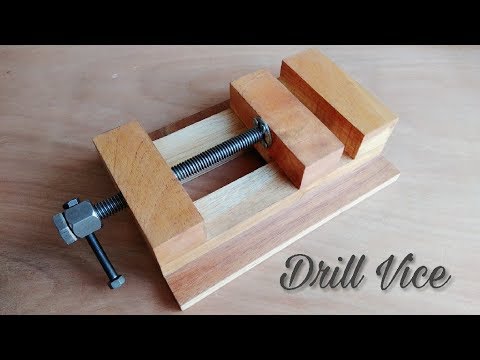
Your email address will not be published. Save my name, email, and website in this browser for the next time I comment. Skip to content. Contents 1. Homemade Woodworking Vise Shop Pinterest 2. Homemade Woodworking Vise 4.


|
Incra Table Saw Miter Gauge Cell Woodworking Plans Executive Desk Pdf |

SYRAX
16.09.2020 at 23:42:27
Play_Girl
16.09.2020 at 14:43:33
ulviyye
16.09.2020 at 16:37:23