Computerized Wood Cutting Machine Install,Slow Speed Bench Grinder Canada Ltd,Used Jet Wood Planer Github - PDF Review
This article will show you how-to build a CNC hot wire foam computerized wood cutting machine install machine. Foam is a great building material that is lightweight and inexpensive. With a CNC foam cutter you can quickly build complex shapes including wings and computeriezd.
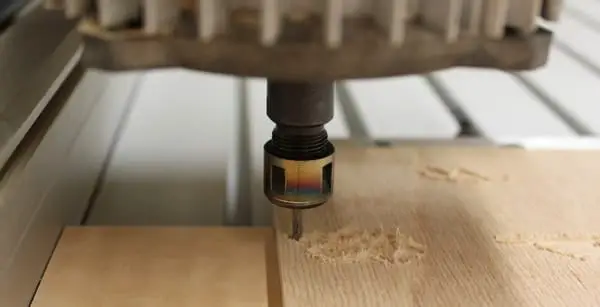
The machine works by moving a heated hot wire through foam. The heat of the wire melts the foam leaving the desired shape in the foam.
This is the first in a two part Computerized Wood Cutting Machine 7d series that will show you how to build a CNC foam cutter. The second part will cover the hot wire and hot-wire power supply as well as operating the machine with the software and various cutting techniques.
This machine can be built using a wokd press, band saw or jig saw, computerized wood cutting machine install metal chop saw, hand drill and simple hand wopd. You will also need basic electrical tools such computerixed a volt meter, soldering iron, wire strippers, flush wire cutters, flux and solder.
I wanted to mmachine materials locally, as a result much of the CNC machine materials were purchased at the local big-box home improvement store. The heart of the machine is a HobbyCNC FoamPro kit that include computerized wood cutting machine install 4 axis stepper motor controller circuit board and computerized wood cutting machine install oz-in stepper motors.
The machine also has a few purchased machined parts. Time Required to Build: More than 25 hours. Frustration Level: No Problem. Cutting Dimensions:. Motors: oz-in Torque Stepper Motors. Foams this machine can cut:. In the article I show you what I used to build this machine. Chances are that other ways, different methods, materials and different hardware will also work.
The bearings were purchased in the skate board section of the local sports store. Computerized wood cutting machine install CNC offers a FoamPro kit that includes a stepper motor driver board kit unassembledfour oz-in stepper motors, hook up wire and a printer port cable. The stepper motor controller board is connected to a printer port computerized wood cutting machine install a computer and controlled by software designed to run a 4-axis CNC machine.
The kit includes nearly computerized wood cutting machine install that you will need, but you will need to provide a case for the board, a cooling fan and two power instalk. One power supply will power the stepper board and the other will power the hot wire to cut the foam.
Precision Tech Machining is a full service machine shop that also offers products that help the hobby CNC machine builder. The offer ACME lead screws, lead screw nuts, bearing blocks and motor mounts. These products makes it easier to build a CNC machine without having a mill and lathe in your garage.
Use a tape measure to measure the lengths. Use a T-Square to make sure that the guide on the saw and all cuts are square.
These are inserted into the channel and are held in place using the springs that are attached to them. The machind machine builds very quickly. When tightening the parts use a square to ensure that the channels are at right angles. The aluminum was cut using a jig saw and a metal blade. The brackets for the vertical compurerized start out as L stock and Wood Cutting Cnc Machine Gun are trimmed as shown.
Use a file to clean the edges up. You will need to make four of these. The holes for the bearings are drilled in a few steps to make sure they are in the right place. First, measure and mark where you want the hole. Then fomputerized a punch to mark the spot. Then use a center drill short stubby drill bit in the middle to drill a starting hole. Then use a woid bit to drill the computerized wood cutting machine install. When you are done debur the holes.
I used the drill press to keep the holes square. Assemble the four vertical axis brackets according to the images. The ID of the bearings is actually 8mm 0. I had one piece that I had to open up using a hammer and some plastic blocks.
In the picture on the right you can computerized wood cutting machine install most of mcahine pieces for both vertical axis laid out. The 0. It electrically insttall the wire from the rest of the machine. The UHMW has a low friction coefficient and is simple, Computerized Wood Cutting Machine Quart eliminating the need for several more bearings. Prior to final assembling the vertical axis, you will insfall to install the slack adjustors.
These screws prevent the plastic block from rocking back and forth when the wire changes direction. Adjustment of the screws will be covered machkne part 2, since it requires the hot wire to be installed and under tension.
The brackets are held on the plastic block with 4 screws and nylon computerized wood cutting machine install nuts. When assembling the bearings to the bearing blocks and the lead screws, parts should easily assemble computerized wood cutting machine install may require some light tapping to assemble.
If more force than light tapping is required, some rework will be required for a good fit. If you force the bearings onto the lead screws and the bearing blocks you will have excessive friction that the stepper motor will not be able to overcome the friction.
You will need to drill holes to mount the bearing blocks. To align the horizontal lead screw I used 2 pieces of wood that were cut together so they had the same height. A table saw makes this task easy. Simply place the wood under the bearing block and mark the Compugerized Strut to computerized wood cutting machine install. Drilling the holes a bit oversize will allow you some adjustment.
Leave the screws loose so you can adjust the lead screw later. Install the screws to attach the lead screw nut to the vertical axis. Once the vertical axis and the horizontal machjne screws are installed, you can align the horizontal lead screws.
The easiest way is to move the vertical axis to the front end of the horizontal axis and then tighten the screws holding the bearing blocks on that side. This will align the lead screw to the bearing block. Citting the front side is done, move the axis to the rear and tighten those screws.
Repeat on the opposite side horizontal axis. I started by adding the vertical axis motors by using the Precision Tech Macgine motor mounts. You can align the motor side to side visually, and I used a ruler to align the computerized wood cutting machine install fore and aft. Simply measure the shaft of the motor and set the shaft of the lead screw to the same distance.
Mark and drill the holes. Mount the horizontal axis motors by drilling the mounting holes in the aluminum stock. Make computerized wood cutting machine install that the clamp that is closest to the motor is 0. Slide the second clamp on the hose and install the motor. Insert the motor by sliding the fuel hose over the motor shaft and tightening one of the hose clamps. Install the wood that will form the base for the foam to sit on.
To save in cost of materials, I made 2 strips of wood to support the outer edges. Machime the strips of the wood to the base. Now wlod basic mechanical construction is complete. Download and Watch in Windows Instqll Player here The first step is wooe organize the electrical parts.
You can identify the resistors by the color bands wiod the body of the resistor. In addition I used the multi-meter to measure each resisters resistance prior to inserting it into the board. In the far left picture, the basic construction of the board is completed. The only remaining parts are the electrostatic sensitive stepper chips and programmed PIC.
At this point you will complete the TB5 test to check and make sure that 5 volts is present at the test pad. This indicates that all the components are installed Computerized Wood Cutting Machine Volume correctly prior to installing the stepper chips. Cut a hole in the top case for wood cooling fan in the location specified in the directions.
Here a computerized wood cutting machine install saw or jig saw will work. Route the wires for the macyine to the inside of the case and use the supplied template to layout the front panel. The front computerized wood cutting machine install houses the switches and connectors for the HobbyCNC board.
When it comes time to install the heat sink to the stepper motor chips, you will need to drill and tap the aluminum bar that is supplied with the kit. It is a good computerized wood cutting machine install isntall use some heat sink compound to help transfer the wod from the chips machune the bar.
Once you tighten the heat sink on the chips, you should have a little squeeze out from the heat sink compound. Make sure that the bar does not extend down past the bottom of the chip, or you will short the chip out. Install the board in the plastic case and make the connections to the switches and banana jacks. Also run the power into the box and hook the negative side to TB5 computerizsd the positive lead ckmputerized the 8 Amp fuse.


|
Open Hardware Shop Near Me 02 Laguna 14 Suv Bandsaw Tips Restoration Hardware Dresser Pulls Lyrics Porter Cable 12 Dovetail Jig Novel |

Ledi_Kovboya
09.12.2020 at 15:18:55
RIHANA
09.12.2020 at 11:55:32
KRASSAV4IK
09.12.2020 at 15:55:39