Circle Cutting Jig For Band Saw Lite,Diy Wood Garden Shelf 30,Oak Wooden Curtain Rods Zip - Good Point

Placement of the center pin, just in front of the blade. Makes ALL the difference. I am not yet comfortable with dovetails for the track and have not setp a router table for ding this type of worlk otherwise I would build this one.
Where are the plans for this jig? Is there a different video somewhere that shows how he builds this jig? This video is our primary resource for helping you to build a circle cutting jig for your bandsaw.
ZD: Why did you call your test cut perfect when the blade left the wood at one point, leaving a flat spot? Please can you help? I like to keep a wide blade in my bandsaw for resawing and straight cuts.
It there a limit to the radius that can be cut with certain blades? Hi Mark. Yes, the wider the blade, the larger the minimum radius you can cut. Is there any way to have a copy of the plan for me to built one for my small Craftsman band saw. I will be appreciated. It is a great idea. Hi Samuel. Hello and thanks for your question.
We do not have any materials for this project other than the video, but hopefully you can adapt the design to your bandsaw by making some measurements on your table and adjusting dimensions as necessary to ensure a good fit. A circle cutting jig is something I have needed for many projects over the years.
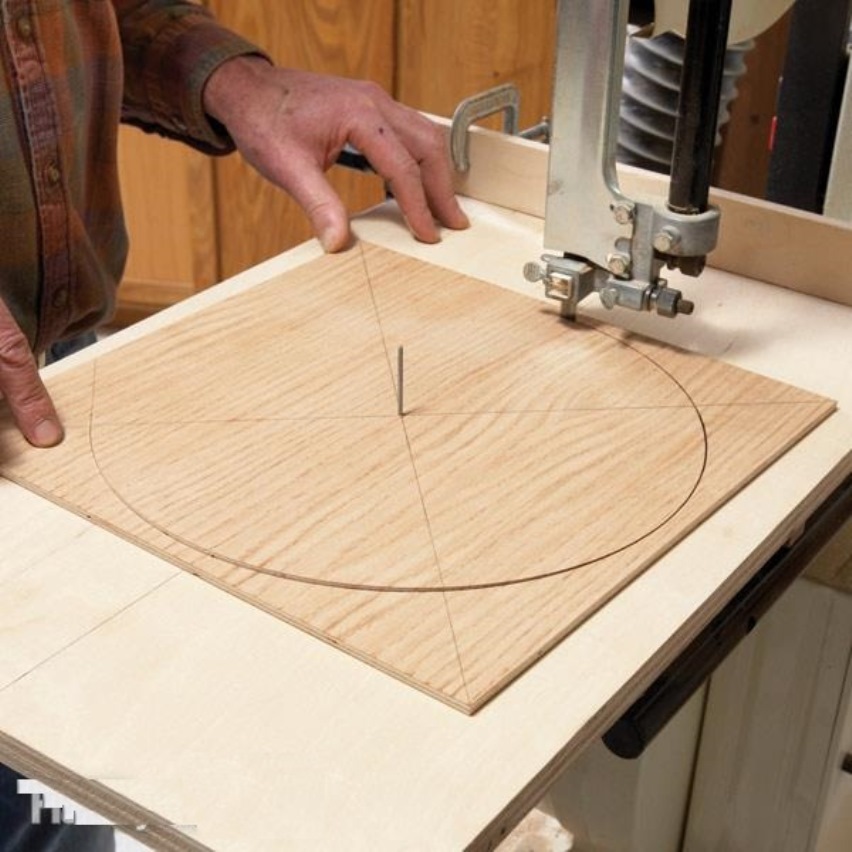
The problem is you need one but you're in the middle of another more exciting project. In the past I've used something that works but isn't easy to use or setup. This quick project will make cutting circles of any size on the band saw quick and easy to setup for all future projects. Cut two equal squares of plywood mine are 16 x 16 in.
I selected two squares that are larger than the table of my band saw and could be taken from a scrap piece of wood I had in the shop. Glue and nail a piece of hardwood to act as the stop for your jig. This piece of wood will bump up against the front of the table on the band saw.
Using a fence or straight board to act as a fence , make the first cut into the bottom board with the stop in place. I left 4 in. Using the table saw, cut a runner just shallower than the track of your table. Take small cuts off until it's just the right size. If you cut it too small like I did , you can save it by cutting some reliefs in each end then use small screws to expand the ends of the runner. Place some washers under the runner to elevate it above the surface of the table.
Apply two sided tape on the runner and slide the jig in place and press down. Remove the fence and slide the jig off the table and attach the runner with screws. Attach the second square of plywood to the top of the base square with a lot of screws I ended up adding more in a future step.
Using a square, transfer the max depth of cut to the left hand side of the jig. Measuring an inch to either side of the center mark will indicate where to cut the 45 degree tracks. Using another scrap piece of plywood 17 in. You can make multiple lengths of this slide for different groups of circle sizes. For example, this slide can cut circles with diameters ranging in in, and in.
I will need to make another slide in the future if I ever want to cut a circle with diameters in range from 18 and 33 in. Tap the t-nut in place to mark the location of the four tines.
Once I made the same adjustments to my saw, it cuts perfectly every time. It's actually a useful tool for me, when it wasn't in the past. Thanks for the response. Funny thing about that video is that the saw he is demonstrating is very similar to my craftsman saw.
For an old, hobbiest saw, it works pretty well. Thanks again. This is a common problem. Make sure you are using a sharp blade with the correct number of teeth. Also make sure your blade is properly tensioned and is tracking well. Finally, go slow and use a steady feed rate. Let the blade do its job. Hope this helps! Thanks for the tips. I'm pretty sure the blade is ok, but I will check the tension.
Slow and steady wins the race As Max pointed out, slow and steady cutting wins the race. But it's also possible that you have the jig a hair too far forward or back in relation to the point on the wood that the blade cuts. The nature of circle cutting jigs is that the cutting of the wood must happen almost exactly on the axis of the pivotting point or the blade will attempt to track in the kerf, causing some binding.
If your jig has a fixed depth stop a cross bar that registers on the table front like this one does try adjusting the rear tacking bearings to nudge the blade forward or back.
If the blade binds on the outside of the circle's kerf, bring the blade back. If on the inside, bring the blade forward. Oh, yeah. That make total sense now that you say that. I'm pretty sure that may be the problem because I don't have any stop on there now. That's gonna be the first thing I check.
Thanks so much! By handmadewithashley My YouTube channel! More by the author:. About: Hi, I am Ashley. I am a geek and woodworker. I also have a YouTube channel where I share video tutorials. I have always been into crafts.
My … More About handmadewithashley ». Let's get started with the build! Cut a second piece of plywood to match the dimensions of your circle jig base. Cut along the lines with a 30 degree bevel on the table saw to create the sliding dovetail.


|
Best Rap Transitions Quotes Lathe Tools Without Handles Engine |

lil
01.09.2020 at 19:32:14
EMOS3
01.09.2020 at 18:16:44