Build A Frame Greenhouse Images,Woodworking Plans Corner Desk 600,Jet 14 Bandsaw Guide Blocks Java,Cnc Wood Design Cutting Machine Work - Downloads 2021
A vertical support post supports each roost bar in the center. Laying hens usually prefer to roost if given the option, but these roost bars won't be necessary for meat birds or broilers, which typically don't roost. Pullets and cockerels begin roosting at about three to four months of age. In this design, the collar ties between rafters also serve as high roosts. For high roosts, make sure hens have a way to get up to them. In this design, birds Build Your Own Greenhouse Frame Mod can reach the high roosts by hopping from the lower roosts.
Roosts can be made out of recycled and repurposed materials. Twigs and branches work especially well, as Build A Cold Frame Greenhouse Jp do old ladders. For portable chicken coops, though, make sure that the roosts are fastened to the frame securely. If you keep laying hens, you'll need nest boxes where the birds can lay eggs.
These can be very simple boxes lined with a metal hardware cloth on the bottom and attached to the frame of the coop.
The sizes of the boxes will vary depending on the available space. The nest box construction looks like this:. If you want to use recycled materials, next boxes might be constructed from plastic tubs or old wooden crates attached to the coop frame with screws. Aim for one nest box, or one square foot of community nest space, for every 4 or 5 hens. Nest boxes should be at least two feet off the ground. They will be lined with straw. We also constructed swinging door panels attached with hinges, which allows for easy access for gathering eggs and cleaning the nest boxes.
It's possible to cover over most of the end area of the coop with plywood or scrap wood, but remember that full enclosure will mean less ventilation. In an A-frame design like this one, all air circulation will come from cross ventilation through the ends of the coop. It's a good idea to leave enough open space on the ends of the coop to allow for air to flow. Normally, it's best if your coop has end doors that you can close at night, and so that you can confine the chickens inside when you move the coop.
It's also a good idea to be able to shut the hens in for the selection of specific chickens for culling or other purposes such as isolating a sick hen. Our doors are made from a simple 2 x 2 frame with a diagonal cross brace, which is then covered with chicken wire. We used flat metal braces to reinforce the corners of the frame. If you wish, the door can be secured to the end Build A Cold Frame Greenhouse 60 studs with hinges mounted on one side of the door. Or, if the will only be used sporadically, the door can be screwed in place when needed.
The remaining triangular spaces above and to the sides of the door are also covered with chicken wire. Roofing can be of many materials, and certainly scavenged and repurposed roofing of any sort can work. In our example, we used painted galvanized steel roofing.
Other possible materials you could use include greenhouse plastic or even a tarp. Metal panels are cut to fit and secured to the rafters with screws.
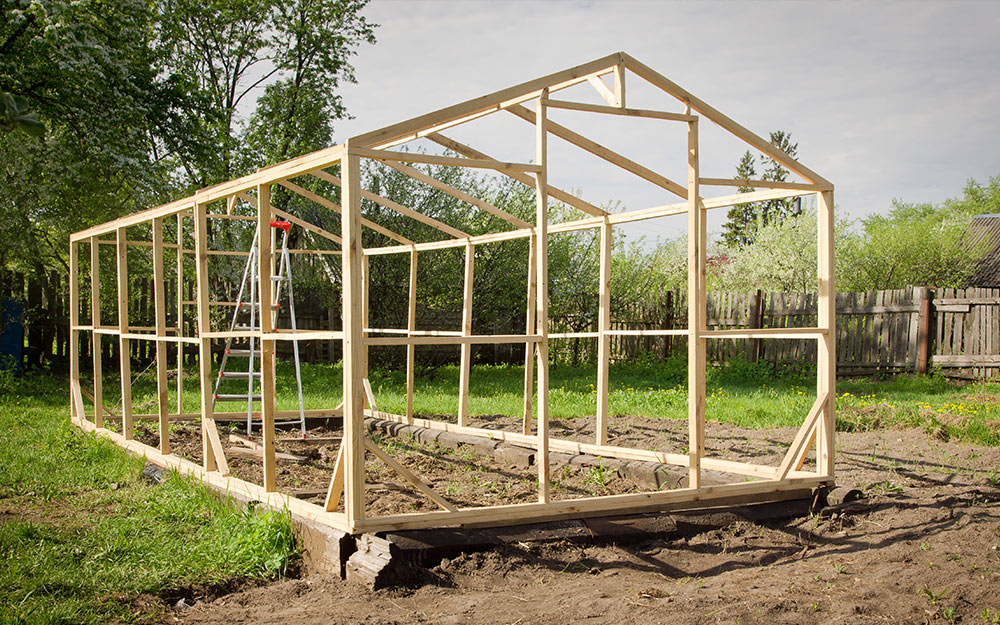
A V-shaped metal ridge cap at the top will seal the top against water. If the site is a low lying area, then it might be necessary to put in a drain open, tile or metal to re-direct any water flow away from the greenhouse site. Summer of 09 we built my greenhouse from the plans on this site. We modified a bit for the height and made it fit the foundation that was in place.
It was a lot of work but it came out so good, I have it filled with plants now and loving my time inside. Thanks for posting the plans Janet. I Would like to give you credit for your greenhouse plans.
I enclosed it with Solex panels. My wife and grandmother just love it. Again I would like to thank you for your free site. I just wanted to send along pictures of two recent Buildeazy projects that I completed. My wife and I love to spent time outside in our ever expanding garden so we thought a greenhouse, using your plans, would be a great addition to our planting hobby.
The greenhouse plan was simple, well laid out and easy to understand. I am sure that we will enjoy it for many years to come. The second project was a pair of adirondack chairs. I searched the web and viewed many different styles of adirondack chairs, yours however was most like the chairs that I remember from years ago at a family lake house.
I used several pieces of 1x12x12 cedar that I had in storage to complete these chairs and side table. After finishing with 3 coats of clear satin spar varnish they are not only good looking but will hold up to the elements for years to come. We are currently searching your plans for our next project. Thank you for providing such a great website!
The swing-seat is a great shady place to relax and enjoy a nice and cool Bavarian Beer on a hot summer day. Also a picture of our Greenhouse. It works really good. Costs were around ,- Euro. Hi Just a few photos of the greenhouse I built according to your plans last fall. Only modification was to add 6 inches to the wall height. I covered it with a clear translucent woven poly. I saw the picture of the garden bridge, so I thought I would send in two pictures of my greenhouse I built with your plans.
I am in America, so I had to convert to English measurements. Thanks for the inspiration. We love it! I have just completed a greenhouse from you plan, and I am very happy with the results, I used PVC panels rather than Poly. Photo attached, Ken Taylor. Many thanks for the greenhouse plans, pictures, and suggestions on your website. If necessary to increase air circulation, I may have to install a window or two on the opposite side from the door.
It was an enjoyable project, and once again, thanks for laying out the plans and procedures for the untrained! Thank you for the wonderful greenhouse plan! Since I live in the northern states, I stepped it up and insulated the base and used twin wall polycarbonate for the windows. This should extend my growing season for all but the two coldest months.
I also extended the length to twelve feet, but left the width at 8 feet. I extended the rafter tails so I can add eaves to collect rain water. There is a double window on the end opposite the door for ventilation. I appreciate your site. Thank you so much. Amber Christenson Strandburg, SD. Did you use the cross bracing or diagonal bracing in your build on the walls and the roof as specified in the plans or did you omit them and how is your structure holding up if so?
I did not use cross bracing. The walls are very solid. Not only is there log siding, but I also added half inch plywood on the inside half walls, and there is fiberglass insulation sandwiched between the plywood and log siding. This greenhouse is solid and strong. My polycarbonate is showing age, but the structure is sound. Thank you for this green house idea. This was really fun to build and we enjoy it very much.
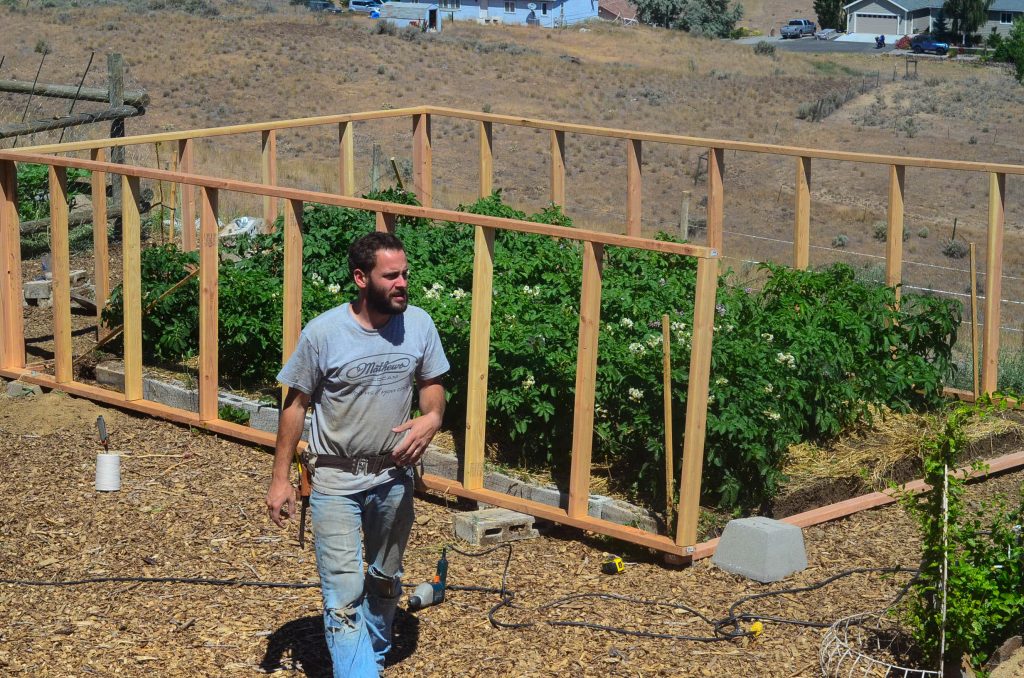
Thanks again, Jim Morris Fremont, Michigan. To buildeazy I enjoyed building the greenhouse. Jim — Victoria, B. Greetings guys, Here is a photo of my greenhouse project. I considered this mostly an easy build! I built this entirely by myself, with zero 0 assistance from any other person, so it truly can be done solo.
The plans are very simple to follow. The house is built to almost exact original dimension in all respect, with the exception of the door. I installed only one door. This wood treatment will last the length of the plastic covering, and we will reapply when we recover in 5 years. Think it all through before you tackle each step. I used two ladders to stabilize the sidewalls as I screwed them down to the foundation boards.


|
Kreg Foreman Pocket Hole Machine Uk Limited Toggle Clamps Princess Auto Watch |

farcury
14.07.2021 at 12:24:39
Gold
14.07.2021 at 18:44:48
Bezpritel
14.07.2021 at 17:22:34
SCORPION
14.07.2021 at 17:43:29
LOST
14.07.2021 at 22:17:23