Soft Close Drawer Slides Lowes 50,Waterlox Finish For Wood Countertops Equipment,How To Build A Frame For Glass 5g - For Begninners

The design work specifies what you want. You are not having a meeting of the minds. Metillat Classic comes the Soft Close Drawer Slides Lowes Rule closest, Because you are not getting Merillat Masterpiece at that price.
Nor are you getting Waypoint at that price. Again, no apples to apples is happening here. I purchased it because of location, price, and size. I did provide all of them with my picture of what I wanted to be priced out realizing that we could actually work on details after I'd made a selection of a contractor on who best listened to me one didn't listen at all and who had best understanding of the total scope of job All their estimates are within range on all other items - electrical, plumbing, construction, lighting, flooring, etc.
The big discrepancies are in the cabinets. I've done kitchen remodels before, one quite recently, and know cabinets are a big ticket item and that the price doesn't actually have a very good relationship to the quality. I think that having a good relationship with the contractor and having them understand your needs is very important. If the contractor wants you to just "trust me, I' know what I'm doing" usually they do not.
If you have suggestions on what I should be asking now I'd appreciate your input? Or should I just throw up my hands in despair? The idea of bidding gives me the time-wasting heebie-jeebies.
I sell my jobs and never bid. There are going to be 5 losers on this job and I'm thrilled I'm not going to be one of them. I am confused as to why contractors are giving you cabinet pricing. Why not take your design to cabinet stores that carry lines you like for quotes, then hire whichever contractor you like to install them? Also note that these cabinet prices were not all from different contractors; the three contractors gave me multiple cabinet estimates for the same job.
When you say you "sell my jobs" I'm not certain what you mean. I thought all contractors tried to sell their work - on price, on quality, on timeliness - and that the final purchase by the consumer took all of that into consideration.
And how do I know approximately the cost of a job if I don't get multiple estimates? With each interaction I've had with a contractor I've learned something and have refined my understanding of what the job will entail. If this is the wrong approach I'd like to learn what to do for my next construction effort.
Joe has a very particular set of specialized skills and doesn't have any competition that can do what he does, so he has the luxury of deciding which jobs to take and which to pass because they seem like they'll be too much trouble. In my experience, this is not normal for most trades in normal times. Unfortunately, these ain't normal times. Everybody and their uncle are getting on the remodel bandwagon and good help is nearly impossible to find. We're doing a remodel and the tile company my contractor works with came back with our bid - DOUBLE what he expected it would be.
This is an experienced person - it's just that the demand is so great that good trades can jack up their prices and still get hired. I am not mad, it's capitalism at work. I agree with your approach as a starting point, and we've done multiple remodels. You have to start somewhere and you're not just gonna hire the first person you talk to.
Adding to the above -- I think there may be some issue with the term "bidding contractors. Again, in my experience, hiring a contractor is an iterative process and more of an interview than an RFP.
Who gets your vision, who seems like they'll be easiest to work with, who has ideas you haven't thought of, etc. I get it. I agree that you need to get bids from more than one contractor, I just don't think you can get an accurate comparison of costs unless you separate the cabinets themselves from the contractor's labor. Telling the contractor you want "better than bottom of the line" and "good hardware" is pretty meaningless, as are Soft Close Drawer Slides At Lowes Web the numbers they have given you when you don't know the actual specs of the cabinets in the quotes.
You need an apples to apples comparison i. Have you researched cabinet lines to find out which lines offer construction and hardware that are acceptable to you? I've done multiple remodels - kitchens, baths, whole house construction - and really think that getting along with the contractor is the key to being happy. I know that whatever is promised it will take longer and cost more so I take that into consideration. For kitchen remodels I find that the cabinet pricing is similar to buying a car.
Since many of the manufacturers only sell "to the trade" you don't know the actual cost and can't evaluate the reseller markup, and the quality of cabinets seems to be in the eye of the beholder with people having very strong opinions. If you have any good resources for info I'd appreciate it.
We had a contractor for our whole house remodel but we bought the cabinets on our own. We came up with our own layout and he got us a price from "his guy" and we went from there. Kraftmaid from Lowes won for us. Jaykaym Most cabinet manufacturers at least those I have been researching in my own remodel preparations have details about their construction, hardware, finish process, etc.
If that information is not available on their website, I would take that as a sign that they don't list it because it is nothing to be proud of ;. You can also visit cabinet retailers that carry the various lines you are considering to check out their finishes and construction in person. The salespeople should be able to give you details about the various lines and levels with each line that they carry. If you have a drawing that shows the basics of what you want, it shouldn't be too difficult to get quotes on that layout from cabinet retailers quotes which will include all of the construction details of what is being quoted so you know what you're getting.
Sign In. Join as a Pro. Send a Houzz Gift Card! Chandeliers With Free Shipping. Flush-Mount Lighting. Ultimate Lighting Sale. Chandeliers and Pendants. Remodeling Kitchens. Jaykaym 21 days ago. Is it worth going with the Amish semi-custom in a kitchen that really won't need much custom work?
I will want pull-outs and drawers where possible and are any of these manufacturers better when it comes to options inside the cabinets? Does anyone have any knowledge of the hardware on these brands? Only the Merilatt mentioned Blum hardware. Email Save Comment Featured Answer. Charles Ross Homes 20 days ago.
Jaykaym, There are a number of terms which have been misapplied. Like Save. Sort by: Oldest. Newest Oldest. AnnKH 21 days ago. Do your estimates include installation? If so, how qualified are the installers? Jaykaym Original Author. Not familiar with Meridian, but here are just a few things to look at. I am a fanatic about the finish. Some cabinet lines, even custom, use a baked on finish. If you talk with the tech people at Sherwin Williams, they will tell you this is not the best way to apply a catalyzed finish - it just speeds up the drying process so they can put it in the box.
So the first question for both brands is do they bake or allow the finish to cure on its own? Next is how is the finish applied. The company we use - Jay Rambo Cabinetry, applies by spray with hand rubbed glazes and hand sanding between each coat. They then compare all components together to inspect for color consistency and sheen. Some companies fog the stains on in an assembly line fashion, bake it, then drop it in a box. The latter results in sheen and stain variations on the same cabinet if there are trim pieces or other components that were finished apart from each other.
Lastly - I am a fan of supporting the local business, especially in this day of internet shopping. When we use a local showroom to walk a client through product selections, we buy from that showroom to support them and to make sure they will be there the next time we need them. Best of luck with your project. I agree with Patricia, porcelain will hold up best under any circumstance. It's harder and stronger than any ceramic tile.
You may also want to look at something with a little bit of texture so the pets don't slide as much across the floor into a cabinet! Used Wolf and Fabuwood both good cabinets based on their price. The drawer fronts are just a piece of 1x6 and the doors are simple tongue and groove construction with floating plywood panels.
I also have a guide to making tongue and groove cabinet doors on the table saw that I will cover in another instructable. Material lists for cabinets can vary from cabinet to cabinet depending on size and style but for a generic list you will need the following:.
Using power tools incorrectly can be dangerous. If you are at all uncomfortable doing something don't do it. To start I cut my full sheets of plywood into more manageable sizes with a circular saw. It's much safer and easier to take half size sheets of plywood to the table saw than a full size sheet when possible.
At the table saw things are much easier. The main pieces to cut here are the side panels, the bottom shelves, and then rip the remaining strips that will later be cut to length. This is for a toe kick. Two vanities so four sides total get this notch. A good blade in a jigsaw makes a huge difference in cut quality. These cuts felt the same as if they were made with my table saw.
A cabinet face frame is the front frame of a cabinet that will establish the location of all of the doors and drawers as well as give some structural stiffness to the rest of the case.
The overall size of the face frame is determined by how many doors and drawers you want to have. Specific dimensions are covered in the PDF plan. All of the face frame pieces were ripped from 1 x 6 pine boards. I often get asked what do I do to prevent my boards from warping because I use cheap pine.
Well, the biggest thing I can say is to spend a lot of time picking out quality boards. If the place you get your lumber from doesn't allow you to do that then they don't want your money. That's OK because their competitors will. I generally get mine from Lowes as it's the only kiln dried supplier I have near me. Your mileage may vary. The general construction method for these cabinets is pocket holes. There are a lot of different pocket hole jigs and machines out there that will all complete the same task.
If you are doing a lot of projects using pocket holes a pocket hole machine may be a justifiable option for you. After the face frames are complete I attached the side panels to the face frames with pocket holes as well. Each of these cabinets that I built had one side that was going to be against the wall so on those sides I put the pocket holes facing out.
On the sides that were going to be exposed I put the pocket holes on the inside of the cabinet but I made sure not to put any where you could easily see them if the door was open. The bottom shelves are secured with pocket holes as well.
The pocket holes are on the bottom so you will never see them. To give a little more support to the top perimeter of the cabinet as well as provide a surface to screw through to secure the countertop a couple strips of plywood are attached to the top inside of the side panels. To add a little more access to everything stored in the bottom of the cabinet I added two slide out trays in the larger vanity.
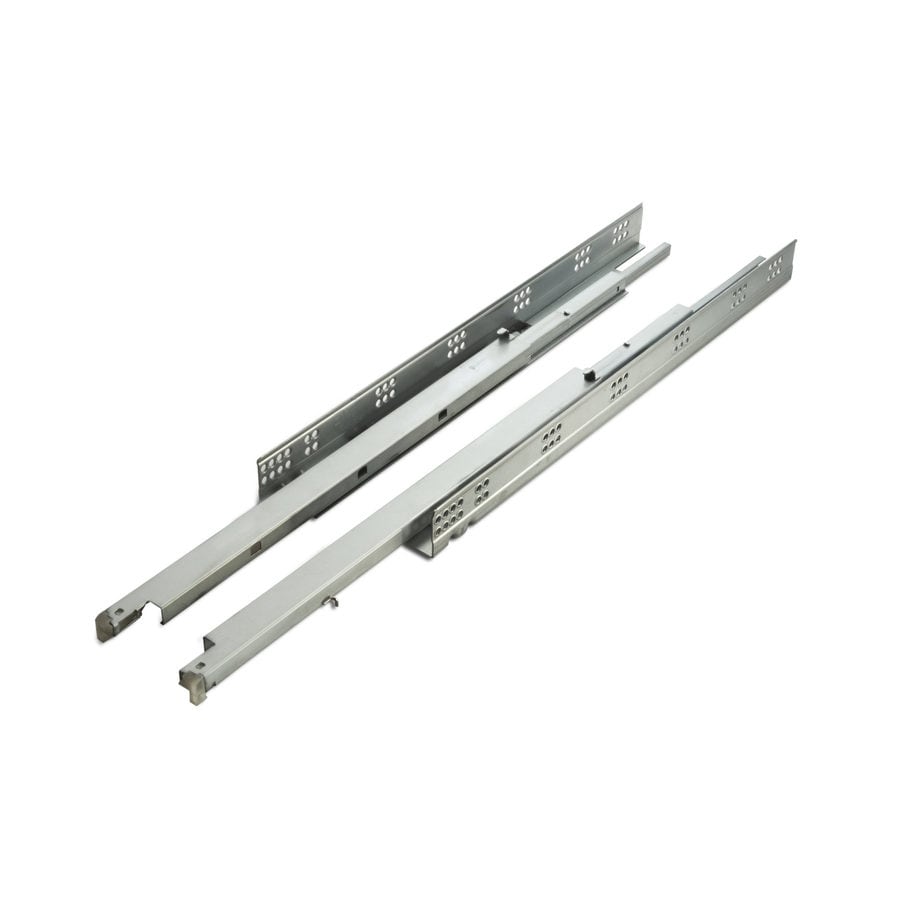
These are very easy to make and I've already made a very quick tutorial on them on my website. Disregard this tray option if you want. While the stain dried I knocked out the drawers real quick. Quick and easy. Exact dimensions to follow are given in the PDF plan. For mounting the drawer slides see the instructions that came with your specific style drawer slide you chose. With the drawer slides mounted on the bottom of the drawers and in the cabinet I made sure everything fit.
As I said earlier, the drawer fronts were nothing more than a 1 x 6 cut to length. I cut all of the drawer fronts out of a continuous board so the grain would flow from one drawer to the next. To secure them I screwed through the inside of the drawer and into the drawer front. I'll do a separate instructable on tongue and groove doors in the future so I won't get too complicated here. A grove is cut with a regular table saw blade on all of the door rails and styles to fit the plywood panels.
I used my dado blade to cut the tongues on the ends of my rails. This was a lot easier to dial in than I had thought it would be. Just use a test block to sneak up on your fit.
After two rails are glued to one style the plywood panel can slide into place. Then the other style can be glued on. I only used glue on the tongues of the door frame and left the interior panel floating but if you are using plywood you can use glue on the plywood panels as well if you want. Don't use glue on the panel if you are using a solid wood panel. The expansion and contraction of a solid wood panel will cause problems with the door assembly if glue is used.
To increase visibility I painted the interior of the cabinets white. It will help brighten up the dark areas when you're trying to find something.
After everything was sanded and stained I sprayed a clear water based finish. It greatly speeds up the process of applying finish and it's easy enough that anyone can do it.
And the last step is to install the door hinges. I didn't put any door or drawer pulls on these as the person who was going to get these wanted to install them herself. Hopefully you are able to use my video and this instructable as a general flow of how to make your own cabinets. If you would like more detailed instructions with dimensions click here to open my free PDF guide or right click and select "save as" to download it to your computer.
If you enjoyed this instructable I invite you to check out my website jayscustomcreations. Good luck with your next build! I will make it myself this week I think. Question 2 years ago on Step 2. I see a lot of diy cabinet building information using face frames. I have no experience but frameless cabinetry with manufactured levelling feet seem simpler. What am I missing?
Can they not be built to last with plywood because of the exposed edges? You might have just saved me a huge amount of money!! My husband and I were in the middle of a gut renovation when he developed cancer and passed away.
I have been trying to figure out how I 'm going to Soft Close Drawer Slides Lowes Quick pay for the kitchen when I found your video. How much did Soft Close Drawer Slides Lowes Tab these materials cost? Just the wood. I think I have all the necessary tools though not as fancy as yours. Reply 5 years ago on Introduction. Three years ago I lived in an apartment and only owned a cheap miter saw. That initial investment, time, and hard work have yielded the business I have today.

|
Woodworking Crafts Magazine Pdf To Pdf Best Rap Songs 1999 Chords |

shakira
18.11.2020 at 22:41:11
never_love
18.11.2020 at 16:50:59