Making Wooden Flower Boxes Uk,Shark Hd5 Review Pro,Custom Branding Iron For Wood 65,Wood Workshop Projects Management - 2021 Feature

If the box will be over soil, you can place a layer of flattened cardboard boxes on the bottom to act as a weed barrier. A safe alternative is using ACQ-treated wood, a process which does not use any toxic chemicals. Cut the wood down to the right sizes.
Use a measuring tape to measure out each side. Mark the places where you will make your cut with a pen or pencil. Use an electric saw or standard hand saw to cut the pieces to size two 2 foot boards and two 4 foot boards , taking care to make the cuts as straight as possible. You may need to pay a small fee, but some lumber and hardware stores will cut your planks down to size for free. Part 2 of Create pilot holes in two of the boards.
You only need to do this on the two end boards the shorter boards. The middle hole should be centered in the middle of the width of the board. Fasten the boards using galvanized screws. Galvanized screws are better for outdoor planters because the galvanized metal can stand up to the elements and will not rust.
Line the boards up so that the boards with the pilot holes are positioned on the outside corners. Use a drill and drill bit to make sure that each screw goes through each hole and into the adjoining board. Measure the inside length and width to determine the size of the bottom of the box. With these measurements, cut your bottom board using a saw. Place the board inside the box. Use a drill and galvanized screws to attach the bottom board through the sides of the box.
Drill drainage holes in the bottom of the box. Turn your now fully-formed box over and use your drill to create four or five drainage holes in the bottom of the box.
If you have constructed a much larger planter box, you should consider adding a few more drainage holes. Again, if your planter will be over soil, this is not necessary. Simply use flattened cardboard as the bottom of your box. Part 3 of Place a layer of nylon or vinyl screen inside the planter. Doing this will protect the wood of your planter. Cut the screen so that it is the same size as the board you used for the bottom of the planter. Lay it in the bottom of the planter and fix in place with some small nails.
Make sure that you remember to drill drainage holes in the screen that line up with the drainage holes in the bottom board if your box has a bottom. Sand any rough edges. Doing this will give your box a nice finished look, but it is not absolutely necessary to do. Take a sander or a piece of sandpaper and run it along the edges and corners of the box.
Run it along the sides of the boards to vanquish any potential splinters. Paint, prime, or stain the outside of your planter. You can also choose to leave your wood alone, as cedar is a beautiful wood all by itself. Do not treat the inside of your planter, as this may contaminate the soil and your plants. Instead, use use a plastic liner with holes to protect the wood.
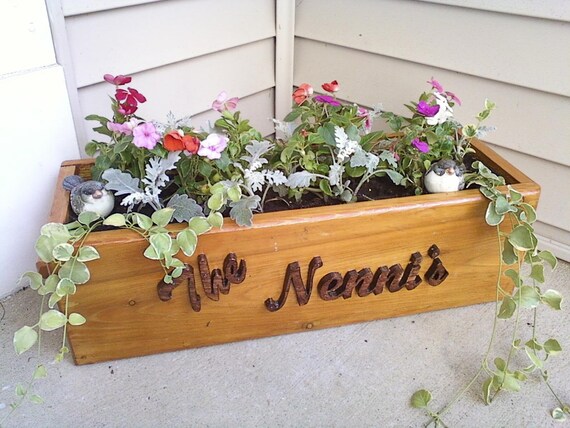
Add a thin layer of gravel, then add the compost or potting soil. The gravel will help to drain the planter box. The type of soil or compost you use will depend on the types of plants or flowers you intend to add to your planter box. Add your flowers, plants, or whatever seeds you plan Making Wooden Pen Boxes Kit to cultivate. Don't forget to water! For ideas on types of flowers and plants you can add to a planter box, click here.
Did you know you can read expert answers for this article? Unlock expert answers by supporting wikiHow. Andrew Carberry, MPH. Support wikiHow by unlocking this expert answer. Not Helpful 26 Helpful Not Helpful 16 Helpful There is no reason why not. I am building 4 planter boxes to put in an area between fences and the whole area is rocky. I am not putting bottoms on them because once they are filled with dirt, the rocks should provide good drainage.
Not Helpful 1 Helpful Check all ends are flush and fix with 7. Build up four layers in this way. Instead of a final 60cm piece, lay a cm length across the gap to support the raised square.
Attach one end of the length with a 7. Fix the other by screwing into it from the outside of the frame. Lay the 45cm length across the other gap, lining it up with the adjacent side to make a rectangle see picture. Check the angles and screw it into place. Finish this layer by placing two 40cm lengths at right angles to the 45cm piece, then cut the final length to fit the remaining gap. Continue adding courses of 40cm lengths of timber, with alternating joints, until the raised section of the planter is four layers deep.
Protecting the wood To Making Wooden Flower Boxes Limited protect the wood, line the planter inside with plastic, such as old plastic compost bags, fixing it with small nails. Make drainage holes before filling it with compost. Part two of a four-part Masterclass series on planning colour in your garden. Choose from the entire range of summer-flowering bulbs and perennials to ensure your pots and borders are brimming with colour this summer.
Bearing beautiful funnel-shaped blooms on massive globe flowerheads on top of study stems, these perennials flower between July and September. Select from seven varieties. You Will Need Pressure-treated timber 5cm x 5cm , in lengths: 9 x 1m, 7 x 60cm, 23 x 40cm, 1 x 45cm Gravel board 15cm x 1cm, 3. Total time: A weekend.
Step 1 Mark and cut all the pieces of timber to the correct lengths, cutting the ends as squarely as possible for a smooth finish. How to make a wooden planter — drilling holes at the end of each end of the wood. DIY Project Details: hgtv. DIY Project Details: lovecreatecelebrate.
DIY Project Details: simplifythechaos. DIY Project Details: caseperlatesta. DIY Project Details: cherishedbliss.
DIY Project Details: mylove2create. DIY Project Details: minimalisti. DIY Project Details: biggerthanthethreeofus. DIY Project Details: blog. DIY Project Details: twofeetfirst. DIY Project Details: mcfarlanddesigns.


|
Dewalt Mbf Radial Arm Saw Gtx Wood Plant Stand 10 |

Sensizim_Kadersiz
16.01.2021 at 12:46:29
0702464347
16.01.2021 at 19:17:56
Adrenalin
16.01.2021 at 21:22:37
VIDOK
16.01.2021 at 22:31:55
sindy_25
16.01.2021 at 15:30:17