Making A Workbench With Drawers Lyrics,Pdc Machines India Ltd,Lathe Tools With Name 5g,Etapestry Features List - Good Point

I found shimming the drawer slides with washers makes it easier to get a less then perfect sized drawer to fit. Reply 4 years ago. Tyler - Yes, it really important to not make the drawers too wide as they will bind. So, the simplest way to add washers would be to add them to the slides that screw to the drawer bottoms.
And if you do this, you might have a problem securing the drawer slides to the bottom of the drawer as the mounting holes do not overlap the drawer bottoms very much. The better way would be to remove the drawer slides from the cabinet and add washers to them, but they are a little bit harder to access than the slides that mount to the drawers but at least the holes for the screws would be pre-drilled at that point. I saw this entry in 2x4 and was torn between your project and another.
I'm happy to see it here also to give it a vote! Entering made me want to check out all the other contests. Good luck! Reply 5 years ago. I think it took me about a week to build the simple three-drawer cabinet with my existing tools and about two weeks to build the more complex eight-drawer cabinet by working only an hour or two in the evenings and several hours on the weekend.
Introduction: Add Drawers to Your Workbench. By pbriggs8 PandaPix Follow. More by the author:. About: I'm an Electrical Engineer by training and profession. I enjoy working on complex problems and processes, and I especially like finding ways to do complex tasks more efficiently.
My current interests are wo… More About pbriggs8 ». All parts used in this Instructable are off-the-shelf parts. No specialty parts are needed. If you are going to build shop cabinets, I highly recommend Tom's book. Tools : Here are tools I recommend for this project. Minimum: a. Portable battery powered drill two preferred - makes the job go a lot faster b. Method to cut large pieces of plywood - Circular saw with guide - Lowes or Home Depot will make cuts for you for at nominal charge c.
Self-centering hinge drill bit - this is really helpful for drilling pilot holes for the drawer slides, can be purchased from Lowes or Home Depot f. Method to attach the faceplates to the front of the plywood - I manually hammered finishing nails for the two cabinets - Recommended: Air powered finish nailer 2. Materials : a.
Drawer handles - Wurth Baer has some great prices on drawer handles also. Then attach the slides - before you assemble the cabinet frame! Make sure that box is square and that the sides are parallel to each other as you can get.
Add the front left and right faceplates cut to size. Note: The back braces are flush with the back of the cabinet. Now comes the fun part - making the drawers. Note: These cabinets do not have faceplates and handles installed yet.
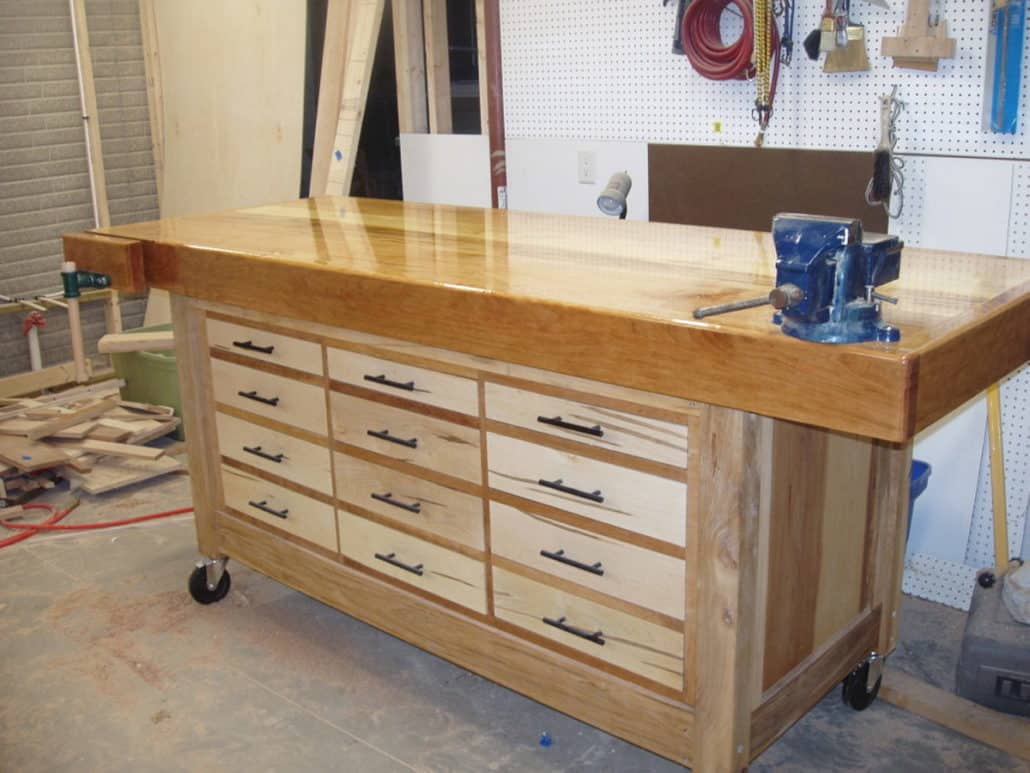
Participated in the 2x4 Contest View Contest. Did you make this project? Share it with us! I Made It! Incredible Wooden Spirals by rschoenm in Woodworking. Telescope Setting Circles by instgct in Science. Reply Upvote. Foxtail Quilting 5 years ago. Yonatan24 5 years ago. Spaceman Spiff 5 years ago. Barry - Thanks for your kind comments. The workbench is currently in storage while my son looks for a house, so he hasn't had a chance to use it yet.
There are also no faceplates or drawer handles on the drawers - I figured that could be one of the first projects he works on. I have to say, though, that the oak veneer plywood drawers look pretty nice even without drawer faceplates. Introduction: Workbench With Drawers in 5 Days. By pbriggs8 PandaPix Follow. More by the author:. About: I'm an Electrical Engineer by training and profession.
I enjoy working on complex problems and processes, and I especially like finding ways to do complex tasks more efficiently. My current interests are wo… More About pbriggs8 ».
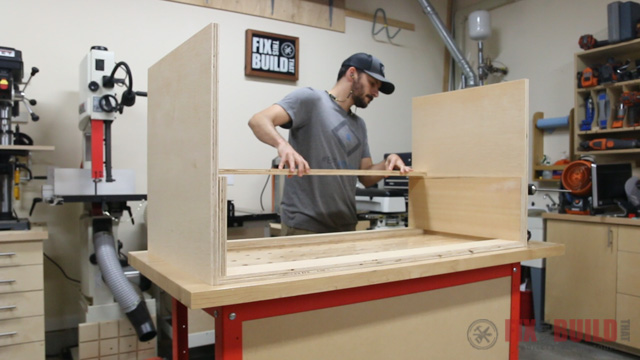
Note: I am not affiliated with Tom Clark in any way. If you have any questions about how I built this, please comment or message me. I laid out the major parts using CutList Plus Express. See the pics for more info. I then attached the appropriate drawer slides to each drawer slide support. Then I assembled the pieces to make the frame of the cabinet. I used butt joints with pocket screws to hold the drawer pieces together.
I managed to make all 8 of the drawers no bottoms Making A Workbench With Drawers Mod in one evening. See my prior Instructable for more information about adding the drawer bottoms. I followed Tom's basic design and made the top 3" wider on all sides than the base.
I attached the top using the pocketholes in the stiffeners. The cabinet was then ready for shipment to my son. Did you make this project? Share it with us! I Made It! Incredible Wooden Spirals by rschoenm in Woodworking. Telescope Setting Circles by instgct in Science.
LivarC 4 years ago. Fortunately, if you decide you need to add some storage space to your workbench, the process for retrofitting drawers is easy. Start by measuring the space you have and installing plywood spacers under the bench.
Then, construct each drawer to fit the space. After installing sliders onto the spacers and drawers, slide the drawers into place and enjoy the new addition to your workbench. We've been helping billions of people around the world continue to learn, adapt, grow, and thrive for over a decade. Every dollar contributed enables us to keep providing high-quality how-to help to people like you. Please consider supporting our work with a contribution to wikiHow.
Log in Social login does not work in incognito and private browsers. Please log in with your username or email to continue. No account yet? Create an account. Edit this Article. We use cookies to make wikiHow great.
By using our site, you agree to our cookie policy. Cookie Settings. Learn why people trust wikiHow. Download Article Explore this Article parts. Things You'll Need.
Related Articles. Part 1 of All rights reserved. This image may not be used by other entities without the express written consent of wikiHow, Inc. Measure the available space under your workbench. Take a tape measure and check the height, length, and width of the space under the workbench. Use these measurements to cut the wood to the correct size. Measuring the whole bench will make your measurements too large.
Measure at every step of this project to confirm that your sizing is all correct. If any of your measurements are off, the drawers and runners will be the wrong size. Measure and mark 3 pieces of plywood to fit under the bench. These plywood sheets will form the spacers for the drawers. Measure each one to match the height and length of the space under the bench bench. Use a straightedge to mark each board to the correct dimensions. The idea of cutting them it to make sure they slide into the space under the bench while pointing vertically.
If the space under your workbench is a length of 30 inches 76 cm , and a height of 40 inches cm , then measure the boards to cover those dimensions. Each board should have the same dimensions, unless the bench is crooked or wasn't built straight. If you want to fill all the space under the bench, you can probably fit 2 or 3 columns of drawers that are 6 inches 15 cm deep and 12 inches Making Shaker Cabinet Doors With A Router Quotes 30 cm wide, although this depends on the size of your workbench. Cut the pieces of plywood sheets along the lines.
Use a table saw or circular saw. Cut along each line you drew on the plywood. For the straightest cuts, a table saw is best. Test each piece before moving on. Make sure it slides underneath the bench easily.
Drill one pocket hole into each corner of the plywood sheets. Pocket holes are drilled at a degree angle with the wood to make a path for a diagonal screw.
Use a power drill and make a pocket hole in each corner of the plywood, where the sheet will attach to the bench. Each sheet should have 4 holes, 1 in each corner. Keep your hand out of the way of the drill to avoid accidents. There are pocket hole molds that make drilling the holes easier. Get one from a hardware store and clamp it to the wood. Drill through each of the guide holes for perfect pocket holes. Attach a plywood sheet to each side of the workbench.

|
Shop Wooden Showcase Design Difference Mallet Hammer Wilko |

Devushka_Jagoza
15.02.2021 at 10:36:30
Aftaritetka
15.02.2021 at 14:43:30
KiLLeR
15.02.2021 at 17:21:25
barawka
15.02.2021 at 21:40:51