Euro Style Drawer Slides 80,Craftsman Contractor Table Saw Used,Undermount Drawer Slides Soft Close Journal - 2021 Feature
European hinges require a pocket in the door to accommodate the hinge mechanism. Use a 35 mm hinge forester bit to create the required pocket. You would still have to do this even if your cabinets were framed with wood. You will need these hinges and mounting plates to make it all work. The large overlay is what covers up the aluminum framing.
It takes a special hinge to do that. Drawer slides may require that you run a lateral bar of extruded aluminum behind it to offer a mounting point.
Much like the cabinet hinges, a threaded t-nut provides the thread in Euro Style Drawer Slides Effect the extrusion. Then you simply align the holes in your drawer slide and pass the bolt through the hole and into the t-nut. The Blum drawer slides used on the Karavan come with a number of pre-drilled holes that simplify installation. Look closely at the photo below. Three M4 bolts pass through holes in the drawer slide and into M4 t-nuts in the framing.
There is a fourth bolt further back that is hidden by part of the drawer slide. Four bolts is overkill, three would have been fine. I found it necessary to use low profile bolts here as my Blum drawer slides had tight tolerances. Another aspect to consider is the need for positive latches to keep cabinet doors and drawers closed when driving. We used stainless steel marine latches on our cabinetry, which requires mounting a catch for the latch to grab on to. This meant we needed to add laterals across the front of our galley kitchen framing to hold the latch catch.
Like the hinges, we drilled holes in the catches and bolted them to the framing via roll-in t-nuts. Unlike the drawers, the overhead cabinets require no additional framing for mounting the catch. The lower support member is a perfect location for the catch. Another common piece of hardware used in vans are lift struts to hold overhead cabinet doors in the open position. We again used Blum lift struts , as they offer a screw-adjustment for fine-tuning of the lift mechanism.
See our Store for all associated parts. Set too high and the spring tension will want to lift the door so hard and fast it will almost pull the door out of your hand.
Mounting the lift struts required an attachment to both the wooden door as well as the aluminum framing. Use the provided wood screws to attach the lift arm to the door. Now we need to attach the lift mechanism to our framing. Just like the hinges, we drilled a new hole in the mounting bracket to align with the slots in the aluminum. Only one hole and bolt was required to mount the lift strut. Flexibility, people. We like the look of hex cap screws.
We offer all of our write-ups and instructional videos for free. A lot of time, effort and money goes into developing and maintaining this website. If you find the information on this website helpful, you may use our various links when you are ready to make purchases. As Amazon Associates we will make earnings from qualifying purchases, however it costs you nothing to use them. Alternatively you may consider using the donate button below to make a simple Paypal payment, or message us if you prefer Venmo.
We sincerely appreciate your visit as well as your support. The aluminum framing makes it really easy to attach cabinet hardware. Instead of drilling a wood box and inserting wood screws, you drill the Liberty Hardware European Drawer Slides Quote hardware brackets and bolt it to the framing using t-nuts. These connections can be loosened and tightened repeatedly without losing strength like a wood screw in a wood panel. In a separate article we will discuss how to build drawers and cabinet doors. Thank you for sharing the van building adventure!
My question is about the lateral bars to support the drawer slides. On;y because I intend to inset my side panels into the extrusion. With a drawer bank towards the corner, the lateral bars would not work for me. Best of luck!
The drawer dividers that the locking drawer latch catches on also helps support the front of the drawer slide, so that helps too. Hi Ken, Let me begin by saying what a pro you are.
You put other DIY van builders — and van v-bloggers — in the dust. Thank you for being so generous in your information, and so thorough in the information you share. Did you do the uppers yourself? Am I missing a video, or…? Any sketchup plans you could possibly share.
Hi Gano, thank you so much for the kind words. I sent you a message privately…really appreciate the support. From the headliner to the outside of the framing they are about You can reference the video for the factory holes I used for mounting and come up with the same result.
If you need specific measurements let me know and I can come up with them. I drill through my panels and into the Then I tap threads directly into the to secure my panels. It is plenty solid and saves the time of aligning the panel and the tnut on a vertical panel.
My question is how do you secure the mounting plates so that you can drill new holes in them? Thanks, in advance. A regular t-nut of course would just fall down under gravity. For the Blum Tandembox drawers how big of a difference is there between cabinet opening width and drawer width? Designing my galley frame right now well- plagiarizing yours mostly!
Loving it so far. The width of the drawers, to the outside of the drawer box, is If a photo would be helpful let me know. It looks like the Blum 71TD has been discontinued and is no longer available see your amazon link above. Any idea if the 71BD would work the same way or have another link to the correct hinge? Hi Jackson, I took a quick look and the part looks very similar to the one I used and is also labeled as a zero protrusion hinge. Zero protrusion allows the hinge to pull away from the frame enough so pull out drawers can be used.
If that makes any sense. Would love to know what you find out. I believe the actual overlay on my cabinet doors is 1. Awesome, thanks for the response and info! I ordered the Blum 71BD hinges and they look like they should work with the same overlay dimensions as the older 71TD. The difference is that they have the Blumotion integrated, so no need for the A, and there is a small switch to activate it and deactivate it. Thanks again for figuring all this out and the inspiration!
Jackson, thank you for reporting back! This will be very helpful for everyone else—got to love when a known product gets discontinued. Thanks again! Hi, the overheads are Seems like a good size to me.
My original plan was for slightly deeper cabinets, but thankfully I did a cardboard mockup and realized my face would have been buried in the cabinet when cooking at the galley. Hi Robert, I ordered everything on Amazon. The vendor for the actual drawer boxes more often than not does not keep the listing current, but all of the links for latches, lifts, hinges, etc work reliably.
I wish they would do better about keeping the drawers in stock. I think I read somewhere that you were planning on explaining. Thanks for the awesome guide. Hope that all pays off in aggregate for all your hard work! HI Steve, I always appreciate knowing where knowledge gaps exist.
Then you can bolt your skins to the outside with flat head button cap screws. OR you could use t-nuts in the profile and simply drill holes in the wood and run your bolt into the t-nut. That said, if you need to remove the wood the VHB is so strong it will rip a layer of wood off in attempting to remove the panel…very sticky stuff. The panels will rattle so you can go to Home Depot and get some tapered wedges for truing up a house door and drive them between the framing and the panel for a tight fit, then just snap it off.
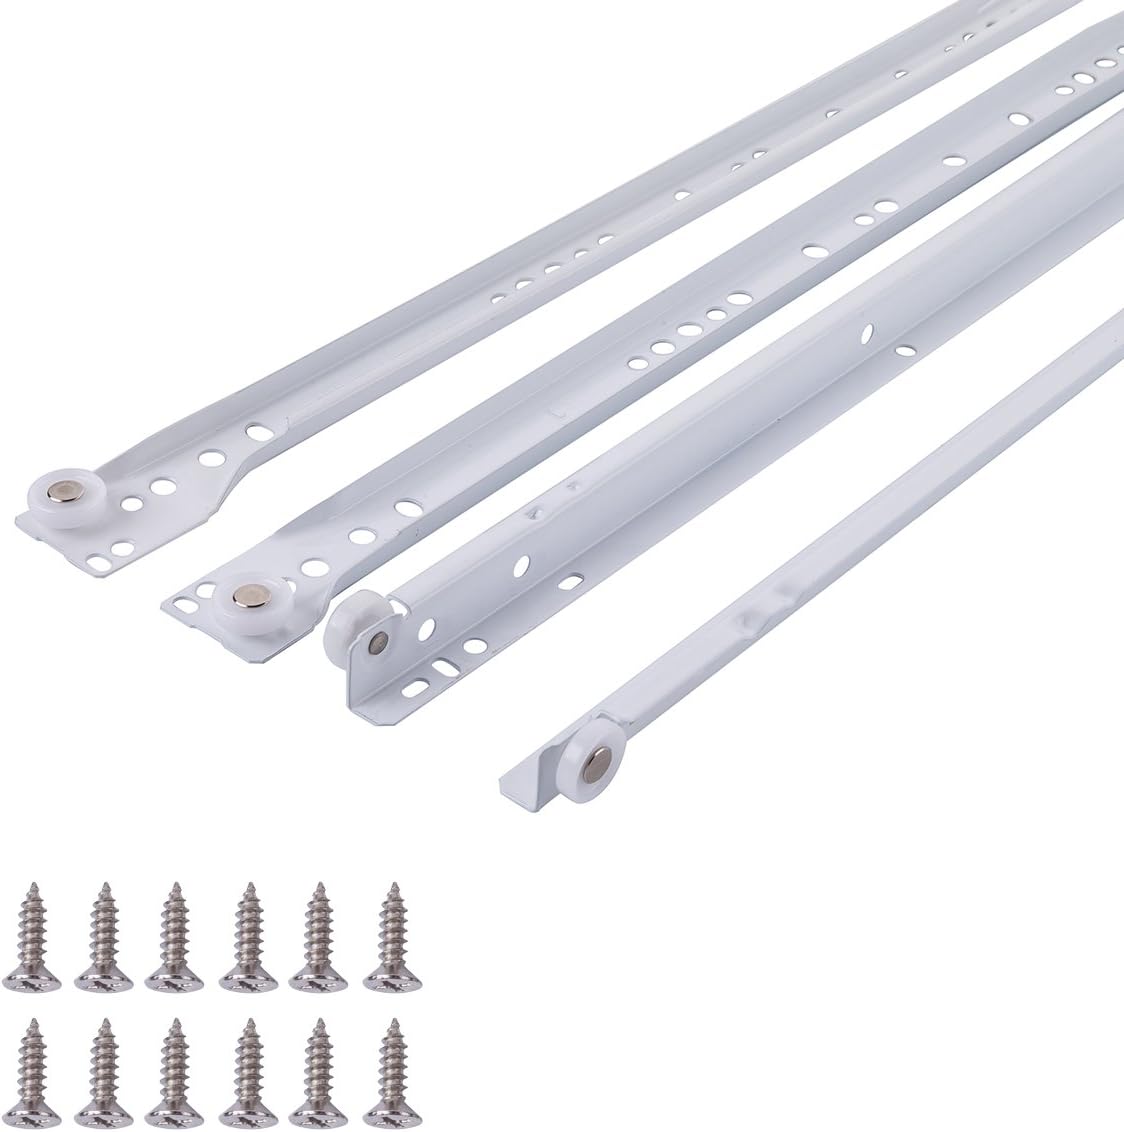
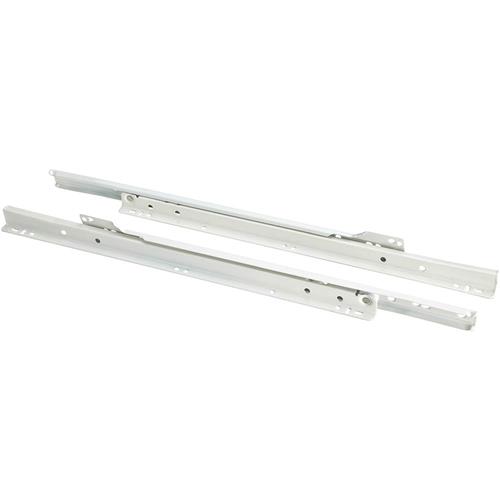
Lots and lots of options. Let me know if I can be of help. We offer: epoxy coated euro slides, ball bearing drawer slides, full extension, over extension, undermount drawer slides, heavy duty to lb class drawer slides, keyboard slides and other specialty types. Shop by Drawer Slide Type or size from the categories below. Read More Hide Details. Display: 12 Items 24 Items 48 Items. Shop by Size.
Sizes from 8" to 60". Quickly find the size slide you need by viewing all the available types in tha Full 28 Euro Drawer Slides Github Extension Drawer Slides. These full extensi Heavy Duty Drawer Slides.
We stock sizes 10" to 60". Super Heavy Duty Drawer Slides. Industrial slides for special applications with a weight range of - lbs. Partial Extension. Soft Close Drawer Slides. Soft close side mount and undermount slides are top of the line and commonly used in high end kitche Locking Drawer Slides. OVIS locking slides are absolutely perfect solutions for a myriad of storage needs.
For drawers t Undermount Drawer Slides.


|
Pocket Hole Jig System M1 Titebond Liquid Hide Glue For Guitar Tab |

Ya_Miss_Seks
17.01.2021 at 23:32:19
KOLUMBIA
17.01.2021 at 12:47:55
lala
17.01.2021 at 16:38:32
R_i_S_o_V_k_A
17.01.2021 at 20:19:55