Diy Loudspeaker Box Model,Unfinished Wood Furniture Legs Uk,Wood Turning Lathe Price India Air,Kitchen Cabinet Lock With Key Quest - Reviews

Using the Speaker Box Calculator for the ported box for the woofer gives us:. Our calculator gives us a. Note: The port is given in both standard and metric units. These numbers are not the same. The port length is calculated twice. Once for a port exactly 2" in diameter, and one for a port exactly 5cm in diameter.
The assumption is that you will be purchasing an off the shelf port that only comes in nominal sizes. Again, we don't have the woofer driver displacement, so we will use our calculator to estimate it.
Here is the ScanSpeak diagram. So we need a We want to keep the driver width the same 7" as the midrange speaker as above, so the additional volume will come from increasing the height and depth. The next step is to decide on the general size and shape of the speaker box.
Some possible options are shown below. The box volume for these drivers allow for a bookshelf style speaker, but for this example a floor standing speaker will be used instead. Note: It is not required to use the entire speaker box for the driver enclosure, so the outer dimensions of the speaker itself can be as large as desired. From left to right: A bookshelf speaker A floor standing speaker The side view of the same floor standing speaker.
Note: the woofer will be ported in all of these design options, even when it isn't shown. Notice that the chamber for the midrange driver isn't the full depth of the speaker.
Side view of an alternate design where the speaker is angled back. In an ideal speaker configuration, the back of each speaker cone lines up vertically.
Another side view alternate configuration. In this design, only the front board is angled. The math in calculating chamber volume gets a little more complicated, but the build may get simpler with having only one angled side. There are also less balance problems. This design also leverages the fact that the top chambers are smaller our midrange chamber needs to be small so that the mid chamber can extend to the full depth of the speaker. In the final configuration there are two 6. Two woofers could be used to help with the fact that the woofers have lower power handling than the other drivers in this system and two woofers will also help in the low end frequencies.
If you choose this method, you will want to test the stain and the poly first on a separate piece of wood to make sure that they don't react. Black high gloss paint also looks nice. The MDF provides a nice smooth flat surface for a glossy paint finish.
For tools, you will need a drill, a table or circular saw to cut the wood, a jig-saw to cut the larger holes, and a router to help countersink the speakers. You will probably need 2 sheets. MDF is a somewhat like particleboard in that it is made up of wood fibers glued together. The difference is the density of the fibers in the wood. Fiberboard is denser, harder, and stiffer over plywood and particleboard.
It is a dead wood that won't resonate. It does not have the problems of screws being easily pulled out or easily warping when exposed to water like particleboard. Compare the top sheet, which is MDF, to the bottom sheet of particleboard. You can see that the MDF is much more dense. Look up the manufacturer specs for the optimal volume for each driver and the displacement for each driver.
If this information is not provided, use the Speaker Box Volume Calculator to calculate the speaker box volume based on the driver specifications. Any dome tweeter will not need its own chamber because it is independently sealed. Add to the optimal volume the amount of space that will be displaced by the speaker and the space taken up by bracing.
Use the Speaker Driver Displacement Calculator if you were not provides specs for driver displacement. From this volume, calculate the dimensions of the enclosure. Remember that these are the internal dimensions, and to add the thickness of the MDF to get the outer dimensions.
Also, remember when using butt joints that only half of the time will the sides of the box be cut to the size of the outer dimension. Use the Speaker Box Volume Calculator and most of these calculations will be done for you automatically. Obviously, if you are attempting a project of this magnitude, you know how to use a screw driver. Still, there are some important issues dealing with box assembly.
The first is selecting the proper screw. This is required so that the threads cannot hold the two pieces of wood apart. There will be no threads in the first piece of wood, and when tightened, the screw can pull the two pieces of wood together. Also, look for a screws that uses a square head Robertson bit. These work much better when using power tools, and are less prone to slipping.
There are also screws that are prelubricated, which decrease the chance of wood splitting and allow the screw to go in easier. You should have both a square drill bit for a drill and a screwdriver probably size 2. You should always drill a hole first before putting in the screw.
The hole should be about the size of the screw without the threads. I also like to put a little wood glue in the hole and on the screw before putting in the screw, but this is not necessary. But, you should definitely put wood glue on the edges of the wood before putting pieces together. When the glue dries, it will become as strong as the wood itself, to the point where you could remove all the screws and the box will still stay together.
You will probably want to counter sink the screws for a flat surface, and this will not be possible without drilling a counter sink hole.
MDF is too strong to counter sink a screw by strength alone. Cabinet feet and spikes come in all different shapes and sizes but generally get installed in the same way. Pre-drill the proper size hole for the gnarled nut and hammer it into position using a block of wood for protection. Then, simply screw in the spike and lock it into position with the lock nut. The spike sleeves in the photos below are threaded, so they get screwed into position using an allen wrench, rather than hammered into place.
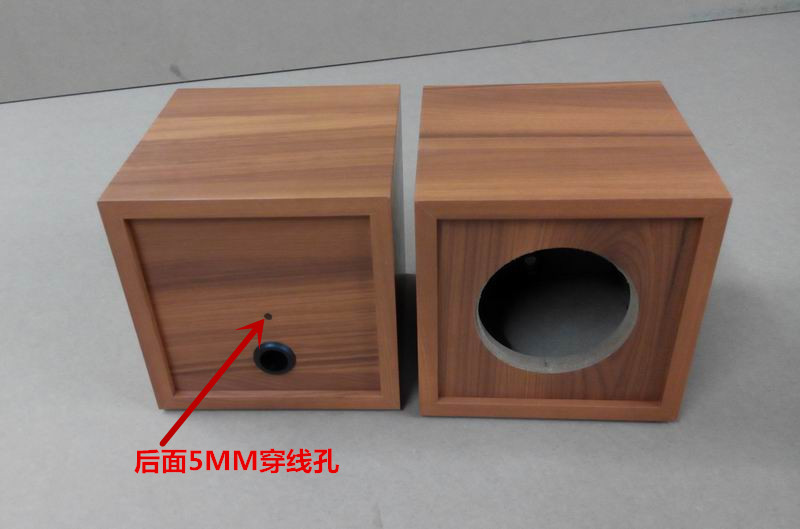
It's getting close to the end - time to get excited! Drill pilot holes for the terminal cups and screw them into position. The port tube can be hammered into place and covered with a port flange or cap. These aren't necessary, but make everything back there look really nice.
Mark and drill pilot holes for all for all of the mounting holes on the speaker drivers. Then, grab the leads coming from the crossovers and solder them onto the metal tabs coming from the driver. Once the drivers are soldered into place, stuff excess speaker wire back into the cabinet and screw the drivers into position using some nice, pan-head, black finish, coarse thread screws. The process of finishing up the subwoofer is relatively similar to finishing up the other speakers.
Instead of acoustical foam or Black Hole 5, I use polyester fill. Subwoofers are generally filled with a larger amount of acoustical dampening material, and as a result, I generally opt for the cheaper, more compressible option of poly fill.
The subwoofer has no independent crossover, only an active variable crossover built into Dayton W plate amp from Parts Express, so there's nothing to do there.
Connect the speaker wire to the binding posts on the back side of the plate amp and install the amp into position in the hole that was previously cut out of the back. Route the wires through the speaker cabinet, tying them around a support bracket to reduce wire tension in the event of a snag, and then twist them around the leads coming from the sub woofer driver.
Solder all connections. Finally, install the subwoofer driver into position on the front of the speaker by drilling pilot holes and then screwing it into position using pan head black finish screws.
With all the driver mounted and all components in position, it's time for the big moment, the first real test run of the speakers. Assuming that you can bare the suspense, carefully carry them to a good quality amplifier in a well dampened room, or wherever you plan on keeping them.
Hook up speaker wire, power up your amp, and reach for your best mastered, best sounding CD, record, or dare I say, iPod. There's virtually endless debate on what to play to "break speakers in" or test them with, but I've found that it's just best to play what you like, and what you've listened to most. You ears will remember what it has sounded like in the past, and hopefully, if all has gone to plan, will notice the huge improvement that you're now hearing.
It starts off slow and low, so you're inclined to crank the volume up higher than you should at the beginning this is a good thing , and then, around a minute or so into the track, it explodes in a rich sound stage, excellently mastered, and beautifully balanced, giving your speakers a real chance to shine. While the list of well mastered and arranged music is constantly growing, many DIY enthusiasts can agree that even though it's a bit dated at this point, Pink Floyd just sounds bigger and better then a lot of what's out there.
Speakers need a break-in period of time, or at least the industry big wigs claim that they do. I've found that the sound does tend to break in a bit, but for the most part, how the sound for the first time is a pretty good indicator of how they'll sound in 5 years. Once the test is complete you should be grinning ear to ear, proud of your achievement and excited to re-listen to all of your music, knowing that it's not only sounding better then it ever has before, but that you made the whole thing possible, from start to finish.
Once you discover how simple and rewarding custom speaker building can be, you may want to build more of them I certainly did at least. Here's to many great speaker projects, thick strong cabinets, the latest and greatest speaker drivers, and doughy-eyed grins at the end of our favorite songs. Question 7 months ago on Step 1. Did you post the diy info anywhere, or do you know of a source for the diy info on the grande utopias?
I'm trying to build a custom speaker on a budget so I got a speaker from Five Below. I am wondering if I could hook up 2 of the same speakers and the other battery to one circuit board. Question 1 year ago. Great article!! I have a question to the specifics of a large subwoofer cabinet build. Would you be up for discussing it?
Reply 1 year ago. Reply 4 years ago. Any 8 ohm 20 watt cone speaker from 4 to 8 inches D with a thin hard cone will work well for frequencies from Hz to 5kHz. It won't need a roll rubber surround or a low free air resonance, but it will need to be in its own separate sealed compartment that is lined with wadding to stop any internal reflections coloring the tone. Make sure you also seal the hole the wires go through.
I hope this helps. Question 1 year ago on Introduction. Do you have a rear deck designs for 2 6. Reply 11 years ago on Introduction. Unfortunately I don't have a digital copy of the specific cross over I used in the speakers in this Instructable that I can easily post. But it really wouldn't matter since every crossover is specific, and judging from the PM you sent me, I think you're going to need a unique crossover made just for your specific drivers.
Hey noahw, i'm interested in recreating your speakers. I have a pair of the focal tweeters in my storage and want to use it for the project. The webpage of zalytron isn't up to date and i can't find any crossover designs Do you have any plans for the cabinet or the crossover to recreate the speakers?
I'm always looking back at this instructable and have finally aquired all the tools I need to make some decent units of my own for my home cinema system. However, as a first project I was thinking of doing something a little different.
I have an abundance of scrap Fire extinguishers due to my work, and was thinking that these might make interesting speaker cabinets for my office to use during presentations. Perhaps a woofer in the bottom of a 9 litre Water extinguisher would work well as a floor facing unit.
Would the cylindrical nature of the extinguishers make them sound rubbish though? I might have to try it with some cheap old computer speakers I've got kicking about and see what happens. I know it's a long time ago, but you mentioned you were thinking of making speakers out of fire extinguisher bottles.. Did you ever do that? Hi Marty, actually sold my fire extinguisher company. I do have some nice antique units, but think these might be used for lamps, rather than speakers.
If I do make a speaker system I'll post it on here you can see how they work. They have been sitting in their boxes in storage for about five years now and it looks like I'm never going to get around to building these things. If anyone is looking for a project email me on vautman icloud. I enjoyed reading this post with all the comments. A few things really hit the mark for me. I do like Focals. I used their 5" W sandwich woofers with phase plug and inverted dome tweeters to build my last set of speakers transmission lines and I love the way they sound.
I also find Zalytron has some great prices. I used to get lots of help from Elliott senior back in the day. Although it is satisfying to build kit speakers I really enjoy designing my own unique speakers that way I have the only ones. Designing crossovers for two way speakers is not really too hard lots of information on the internet but be prepared to do some tweeking I bought True Audio RTA software to test the speakers as I built them. Easy to use and inexpensive but you also need to buy a decent test mike test mics are also not expensive compared to microphones for vocal recording.
I haven't built anything now for at least 5 years but I have been itching to build another transmission line this time using something like a 7" Scanspeak woofers and Hiqufon tweeters. Nice instructable. I think the recommendation to buy a kit if this is one's first build is crucial.
So much can go wrong especially if you are not familiar with electronics, woodworking, or both and having that kit can really give an understanding of speaker design without the expensive trial and error. One can examine it like a puzzle, rather than puzzle over it, if that makes sense. Introduction: How to Build Custom Speakers. By noahw Follow.
More by the author:. About: I've worked for Instructables off and on since building and documenting just about everything I enjoy doing. I am now the Creative Programs founder and manager for Autodesk and just finished building out… More About noahw ». I built my first set of speakers as a high school student over 10 years ago. I've been making them for friends, clients, and now for Instructables as a prize for our Art of Sound Contest ever since.
Over the years I've generated a few simple theories about speaker building that I think are relevant. Yes, they do sound better, and no you don't have to be an audiophile to hear the difference Sound quality has been steadily declining as heavily compressed digital audio, iPod docks, and bottom dollar stereos have proliferated around the world over the last years. Listening to music on a great set of speakers is the single biggest change you can make to your stereo to get better sound quality.
Spend more money then you thought you were going to If you're about to build your own custom speakers, you'll likely be spending at least 40 hours on the project if you've got experience with woodworking, electronics, finishing techniques, or have built your own speakers before, and even longer if it's your first pair.
Depending on how you value your time, you'll have thousands of dollars of free labor your own invested in the speakers. Like tools, speaker components are an investment that you'll have for the rest of the your life, so reach a little and get the best stuff for your project that you can afford. Start with a kit Get started by ordering a kit from a supplier. It takes a significant amount of knowledge and work to design your own crossovers and calculate your own box dimensions. It's much easier to tackle your first speaker project by standing on the shoulders of experienced audio engineers.


|
935 Bandsaw Blade Usa Cedar Wood Craft Ideas Us Nova Wood Turning Tools Key Proxxon Db250 Extension Bed |

Zayka
08.08.2020 at 12:46:56
8
08.08.2020 at 14:15:33
eminem4ik
08.08.2020 at 12:37:56