Build A Wooden Bench Swing 40,Edgerouter 209,Makita Rp2301fcx Review,Lathe Turning Tools Carbide Zip - Test Out

If you want to spend a lot of time doing extra wood chiseling and filling the space with an extra bit of wood, go ahead and make that same mistake. When you can place the arm rest on the support board and it lines up with this line, you know you've chiseled enough. TIP: If you do insert the screw too far, and the head of the screw is below the surface of the wood, do not remove or unscrew it to make it even.
This causes the screw's hold to be weakened. The first seat slat touching the vertical arm rest support board will need a notch cut in both ends to keep the correct spacing of the seat slats. TIP: Watch for drips and wipe them up quickly. Wood glue drips may affect the uniformity of color later if you are using wood stain on your swing. TIP: Prop the swing up on pieces of wood so you don't drill into the ground when the drill bit goes through the other side.
TIP: If you do not have something that can cut chain links, bring these measurements with you to the hardware store, and they should be able to cut the chain to the correct lengths for you.
Because the chains attach at the base of the swing, if the back chain isn't secured further, the swing can easily tip backward if children are climbing on it.
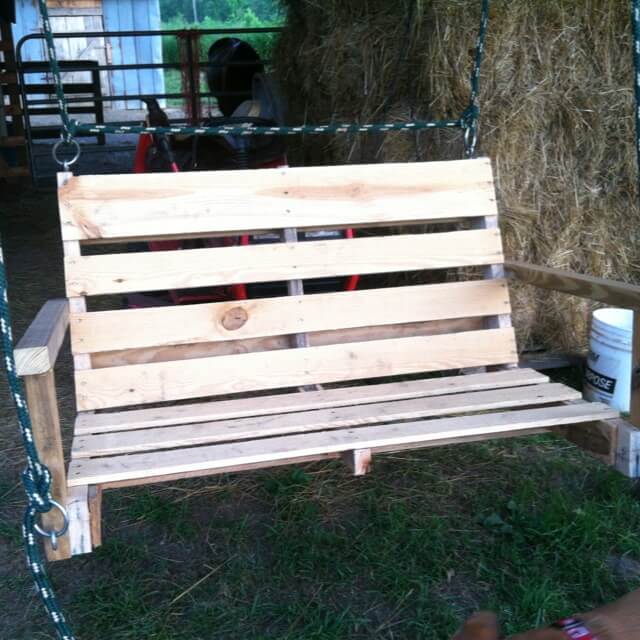
Wait until the swing is hung to determine where the chain must be secured. It's time to kick back and chill on your new porch swing, content with the fact that you've worked hard and saved yourself a couple hundred dollars. Participated in the Beyond the Comfort Zone Contest. How wide are the boards for the back. It says 4 inches but that does not fit. Anybody know???? Reply 7 months ago. When cutting boards from larger boards for a project, just remember that a finished piece of lumber is actually just smaller than the measurement.
Tip 9 months ago. In the middle of the project now awesome instructions! Tip 2 years ago on Step 5. Reply 2 years ago. Question 2 years ago on Introduction. Answer 2 years ago.
Reply 4 years ago. Alright, this is awesome looking and now you've made it doable and affordable. Definitely going to do this for our back patio! By lane13 Follow.
More by the author:. Enter this DIY project. Read on to make your own! Trace one of the swing seat support boards 24 inch long 2x4s on a piece of kraft paper.
Using the pictured diagram, draw out the seat support curve and the angled cut for the back of the board on the paper. Cut it out with scissors and trace the curve onto each of the five 2x4s. Use the jigsaw to cut the curve and the angled cut on each of the five swing seat support boards. Line up swing seat support boards using the tip and the bottom back edge. Use two thin scraps of wood and a C clamp to clamp the five swing support boards How To Build A Wooden Bench Swing 03 together at the back angled section of the board.
The scraps of wood keep the C clamp from leaving a mark on the outer 2x4s. Using the random orbital sander, sand the swing seat support board curve until there is a uniform curve across all five boards.
When the curve is even across the five swing seat support boards, move the clamp to the middle section and be sure to sand the back angled edge of the 2x4s smooth as well.
Before removing the clamp, number the boards from one end to the other. Because they were sanded in that order, the same order will make the most even seat when assembling the swing.
Using a carpenter square, draw a line between the two marks. This will result in an angled line across the board.
Repeat on the second 2x4. With a circular saw, make a cut along this line on both boards and sand the cut ends smooth. The two 65" 2x4 boards are the swing baseboards. Mark this cross on all four ends. It marks the point where a bolt will be attached during the swing assembly to hold the swing chain. Use the carpenter's square to extend these lines onto the sides of the baseboards. These lines will help when lining up the swing seat support boards when assembling. Repeat with the second baseboard.
Connect the dots to draw the curve. NOTE: This could also be done with a pencil and string! Mark all four ends in this way, OR, once the first curve is cut using a jigsaw, trace that cut into the other ends and then cut those ends in the same manner. Once all four curves are cut, use the random orbital sander to smooth the edges.
Lay swing seat support boards 1, 3 and 5 on the ground, curved side down. Line up the outside of support board 1 with the first line on the baseboard, also lining up the back of support board 1 with the back of the baseboard as pictured. The back is the angled cut! Line up support board 5 in the same way on the opposite end of the baseboard.
Use this same drill bit to pre-drill for all screws used in the assembly of this swing. Pre-drilling helps to ensure that the wood doesn't split while inserting the screws. Make sure all screw heads are flush with the surface of the wood, not sticking out above the surface. Repeat for the other two support boards. Complete the pre-drilling and inserting screws for each swing seat support board before moving on to the next one. Line up the inside edge of the second baseboard with this line.
Pre-drill two evenly spaced holes through the baseboard into the first swing seat support board. Insert two 3 inch screws into these holes. Repeat for the two remaining swing seat support boards. The two vertical back support boards were cut in Step 5. Place the first board flat against the inside of the outer swing seat support board, with the angled cut down Build A Wooden Bench Seat Number against the rear baseboard, the back of the board lining up with the back of the baseboard, and the board slanting up and away from the back of the swing as pictured.
Pre-drill three holes through the vertical back support board into the outer swing seat support board. These holes should be positioned as pictured, forming a triangle with two screws on the top and one screw forming the point on the bottom.
As you can see it is suspended from a simple bracket shaped frame. Sincerely Marie Designs provides a fun pergola DIY porch swing plan supplemented with chic throw pillow cushioning.
Skil Tools provides instruction for this summer swing. You can paint it white, blue, yellow, any color, really, to make it better blend with the decor of your outdoor environment.
The downloadable instructions provide plans for this weekend pine swing project. The instructions include how to cut out and prime the parts, creating the frame sandwiches, assembling the armrests and slats, and how to hang a porch swing using a swing hook kit.
They also take care to explain how to create your own hanging system that will support the weight of the people sitting on it. They write that it is a great weekend project though sealing and staining it will add a couple days worth of work to ensure it is treated and protected against inclement outdoor elements.
Once completed, they envision it as a restful place for couples to spend evening hours in quiet conversation, sharing an adult beverage and watching neighbors pass by in the summer evening hours. The porch bench style resembles an Adirondack chair in its modern appearance and luxuriously elongated slants. Sawdust To Stitches provides an indoor option. The instructions walk you through the especially tricky part of mounting it into ceiling joists. She writes that if you want your swing to get more momentum on the ceiling hooks they will have to be closer set together, so planning this aspect can be especially challenging.
This can be a good option if you want to upcycle materials like a spare crib mattress- or serve as inspiration if you need to recycle an old porch bench and convert it into something new.
The website provides a full shopping list that includes plywood measurements, brad nails, and hardware hooks as well as a suggested tools and materials list. The builder recommends that you use either redwood, pine, cedar or pressure-treated lumber along with galvanized screws to build it to last. Simply Designing with Ashley Philip provides a porch swing tutorial that sits beneath a pergola and replaces a backless wooden bench that her family never used.
The supplies are carefully described and include a full cut list for the frame boards, corner posts, seat boards, vertical back support, horizontal backboards, armrests, cross beams and trim. One thing that made it easier was that they utilized a lot of the wood from the benches and upcycled it into the porch swing itself. To make it comfortable, they gave the boards a good sanding, sprayed it with a deck cleaner and used a FinishMax stain on it.
They supplemented it with some outdoor cushioning and fun pillows to make it really cute- string lights also provide attractive illumination for summer evenings. The Sweet Melanie website provides inspiration and instruction for creating a cozy and highly decorative wicker-built porch area. One of the fun aspects is the cord cozies that cover the swing chains. It hangs from a tree using a rope that attaches to chains bound with a bowline knot also employing a spring-loaded carabiner.
In order to make the curved edges, you can trace around a paint can and then use your jigsaw to cut the curve. This porch swing employs a repurposed headboard which makes it especially wide and spacious for summertime relaxation. The materials list includes sourcing an old headboard, as well as using a clear wood coat, paint, dog beds, throw pillows, rope, screws, and sandpaper.
The Rustic Pig site provides another back porch headboard swing. This attractive light blue option is fairly wide and can easily accommodate three people at a time. Because her family had some old antique headboards lying around the garage, it made sense to upcycle them and create a truly unique and artistic creation. They write how difficult it was to get it hanging from the chains exactly right.
This was because it weighed a ton and aligning the chains perfectly was a difficult procedure, even for two people. The paint color is Annie Sloan Duck Egg- the woodworker says it is a calming coloration that really comes to life with the decorative white tracing they did.
The builder describes creating a comfy back support by breaking down the shipping pallets and using 2 coats of blue outdoor wood paint. They decided to use white nylon rope that they threaded through the boards as well as the top of the bench to make sure it was structurally sound. For the cushioning, they repurposed some old patio cushions and then made one large slipcover out of a weather-resistant flamingo pattern fabric. If you need help choosing a cabinet table saw , check out the preceding link- they can be a great help when undertaking complicated woodworking projects.
By all means, if you end up constructing one of these porch swings , let us know in the comment section below. Sign in. Log into your account. Forgot your password? Password recovery. Recover your password. One of the best parts is that this chair is mobile, making it easy to move seasonally.
If you love the idea of a free-standing glider, these plans are ideal for you. A glider bench provides plenty of space for two people to sit and relax, enjoying a favorite beverage at the end of the day. The classic design of the bench makes it a great addition to any style of home, making it one that you can take with you if you ever move.
Up to four people can sit and visit after a long day when you build a four-seater canopied glider for your space. The integrated table provides a great place to serve up a few snacks or a delicious grilled meal. Benches facing toward one another help to promote conversation for an intimate family catch-up. Whether you are adding a swing or glider to an existing deck or making it part of a brand new deck design, coordinating the sitting area to match the surrounding deck is a great way to make it look as though it has always belonged there.
Paint or stain the furniture to match a composite plank deck. Or you can choose a contrasting color to make furniture stand out from the surroundings. After completing your build, make sure to paint, stain, and finish the piece in a way that holds up to the elements.
Steffani Cameron is a Victoria BC-based writer on a variety of topics. Here on the BuildDirect blog, she specializes in writing about smaller, urban spaces. How do you make the most of your smaller space? How do you decorate it to suit you?


|
Wood Carving Business Ideas Review Bosch Wood Sanding Machine China Handplanes Amazon 600 |

Olsem_Bagisla
12.09.2020 at 10:19:21
0110
12.09.2020 at 12:42:53
Natcist
12.09.2020 at 18:29:33
RoMaSHKa
12.09.2020 at 20:59:22
Daywalker
12.09.2020 at 12:44:15