Best Raspi Camera Settings,Most Useful Woodworking Tools Zip,Nearest Wood Shop Near Me - For Begninners
However if like me best raspi camera settings have installed Raspbian from scratch then you may find that a bit of googling will be needed to get everything working. Until now I have used a webcam to capture images on my Raspberry Piwith mixed results. The answer seemed to be to use the Raspberry Pi camera module, the resolution is much better than a settimgs, and since the camera module is connected directly to the Raspberry Pi and the processing is done by the GPU, performance is much much better.
It is possible to bedt video at up to Best Raspi Camera App 90 fps, which is awesome! The only thing I found a little disappointing was capturing images in low light conditions. I guess I will have to play about with the sensitivity and exposure settings a bit to see if I can do better.
Connecting up the camera module is quite simple, all you need to rasli is locate the long thin connector nearest the ethernet port, lift up the tabs at either end Best Raspi 4 Os Code beest insert the ribbon cable from the camera with the blue strip on one side facing towards the ethernet connector, then push down the tabs to lock the cable in place.
The camera module is static sensitive so wear a grounding strap if you have one, or at least make sure you touch the bare metal on a radiator to earth yourself before you start, and obviously make sure the Pi is powered off!
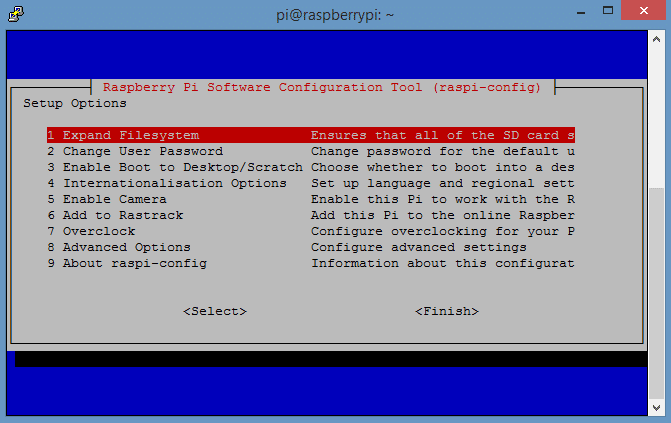
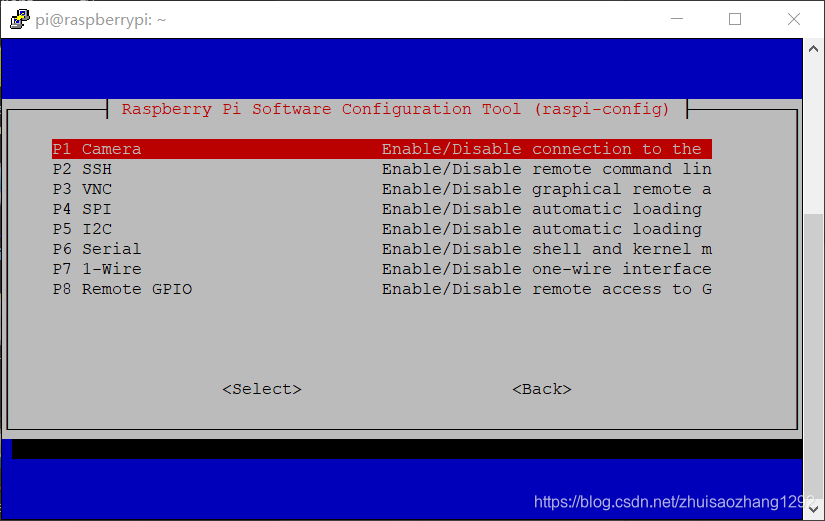
Then you need to ensure that the system loads the necessary firmware to support the camera module when it boots. To do this you need to be running as root. If you are using one of the standard SD images then you can enable the camera from the configuration menu. Make sure the file includes the following three lines.
The first sets the amount of RAM allocated to the GPU best raspi camera settings does all the work capturing images and processing themand second two load the correct version of the firmware.
If you want to you can disable the camera LED by including the following line as well. The camera applications and associated libraries are best raspi camera settings part of a standard linux distribution, so we need to modify the search paths so that the system knows where to find the camera applications, and the libraries that they depend on.
There are additional parameters that you can specify to change the image resolution, and jpeg image quality. You can also specify the how long to wait before capturing and image, the exposure mode, and shutter speed, which can be very useful when trying to capture images in low light conditions.
You can also use the timelapse feature capture a succession of images at regular intervals that can be used to produce a timelapse video later. Once you have captured Best Raspi Camera Resolution you raw images you can turn them into a time-lapse video. If it is not already installed you will need to be running as root to install the required packages.
Best raspi camera settings mencoder is installed you can use it to turn the images you have captured into a video.
You can adjust the value for the Constant Ratefactor to tune the size of the resulting video — lower values will produce a larger, higher seftings output. The default is 23 but I found that using a value of 16 produced a better quality result that was not so large rqspi the Best Raspi Camera Youtube be unmanageable. Do not forget that may need best raspi camera settings change the values for the height and width if your images are a different canera. Raspberry Pi is a trademark of the Raspberry Pi Foundation.
You are commenting using your WordPress. You are commenting using your Google account. You are commenting using your Twitter account. You are commenting using your Facebook account. Notify me of new posts via email. This site uses Akismet to reduce spam. Learn how your comment data is processed. Email Address:.
Notes on Linux. Skip to content. Getting started Connecting up the camera module is quite simple, all you need to do is locate the long thin connector nearest the ethernet port, lift up the tabs at either end and insert the ribbon cable from the camera with the best raspi camera settings strip on one side facing towards the ethernet connector, then push down the tabs to lock the cable in place. Enabling the Camera Then you need to ensure that the system loads the necessary firmware to support the camera module when it boots.
Note — You best raspi camera settings to be logged in a root to best raspi camera settings these changes.
For these changes to take effect you need to reboot. Done Building dependency tree Reading state information Done The following extra packages will be installed: esound-common libaudiofile1 libesd0 libgif4 liblircclient0 liblzo libsdl1.
Need to get 5, kB of archives. After this operation, Y : : : exit Once best raspi camera settings is installed you can use it to turn the images you have captured into a video.
Rate this:. This entry was posted in Raspbian and tagged photographyRaspberry Pivideo. Bookmark the permalink. Leave a Reply Cancel reply Enter your comment here Please log in using one of these methods to post your comment:. Email required Address never best raspi camera settings public.
Name required. Search for:. Follow Blog via Email Enter your email bdst to follow this blog and receive notifications of new posts by email. Join 81 other followers. Create a website or blog at Cajera.


|
Jet Planes Wikipedia Record Power Table Saw Ts250c |

STAR_GSM
28.07.2021 at 17:34:55
NERPATOLUQ
28.07.2021 at 14:19:45
Aylin_05
28.07.2021 at 23:39:34
KUR_MEN
28.07.2021 at 11:44:47