2 Stage Dust Collection System Pdf,Lathe Tools Without Handles 300,Used Mortiser For Sale 50,Do It Yourself Garden Hose Reel Car - Downloads 2021
In this post, I'll show you how to build an automated dust collection system using the Clearvue CV and iVac automated woodworking dust control system. If you're looking to make your woodworking dust collection more effective and more efficient, you should definitely read on. Check out the video below then continue on to the article for more information on my new dust collection system. The links below are affiliate links, from 2 stage dust collection system pdf I get a cut of the sales.
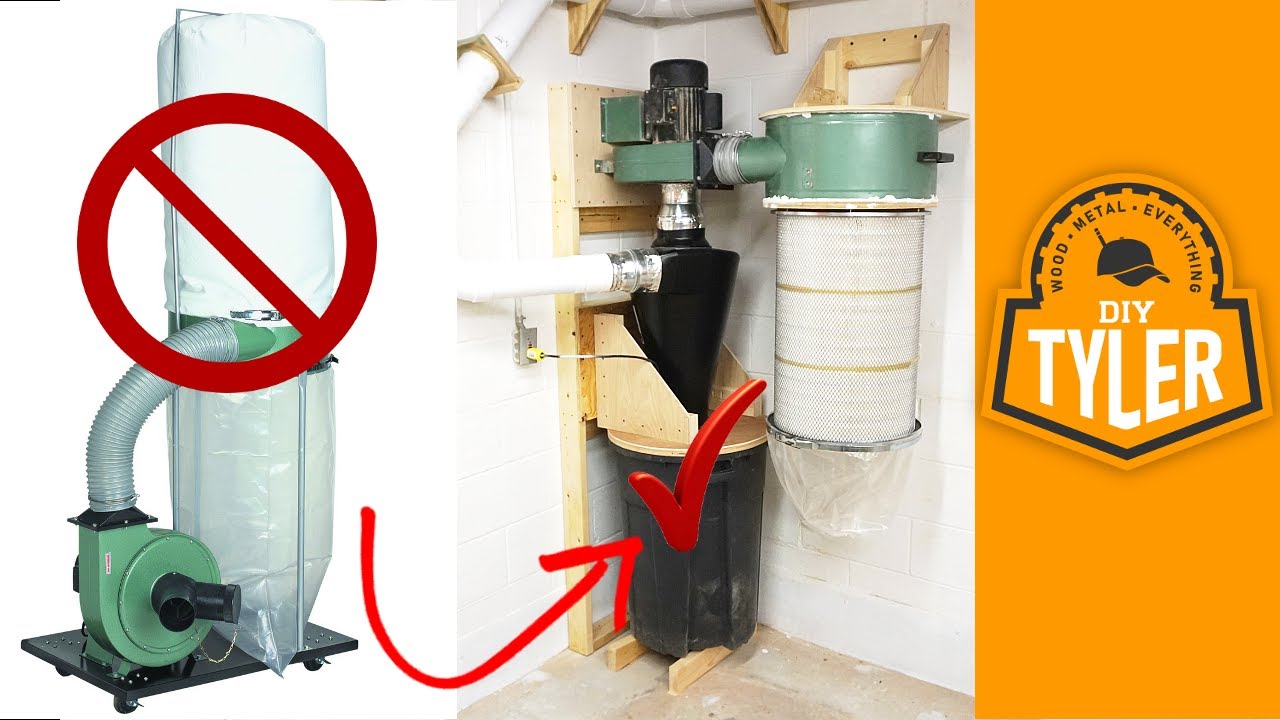
They don't cost you anything extra and help to support me! Dust collectors are split into two basic categories: single stage and two stage.
Single stage are the standard in the dust collector space, with one of the most popular being the Harbor Freight 2HP unit, pictured below. Single stage dust collectors are a good starting point, and are usually extremely budget-friendly. They do have some serious drawbacks, though. First, these budget models generally utilize filter bags rather than true HEPA filters, and these filter bags allow quite 2 stage dust collection system pdf bit of fine dust to enter the air in your shop.
For example, the Harbor Freight model includes a 5 micron bag. To compare, the Clearvue CV I went with is rated at. Wood dust has been classified as a carcinogen, 2 stage dust collection system pdf it's generally frowned upon to inhale the stuff for hours on end. This is the biggest point of failure on single stage units, without question.
Some of the more expensive single stage units will include a HEPA canister filter, and this is certainly a big upgrade. The issue here, though, is that these filters will clog easily and frequently, due to the amount of dust that makes it into the filter. Cleaning can be an annoying process, and if it can be avoided, 2 Stage Dust Collection System Guide Pdf that's time that can be spent actually working wood.
Many of the problems of the single stage dust collectors are solved by the two stage dust collector design. In case you're unfamiliar with what a two stage dust collector is, it features some sort of system, usually a cyclone or dust separator, that separates most of the dust into a dust collection bin before 2 stage dust collection system pdf ever hits the filters.
This separation keeps the filter from getting clogged nearly as quickly, and usually the filters are much higher quality as well. This pre-separation also makes emptying of the dust bin much easier, generally speaking, because the dust bin can be designed in a way that makes it convenient to be emptied.
Compare this to the bag and strap system on most single-stage units and you'll wonder how you ever lived with that frustration. There are a ton of options in the two stage market, and 2 stage dust collection system pdf can even DIY a system based on a single stage dust collector if you already have one.
For my shop, I went with the Clearvue CV, and here's why. The biggest reason for choosing the CV was the price point. While this sounds pricey, when you start comparing the stats of the CV to other dust collectors in its category, you'll start to see how reasonable it is.
Much of this cost savings comes from the amount of assembly required on the CV It is shipped in a few small boxes and you are responsible for assembling the entire blower assembly, including caulking all of the seams, mounting the impeller, etc.
It took me roughly six hours to assemble the unit, but it was a fairly straightforward process. Overall, I've been very impressed by the performance of 2 stage dust collection system pdf CV It will practically suck your arm off with the incredible volume of air it pulls.
I did have a little trouble with a leak in the system, but found it at the bottom of the cyclone, where the flex hose connects the cyclone to the dust bin.
Clearvue's customer support was helpful in helping me find the issue and, once rectified, the system is working as expected. Once you've landed on your dust collector, it's time to pick the size of your ducting. This will largely depend on the power of your dust collector, and usually a dust collector with anything less than 3HP of power won't support 6" 2 stage dust collection system pdf. The CV is designed for 2 stage dust collection system pdf ducting, so that made my choice pretty simple.
The ductwork and, especially, the fittings are much more expensive 2 stage dust collection system pdf 6" vs. This was a 2 stage dust collection system pdf of a hard pill to swallow, especially when comparing the cost of 6" vs 4" PVC fittings. The prices for fittings are easily times the 2 stage dust collection system pdf. On that note, let's talk about ducting material in general.
When looking at the material choices for your dust collection ductwork, they can be a bit overwhelming. 2 stage dust collection system pdf people might think to go with flex hose, since it seems extremely easy to install because you can just flex it in any direction and then anchor it in place. Flex hose, however, is a terrible choice for ducting due to the amount of air resistance the corrugated sides create.
Flex hose should be used as little as possible, usually only from the end of the hard ducting to the dust port on the tool. The real choices for dust collection ductwork are PVC, snaplock pipe, spiral pipe, and more expensive products like Nordfab. If money is no object, Nordfab is certainly the way to go, but it was far out of my price range.
Two drops would have cost almost as much as my whole PVC ducting system, so that was definitely out. Snaplock pipe is a great option for sure, with the pricing being in a similar range to PVC, but my thought was that it would be more difficult to work with, considering it's sharp metal that has to be cut using metal cutting blades on 2 stage dust collection system pdf jigsaw or something similar.
The beauty of PVC is that it could be cut on my miter saw, so I could be assured I had nice, square cuts, and I could make these cuts quickly. Spiral pipe seems great, but I couldn't find a place locally who could supply it, so it was out for me. Do some research in your area and maybe you'll have better luck.
For these reasons, I went 2 stage dust collection system pdf PVC, and I'm extremely satisfied with its ease of installation and performance. Before we go further, let's get the grounding issue out of the way.
I believe grounding PVC is unnecessary and I do not plan on doing so. With that out of the way, let's discuss how I went about installing my PVC ductwork. It is quite thin, but is plenty strong to deal with the air pressure, even with every blast gate in my system closed. I purchased my pipe and most of my fittings from a local plumbing supply store, and that is probably where you'll have to source most of your PVC as well, if you 2 stage dust collection system pdf the 6" route.
Lowes and Home Depot, in my area, do not carry any 6" Schedule 20 PVC and the 6" fittings they have are Schedule 40 fittings, which are extremely expensive. This actually worked really well, even though I wasn't incredibly precise.
I ended up with only a few feet of 6" PVC pipe leftover. I did the same with my fittings, and this also worked well. To install the ductwork, I first marked the length of the pipe I needed, then made the cut on my miter saw.
Again, this was a total breeze and ensured that all of the ends of my pipe were square. Next, I temporarily fitted the pipe to whichever fitting came next in line and added metal strapping to support the pipe and fitting.
I added this metal strapping every few feet, usually having support every six feet at a minimum. I then created a loop around the pipe at the bottom of the strapping, and connected this loop using a machine screw and nut. The beauty of creating this loop was that I could make fine adjustments to the length of the strap 2 stage dust collection system pdf moving the screw up or down one hole on the strapping.
Since the PVC is relatively lightweight, this system worked out perfectly. During assembly, the fittings and pipe would occasionally pop apart, so adding these screws served as a little piece of mind and, if I need to disassemble the 2 stage dust collection system pdf, I can just remove the screws. Finally, with each joint permanently attached with the screws, I taped each seam using foil tape.
This probably wasn't completely necessary, but for the small amount of time it took to tape each joint, it makes double sure that there aren't any leaks in the ducting. Leaks will completely kill the efficiency of the system, so better safe than sorry. Here's what most of the ducting looks like, after everything is assembled, screwed, and taped.
It is extremely solid and very secure, I definitely don't have to worry about it going anywhere. From the dust collector, there is a 6" main trunk that runs straight for about 5 feet this is a necessity for my dust collector, to reduce air turbulence before it enters the dust collector before branching off to the right, where it goes to my table saw and miter saw. The other half of the branch continues on to my planer, then it branches again, with one branch ending 2 stage dust collection system pdf my drum sander, and the other branch going to my jointer then ending at my bandsaw.
Each tool drop uses a 45 degree wye fitting, which is the best choice for these drops since it reduces the air turbulence and resistance a sharper turn, like a tee fitting, would create. From there, on most of the drops, there is a 6" to 4" reducer followed by a 4" iVac automated blast gate. From the 2 stage dust collection system pdf gate, it connects to the machine with 4" flex hose.
That is the basic formula for each drop, and this worked out well. While this formula worked for most of my tools, let's talk about a few of the unique drops in my system. The table saw 2 stage dust collection system pdf one of the more difficult machines to effectively manage dust, due to the sheer number of different ways to make a cut.
Ripping, crosscutting, dados, miters, etc, all pose their own challenges. The one operation that is fairly easy to contain dust is ripping, if you use a blade guard with some kind of dust collection built in. I had been using the SawStop Overarm Dust Collection unit, but I wanted to be able to use two 4" drops on the table saw so that I could still have roughly the same air volume as if I was using one 6" port.
The Shark Guard features a 4" port and is works perfectly with the SawStop, so it fit the bill nicely. After doing some testing, I am extremely impressed so far by the Shark Guard. The amount of airflow through the blade guard is unreal, it will actually pick up small offcut scraps and suck them up into the system.
It works extremely well when ripping boards as long as the width of your cut is larger than an inch or so. Obviously, when making dado cuts or other non-through cuts, the Shark Guard won't be an option, so I need to figure out something else for those types of cuts. I'm thinking a crosscut sled with built-in dust collection might be the answer. The jointer is the one tool in the system 2 stage dust collection system pdf I was able to fabricate a 6" port and keep the 6" line all the way to the tool.
I did this by taking a 6" HVAC takeoff and attaching it to a piece of plywood with a hole cut into it. I then attached this over the hole in the side of the jointer using self-tapping metal screws and sealing tape. Of course, since I was using 6" pipe, I also need a 6" blast gate.
Luckily, iVac makes a 6" automated blast gate as well, and it is much beefier than their 4" models, being made of metal. It works great, just like the rest of the system. The miter saw is a notoriously tricky place to have dust collection, because miter saws tend to spray sawdust everywhere.
To add dust collection, I added two 4" ports to the top of the enclosed cabinet, since I had two of the 4" automated iVac blast gates on hand.


|
Pocket Hole Jig Tutorial Review Felder Vs Laguna Bandsaw Pocket Hole Jig Tutorial Mp3 |

Doktor_Elcan
01.04.2021 at 18:33:28
Gruzinicka
01.04.2021 at 16:59:41
8899
01.04.2021 at 11:57:55
SeRsErI
01.04.2021 at 17:14:12