Xact Pocket Hole Jig Review 64,Router Table Clamps 75,Rockler Drop Leaf Hinges - Try Out

If you ask me pocket hole systems are much better suited to production work than dominos. Quicker to assemble , more adaptable, more repeatable,easier and much much cheaper. KIAB , Sep 15, Last edited: Sep 15, The Axminster screws have a horrible habit of snapping under even low torque across all the sizes.
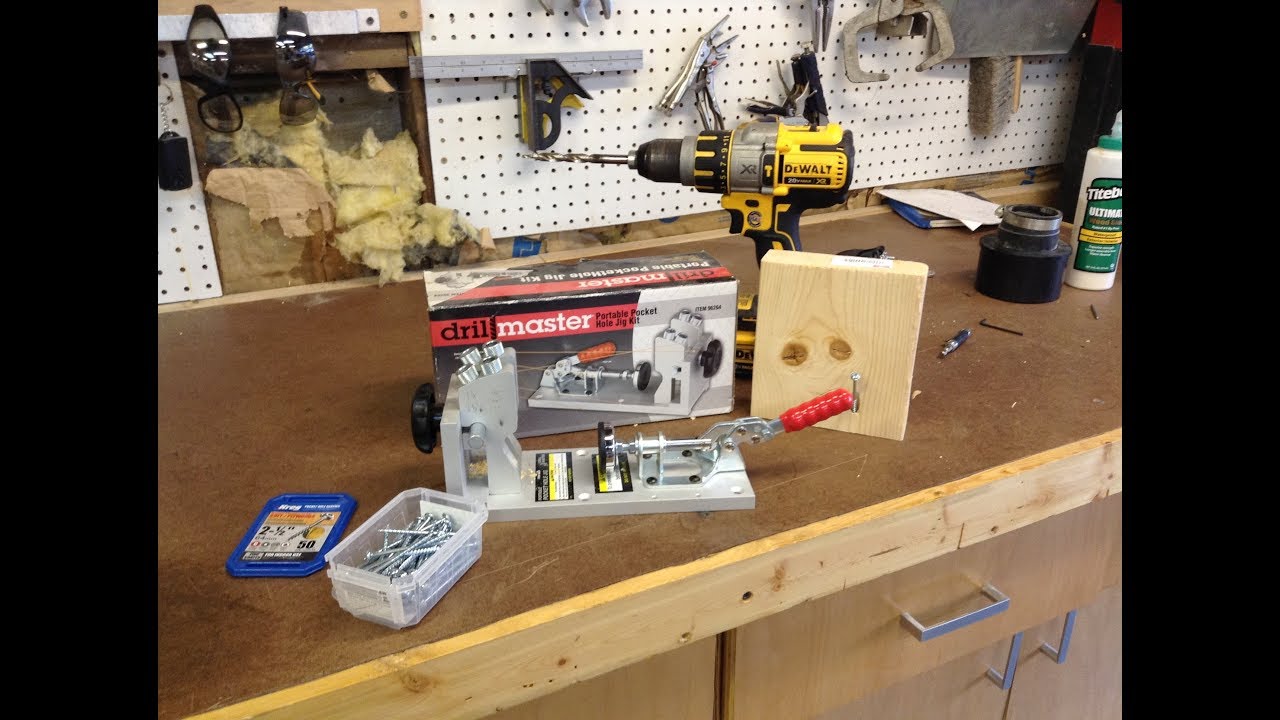
I have probably put 50k Kreg screws without a single snapped head even on oak. Also another question Do you not get splitting as you pull in the joining piece because the joining piece has no pilot hole? Everyone who has replied is using a Kreg jig which should probably be your answer. Pocket hole jiggery and joinery leaves you with horrid holes in the lumber. Ryluer , Sep 15, Oh dear oh dear.
I think you must have been using your jig wrong Ryluer. The pocket holes are meant to be hidden away not on show. I spoke to them at the time and I don't think they wanted to stop selling it. I looked at the UKJ but my impression was basically it was a bit of a knock off of the Kreg. I wasn't over impressed with it The important bits of the Kreg like drill guides, clamp etc are metal and the GRP bit of it hasn't ever been an issue.
In fact if you make a slight error in setting and have the drill a touch too long its very forgiving as its not metal. I can only go on my use of the Kreg. I have used it for years and years and have never regretted the purchase.
Its equally as good in the clamping station as it is when its being clamped on. Dust extraction is excellent too. I imagine that you can count the number of people who have used both on the thumbs of one hand, since neither one is inexpensive.
But it annoys me when people say one or the other is better unless they have actually used both of them. This was because they were the only place I found which had lowers and uppers which matched a particular color I wanted AND could engrave them, and although the other color I use is universally available, I wanted all the test receivers to be as identical as practical to ensure the most accurate comparison.
We will use the Dewalt DWP trim router, as in my opinion as well as many others ; it is the best router for this task. There may be better choices, but as long as it is used with both jigs, should not affect the comparison. Construction — Both jigs being compared have the steel side plates to better resist the guide holes being enlarged during drilling and to be as equivalent to each other as possible.
If you are very skillful at hand drilling or only need to do a couple of receivers or have a drill press, you can save some money by getting the aluminum version of the 5D jig AR only.
Routers Supported — Both can use a quality trim router like the Dewalt. Universality — The 5D jig only does AR The Gen 2 can do both. Neither jig contacts the receiver, so should handle most of the receivers out there, although being closed ended, they may have difficulties with receivers with buffer tube sockets longer than spec.
Guide Methodology — The 5D jig has two guide pins which go into guide depressions on each side of the receiver. This could work very well, but you will have to stop milling twice to change the lengths of the pins, which confines your milling to the appropriate areas.
The Gen 2 has a bushing around the bit which rides on the jig; you are limited to the proper area by a pin which goes through a hole across the jig to block the bushing from going into the take-down lug pocket are, and a sub jig is screwed in place to guide milling the trigger slot. Unless you are really good at keeping a hand drill perpendicular, it is better to use a drill press for this hole. A taper is intrinsically stronger than a step, but since in both jigs the bit is supported by a bearing at the router base well below the transition, that would seem to be a moot point.
It is easier to correctly position the step; if you were to tighten the router collet on the tapered section, it is likely to work free and cause problems. Unique Features — The Gen 2 has a port to which you can connect a Shop-Vac to help suck out the chips. Assembling the 5D jig is a bit more involved than some older jigs, but not excessively so. The drill guide is held to the side plates by four Phillips flat head screws.
The orientation is critical, so the hole spacing is made slightly different side-to-side, preventing you from fastening it in place wrong.
This can be disconcerting if you try to install it incorrectly. The pivot pin holder attaches to the front of the jig with two more of these screws. The jig panel is held to the side plates by six Allen head cap screws. This disc needs to be installed before inserting the receiver into the jig. The receiver is held in the jig by a pin through the pivot pin lug, a pin through the take-down pin lug, and two flat head screws through the jig end into that disk screwed into the buffer tube socket.
Make sure you put the pins in before tightening the screws into the disk, or the receiver may be pulled too far to the rear for the pins to go in. The final assembly step is to thread a long Allen head cap screw from one side plate through the other.
Since both side plates are threaded, this keeps the jig from distorting when clamped in the vise. Once assembled, you can remove the receiver by removing that long screw from the bottom and the two flat head screws from the buffer tube disk. Pull the two pins and the receiver drops out. With the pins in place and the two screws tightened into the disk, the receiver does not move at all in the jig.
The router has to be prepared as well. Remove the factory base. Insert the end mill bit into the router and finger tighten the collet a segmented band or sleeve put around a shaft or spindle and tightened so as to grip it until the bit just barely slides, then push in the bit until it stops hits the start of the taper. Carefully slide the jig router base bearing over the end mill bit, and fasten the jig router base to the router following the instructions for your router.
The Dewalt just takes 4 screws though the jig base into threaded holes in the router base. Once the router is ready, adjust the depth to the initial mark in depth gauge 1. Install the first set of guide pins into the jig base on the router. I force the lug into the pocket as far as it will go; when I remove it, some of the yellow goo has transferred to the places in the pocket which are tight.
These areas can be ground down with a Dremil tool, and the upper installed again to find where else it is tight. I repeat this sequence until the upper fits, then wipe off the remaining goo. This provides the best fit of the upper, and reduces the chances of damage to the buffer stop pin hole or the take-down pin detent hole from over enthusiastic milling.
The instructions are good, but appear to only be available on the site as both text PDF, so you could print them out and video. There are two nylon tubes through the selector holes which hold the side plates securely together; the plates must be pulled apart against the friction of these tubes.
I would also save these tubes for future storage of the jig. The side plates are connected to the top plate with two cap screws each, which should not be completely tightened in order to allow final fitting.
Follow the instructions to figure out which direction to mount them for the model you will be making, and make sure the directional label on each side plate matches the directional label on the top plate. The buffer tube support is screwed to the end of the top plate with two more cap screws which should also not be completely tightened. Insert the appropriate set of pins through the jig and the pivot and take-down pin holes in the receiver, then get the buffer tube Shop-Vac port started in the buffer tube socket and screw it in only three full turns to allow final adjustment then tighten the two cap screws holding on the buffer tube support.
Screw the long bolt though the threaded hole at the bottom of each side plate, to prevent deformation when clamping into the vise. Now follow the instructions on how to tighten the four cap screws and the buffer tube screw using the Allen wrench through the two holes in order to ensure the jig and receiver are assembled square to each other.
The receiver should have no movement when correctly mounted in the jig. The 80percentarms receiver just barely fits in the jig lengthwise, and in fact, some of the cerakote was scuffed and a bit even scraped off the end of my buffer tube socket due to contact with the buffer screw support.
Both side plates are threaded so you will be threading these in for a while. You can snug this screw but do not crank on it. The manual says to not install the large screw that goes through the rear takedown pin hole but if your lower already has the rear pocket machined out you can install it unless you plan to machine the pocket further.
Now your jig is assembled and ready to begin the machining work. Unlike the original Modulus Arms jig you will not need to disassemble the jig to change out drilling and routing plates. The first piece to assemble in the jig frame is the drilling guide. This guide has a lip that mates with a ridge in the jig and the screw slots can only be inserted one way so you don't have to worry about orientation. Secure the drilling guide insert with two of the short screws.
This is for the trigger slot and you will want to drill all of the way through the receiver. Only do this if your rear pocket is not already machined AND you have NOT inserted the large screw through the rear takedown pin holes.
Set your drilling depth using the depth gauge and the "B" slot. Drill out the six holes for the fire control group pocket labeled "C" in the drilling guide. Now you can unscrew the four screws in the drilling guide to free it from the jig. Insert the routing guide in the orientation shown so the "B" part of the template is towards the rear of the receiver.
NOTE: As with all router jigs on the market the hash marks are a bit too aggressive in my opinion. There is less chance of your end mill biting and jumping with these reduced depth millings. It does add some time but the finished product will be worth it. Starting in the center of the hole, route outwards until you have milled the entire area at the first cutting depth.
Repeat the process until you have completely milled out the trigger slot. If you need to mill out your rear pocket, set the depth of cut on the end mill to the first hash mark on the "B" slot in the depth guide. Mill as before working your way up to the final cutting depth. Make sure you do not have the rear support screw installed in the jig while doing this.
Now remove the four screws from the routing template and turn it degrees so the rear pocket portion is now at the front of the receiver.
Re-install the four screws in the routing template. You can now install the large rear screw between the two side plates and through the rear takedown holes of the lower receiver if they weren't alraedy. This will give added support throughout the remainder of the machining. Now set the depth of cut on the end mill to the first hash mark on the "C" slot in the depth guide.
As you approach the final pass make sure you are starting your end mill over the trigger slot which has been completely milled through.

|
Brad Point Drill Bits For Wood Limited Dust Collector Filter Bags Uk |

Puma
24.02.2021 at 14:47:57
PoranoiA
24.02.2021 at 10:47:28