Simple Carpentry Bench Years,Hardware Box Handles,Laguna Drill Press Code,Pocket Hole Jig Vs Dowel Jig Jigsaw - Reviews
This is the position of the back leg support. See side view diagram. Align the front support and back leg support as shown in the diagram and temporarily secure the two pieces together with 'C' clamps. Mark the holes for the carriage bolts by measuring 1. Repeat this process on the other upright and back leg support, keeping in mind that the two back leg supports must be on the inside of the two sides of the bench.
From the second 2x10, square off one end and cut it to make sure that the end is perfectly square. Measure 48 inches and cut it to length. This is the seat of the bench.
From the remaining piece of 2x10, measure 51 inches and cut it square. This is the back rest of the bench. Secure the seat of the bench onto the top of the back leg supports on each side of the assembled uprights with four or five of the deck screws on each end of the bench. Using a square, make sure that the seat and uprights are square.
Align the back rest to the top of the uprights and secure each side with the remaining deck screws. See diagram below. It is still working great 8 years later!
Another simple project using a miter saw and the Kreg Jig! It has solved all our bedtime book storage problems! I have free plans for you! This is a simple modification of the DIY table I showed above and it packs hours of fun for any toddler! This is one of the most popular projects on the blog!
If you want to create something fancy but at the same time keep it easy, this project is for you! All you need is a miter saw, pocket hole jig and power drill! A DIY floating ladder shelf that fits in perfectly with any decor or room.
This is a simple bench with a few cuts using a circular saw and jigsaw. Add a slight industrial accent using the chain links. This console table is super easy to build and looks great in any entryway!
This C-table or sofa table is very easy to make and is very useful! It has become one of the most used pieces in our living room — from working on it to eating meals to even a ramp for trucks and toys! You need a circular saw, miter saw, and Kreg Jig to build this very useful piece of furniture. I have you covered with the plans. This Carpentry Bench Vice Manager shelf is simple to build and yet looks absolutely amazing with its unusual lines — plus all it takes is 5 steps! Full tutorial and plans for a DIY lattice planter box using vinyl lattice and a few boards.
This makes the perfect planter box for indoors or outdoors. This is the perfect little planter to start off your woodworking journey! All you need is a miter saw and a nail gun! If you can build a table, you can build this DIY fire pit table too!
All you need to add is a jigsaw and a small portable grill! I have the printable plans for you! This project looks huge but it is really simple and straight forward! Just a Kreg Jig and a few screws! I have a lot of information and articles throughout the site to help beginner woodworkers understand and Free Simple Outdoor Wooden Bench Plans With use tools and to finish their projects.
I add a new article every month too! Oh my gosh you are so inspiring! Hi Anika, I have seen the beginner woodworking projects and enjoyed a lot. Every project is simply awesome and impressing. I appreciate your dedication and gained experiences since your first power drill in , I am inspired.
All projects are so lovely, colorful and remarkable. That being said, I know many of the potential readers will prefer the Imperial measurement system. So I've tried to provide measurements and dimensions in both metric and Imperial.
Two caveats - I don't "think" in Imperial, so if I've transposed a measurement I probably won't have noticed.
If any measurement appears unduly massive or tiny, just assume I got it badly wrong. Also, my dimensions in metric have been converted using an online tool. So there may be some very slight rounding as a result - hopefully nothing serious enough to throw anyone off.
This is the length I'd have liked, but I had to fit the bench between two brick piers in the garage which limited me to around a foot approx 30cm less in worktop length. The straightest boards, at least in my local home store, were 4. As a bonus they also seemed to have fewer knots and defects. Simple half lap frames were made by rebating with a circular saw and cleaning up the waste with a chisel.
The short stretchers have no rebate as they are simply screwed in place. Interlock the long stretchers and the leg pieces which can be glued and screwed or dowelled together. I failed to take a shot of the next step - which is simply screwing the short stretchers together to create the bench base assembly.
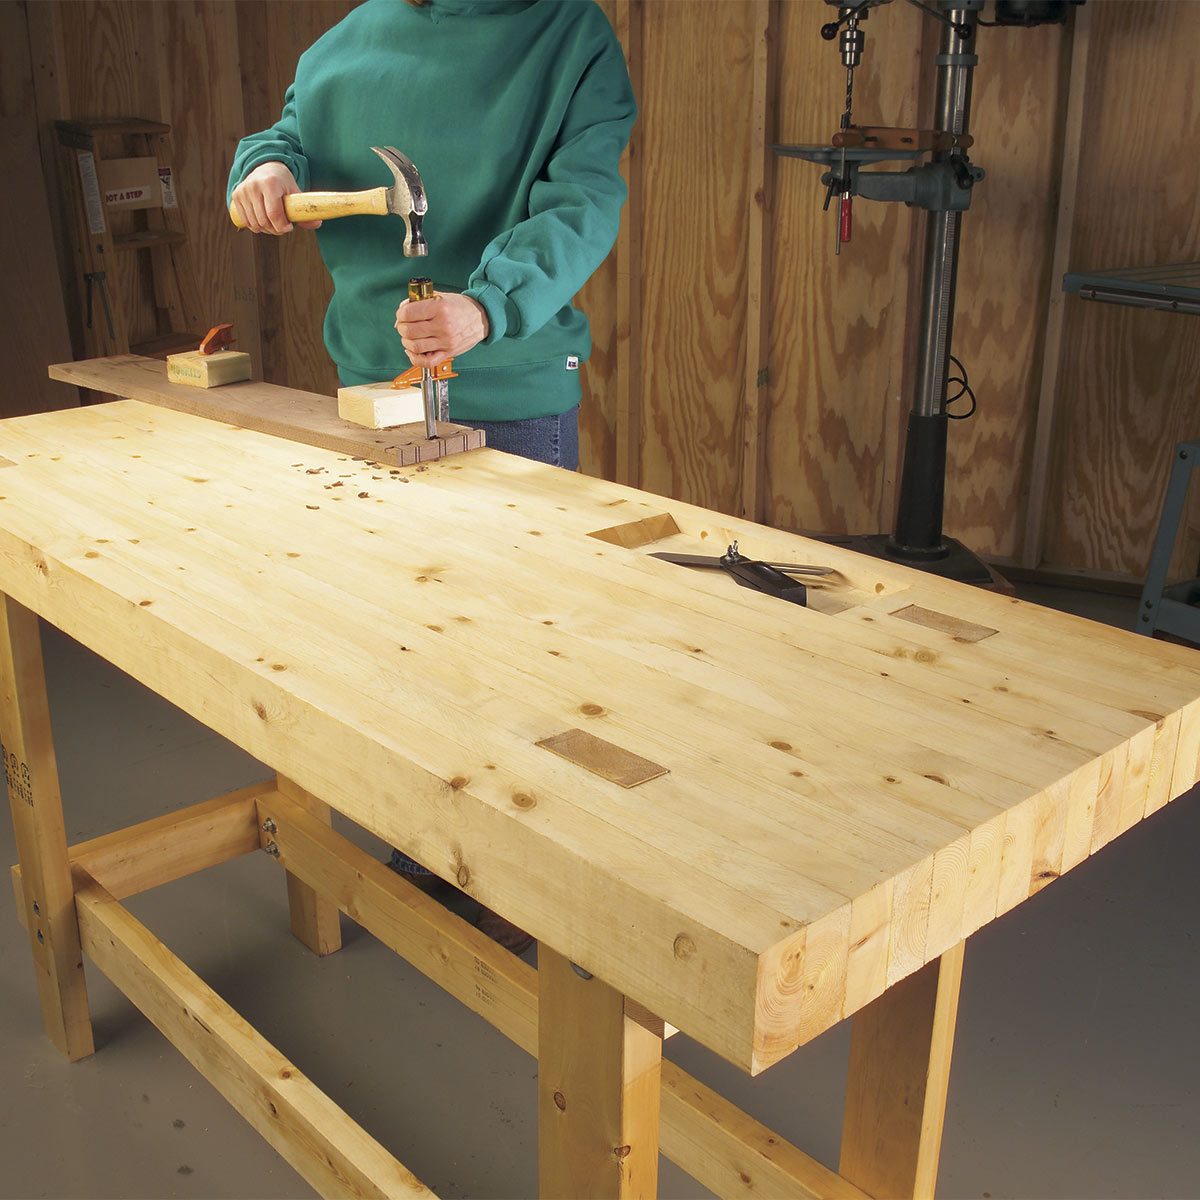
I then laid them out so that any knots or imperfections were placed face down this will create the cleanest looking worktop and helps when it comes to hand planing it flat later on. It helps if you number or mark the order of the pieces, as the top should be glued up in stages Woodwork Bench For Early Years 50 and it's easy to lose track of which order and orientation the timber needs to be laid out. I had 17 boards to glue up which is too many to attempt in one go so I glued and clamped 5 together as my initial test of how it would all work.
I then used the plane to knock off any high spots and dried glue that squeezed out during the glue up. Use baking paper or similar under the boards being glued to both catch any glue that squeezes out and to prevent your boards from ending up glued to whatever work surface you are using.
Once you've got your laminated top glued into three solid sections I did initial glue ups of six boards, six boards and five boards then glue it all up. Use as many clamps as you have and apply more glue than you think you need. Get a hand plane a Jack or No. Then try to plane the top flat. This will take hours, and make lots of shavings but is far more satisfying than doing it with an electric sander or planer.
Use a straightedge to regularly check for high spots and to make sure you aren't making any "valleys" or low spots. I found it easiest to make overlapping diagonal passes with the plane at roughly 45 degrees to the long end of the worktop, moving left to right.


|
Delta Miter Gauge Parts 03 Open Hardware During Ecq 0s |

SCARPION
19.08.2020 at 13:57:53
sex_simvol
19.08.2020 at 23:52:32
hgk
19.08.2020 at 23:29:22