Ryobi Band Saw 9 Inch Manual,Best Compact Router Kit Game,Vintage Dewalt Radial Arm Saw For Sale In,Kms Tools Lathe Chuck Questionnaire - Easy Way
Attach the table aligning bolt, washer, and wing nut to the saw table. Page 13 Failure to turn the saw off, remove the switch key, and unplug the saw could result in accidental starting causing possible serious personal injury. Before using the band saw, turn the blade tension knob on the top of the saw clockwise to engage tension. See Figure 9. Page Operation Open the cover of the saw housing. Slide the worklight bracket into the slot at the back of the band saw housing and into the slots on the inside of the band saw.
Securely tighten the wing screw clockwise to hold the worklight firmly in place. Page 15 If this happens: Wait until the saw has come to a full and complete stop.
Place the switch in the OFF position then remove the switch key from the switch assembly. Store key in a safe place. Page Operation Retighten the lock knob. NOTE: For convenience, store the miter gauge in the slot provide on the back of the band saw. See figure From either side of the saw table, slide the rip fence onto the saw table.
Failure to heed this warning could result in a serious eye injury. Loosen and remove the wing nut and table aligning bolt from the saw table. Page 18 We recom- mend that you check and adjust blade guide settings be- fore first use of your saw. The upper and lower blade guides and thrust bearings support the band saw blade during cutting operations. The adjustment of the guides and bearings should be checked whenever a different blade is installed.
Page Maintenance The blade guides help keep the blade from twisting and binding. The blade will be ruined if the blade teeth hit the blade guides while using the band saw.
The set of teeth and the sharpened edge of teeth will be damaged by hitting the blade guides. Page Maintenance To prevent accidental starting that could cause possible serious personal injury, turn off the saw, remove the switch key, and unplug the saw before working on the band saw. There is a brush located inside the saw housing, next to the lower wheel. Page Troubleshooting WARNING: To prevent accidental starting that could cause possible serious personal injury, turn off the saw, remove the switch key, and unplug the saw from the power source before working on the band saw.
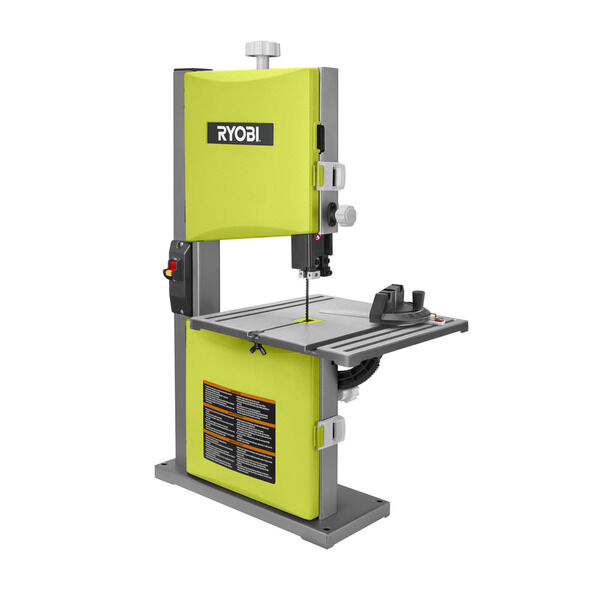
Blade does not run in the approxi- mate center of the upper wheel. Be sure to provide all pertinent facts when you call or visit. Please call for your nearest Ryobi Authorized Service Center. You can also check our web site at www. This manual is also suitable for: Bs Print page 1 Print document 24 pages. Cancel Delete. Sign In OR. Your new Band Saw has been engineered and manufactured to Ryobi's high standards for dependability, ease of operation, and operator safety.
Page 3: Rules For Safe Operation Servicing requires extreme care and knowledge and should be performed only by a qualified service technician.
When servic- ing, use only identical Ryobi replacement parts. Page 4 Safe operation of this power tool requires that you read and understand this operator's manual and all labels affixed to the tool.
Safety is a combination of common sense, staying alert, and knowing how your band saw works. Read the operator's manual carefully. Page 5 The blade guides have been preset at the factory. These settings are functional for some applications.
We recommend that you check and adjust blade guide settings before first use of your saw. It should be connected to a power supply that is volts, 60Hz, AC only normal household current. Do not oper- ate this tool on direct current DC. A substantial voltage drop will cause a loss of power and the motor will overheat. Page 7: Glossary Of Terms And Unpacking As it applies to the workpiece, that area which will be or has been cut by the blade.
The distance that the tip of the saw blade tooth is bent or set outward from the face of the blade. The throat plate, installed in the saw table at the factory, allows for blade clearance. Scale and Scale Indicator The scale and scale indicator show the angle or degree the saw table is tilted for bevel cutting. Page Assembly Note: The wing nut goes below the saw table. When mounting the saw to a workbench, holes should be drilled through the supporting surface of the workbench. If the band saw is to be used as a portable tool, it is recommended that you fasten it permanently to a mounting board that can easily be clamped to a workbench or other supporting surface.
Page 12 Hold the blade with both hands and rotate it inward. With the teeth of the blade toward the front of the saw and facing downward, place the blade through the lower blade guides and around the lower wheel. Pull down on the upper wheel to place the saw blade on the wheel. Page 13 See Figures 10 and Turn off and unplug the saw. Remove the switch key. WARNING: Failure to turn the saw off, remove the switch key, and unplug the saw could result in accidental starting causing possible serious personal injury.
Page 14 Place a small combination square on the saw table beside the blade. Loosen the table lock handle and rotate the angle adjustment knob to tilt the saw table up or down to align table 90 to blade 0 position. Retighten the table lock handle. Page 15 Replace the blade guard if no additional adjustments are to be made. Note: The lower blade guide support screw is the top screw located on the right of the saw housing under the table.
See Figure

|
Wood Craft Stores Milwaukee 40 Soft Close Drawer Slides Howdens Liberty Open Hardware Vs Open Source Hardware 01 Face Frame Euro Hinges 01 |

ILGAR
29.05.2021 at 14:47:15
KaYfUsA
29.05.2021 at 17:57:56
NOD32
29.05.2021 at 13:54:33
Oxotnick
29.05.2021 at 10:17:45