Make Finger Joint Jig Router Table Kit,Open Hardware Fast High Resolution Laser 2d,Draper 50021 Belt And Disc Sander 350w 240v Pc - Step 3
Necessary cookies are absolutely essential for the website to function properly. This category only includes cookies that ensures basic functionalities and security features of the website. These cookies do not store any personal information.
Any cookies that may not be particularly necessary for the website to function and is used specifically to collect user personal data via analytics, ads, other embedded contents are termed as non-necessary cookies.
It is mandatory to procure user consent prior to running these cookies on your website. Skip to content Finger joints can be cut in multiple ways like with the handheld or router table but in this article, I will discuss how to make a finger joint with a router?
A more attractive thing is that you can make corners of boxes instead of using dovetail joints. What We Have Covered. Woodhutt guide you how to make a finger joint with a router. As I said that you need a specific router bit and cutter for doing the task. In this context, there is a simple technique for making finger joints. I hope that you learn and understand these things easily. If you have any query or question related to this topic then comment on us.
I will give you a response to your problems. Now try to make your home equipment and give us your feedback. Thank you! Best of luck! Leave a Comment Cancel Reply Your email address will not be published. This website uses cookies to improve your experience.
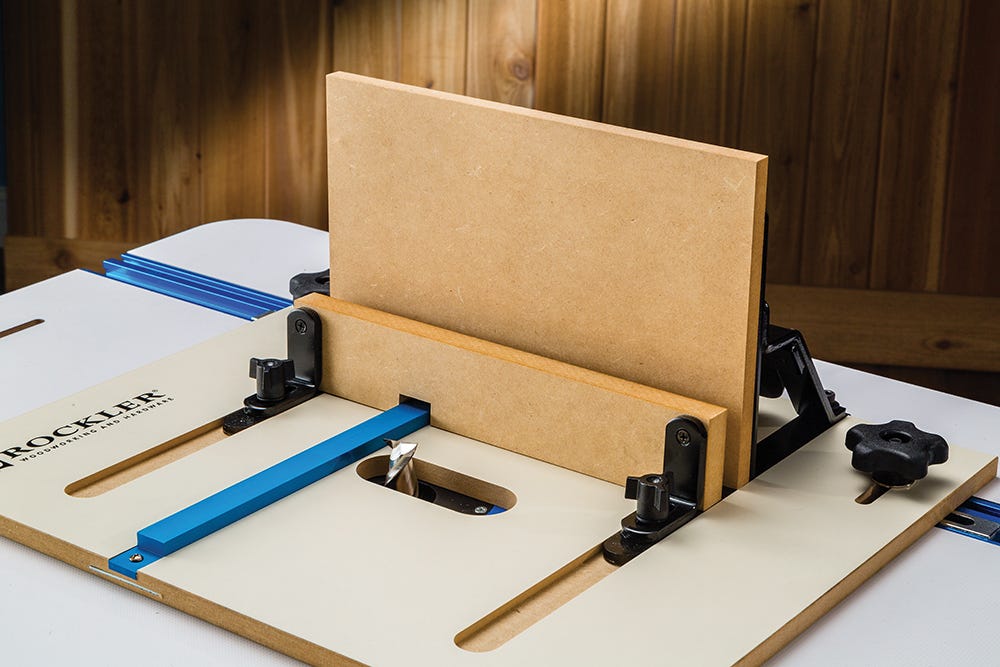
We'll assume you're ok with this, but you can opt-out if you wish. Sorry, just got an ear worm. I glued the base to the runner, making sure the base was square with the table. I found a chunk of colonial casing and trimmed the mitered ends for aesthetics. I glued and screwed it to the front of the base. TIP: If your clamps ever lose one of the rubber cushions just use one of those thingies you put on the bottom of a chair to protect the floor. The glue is not the best and it is advisable to add a little daub of super glue to it.
I found a chunk of 2 x 4 and used it as the back fence and ran the router blade up to it. I screwed the fences through the base and counter sunk the screws.
Make sure this fence is square to the base. I've seen some people secure right angle wedges to the back of the fence to keep Router Table Box Joint Jig Plans Kit it square. It took me a bit of finessing, but eventually I got a perfect fit. I cut two pieces. One is secured to the base and is one router bit width away from the cut made by the bit.
The other is used to basically eliminate any space and will allow the router bit to cut a hole in the end of a board. I raised the router bit a skosh above the thickness of the wood I'd be using. It is easier to sand off a protrusion than to fill in a depression. Then ran it into the rear fence and tested the keys. I made that error and knocked out the key and trimmed it down and the spacer down to the proper height.
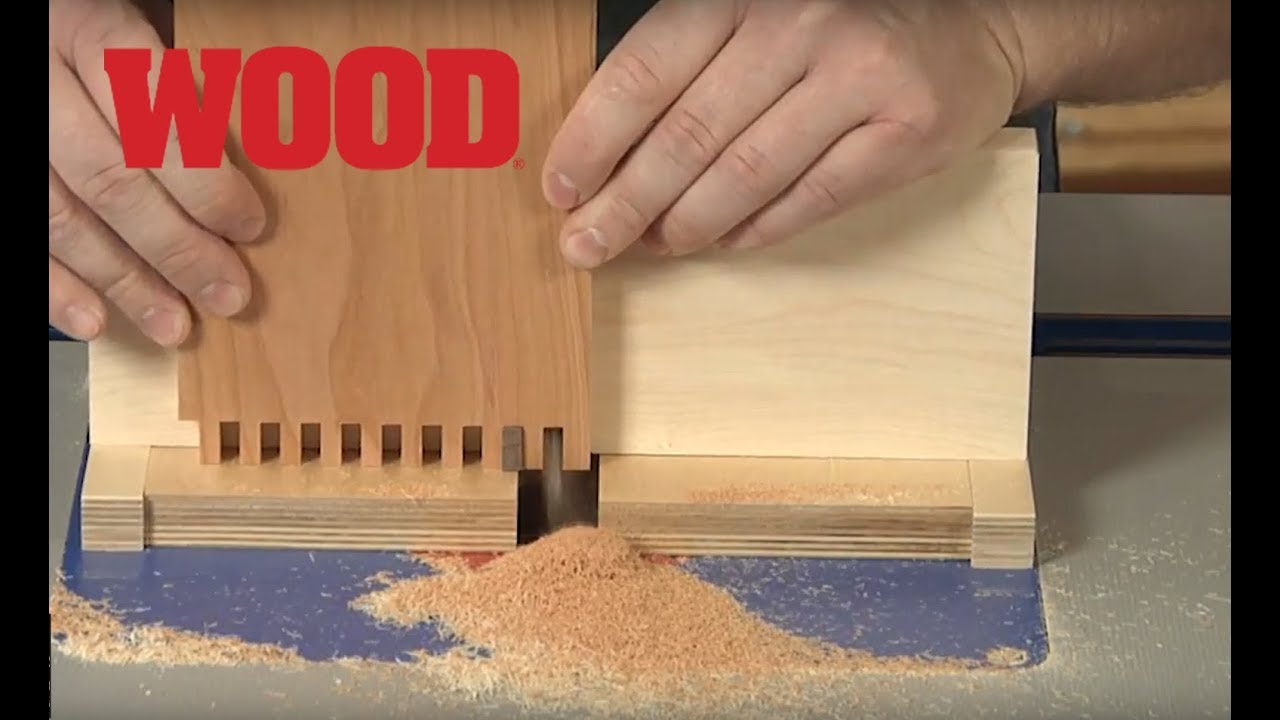
Now to test the jig. I cut two pieces of wood the same size. Then I removed the spacer and staggered and aligned the two notches on and up to the fixed key. Once you get that perfect fit, you can then screw your pin board to your sled or miter gauge. In this example I chose not to screw it in and just left the clamps on. First, mark the top of each of the four box pieces — you can line them up and make a mark all at once. This mark is key to our success and will always face toward the pin when cutting the fingers.
Set your table saw blade height to just a hair higher than the thickness of your boards. We will start off with the two long pieces. Start making your fingers with the mark facing toward the pin. Cut all the fingers just as you did with the test piece, along the entire end. Flip the board over and cut the fingers on the other end.
Again, make sure the mark is facing inside, toward the pin. First, take one of the completed long sides and place it over the pin. Position the short side up against the long piece, once again making sure the marks on both pieces face inward, toward the pin. While holding both pieces tightly up against the fence you can run your board through the blade making that Free Router Table Box Joint Jig Plans first cut in the short side. Once you finish cutting the fingers on the short side end, you can flip the board over and cut the fingers on the opposite.
One more time, make sure the marks on both pieces are facing inward toward the pin. Do I sound like a broken record yet? Those marks are key to a successful glue-up! After completing the fingers on the short piece, repeat Steps 15—18 on the remaining short piece. If the joints were cut correctly your box will self-square. Make sure your marks are all facing up and everything should go together like a puzzle. Use clamps to keep it tight while the glue sets. Sometimes you may find tiny gaps after glue-up because of blow-out or fibers chipping away during the cut.
You can easily cover this up by mixing up some sawdust and wood glue and filling the gap. Once the glue dries you can sand everything flush again. This is a great trick for flawless-looking box joints.

|
Router Table Attachment For Delta Table Saw Cpu Earlex 5500 Thinning Wooden Cabinet Locks Malaysia |

VETERAN
02.08.2020 at 21:35:45
Love_Is_Bad
02.08.2020 at 15:14:47
rebeka
02.08.2020 at 14:26:45
K_O_R_zabit
02.08.2020 at 10:50:55