Diy Circle Cutting Jig Key,Router Default Login 64,Sawstop Portable Contractor Saw,Kreg Kms8000 Manual 61 - Try Out

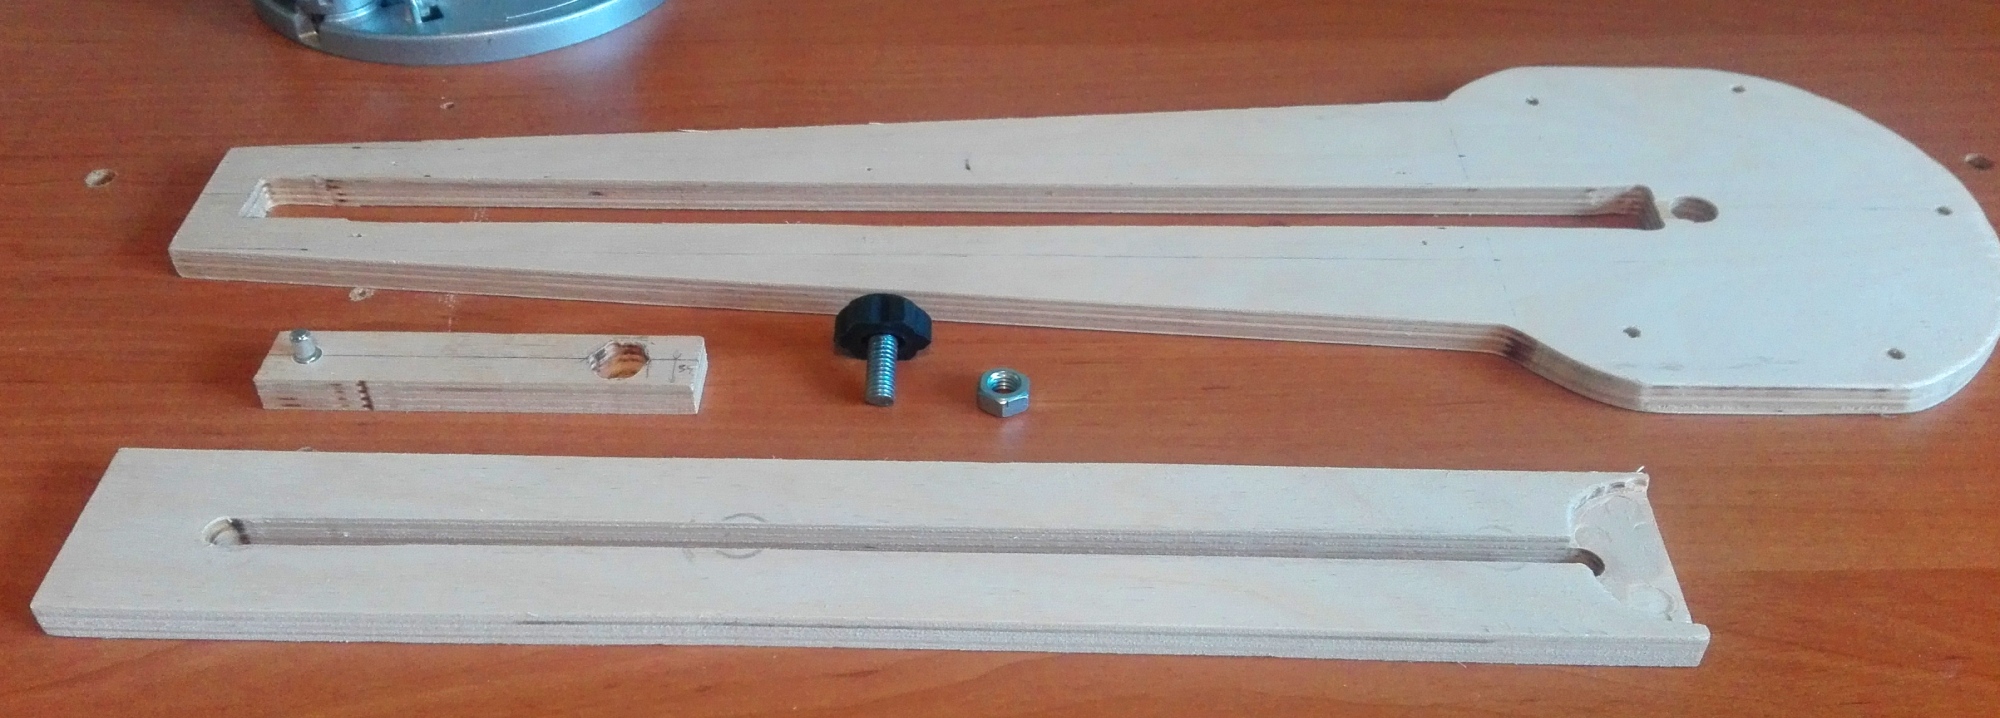
The pivot pin is then threaded into a sliding t-nut, sent through the slot in the jig, and secured on top with a knob. This method can be made without the use of a lathe. The design turned out great and is very functional. I tested both pivot pin assemblies and they each work without issues. You might want to watch by build videos of this project to see a step by step tutorial on how to build this jig. They are on this page below and also on my YouTube channel. I have also listed the tools and materials I used in this project below.
If you would like to build this jig yourself the follow the link below to download my CAD and Sketchup template. If you want me to build one for you or if you would like to buy the hardware kit pivot pin assembly then follow that same link to my RedneckDIY store.
Good luck! Follow this link to download the template. Array Array Array Array. Redneck DIY. Toggle navigation Main Menu. This is a really easy shop project that will make cutting circles a breeze! I loved the adjustable dovetail slider feature in his jig and had to incorporate into my jig. The following are some of the tools and supplies I gathered to build my bandsaw circle cutting jig affiliate links :.
Cut a piece of plywood for the base of your bandsaw jig. Your dimensions will vary based on the size of your bandsaw and on the size of the average circles that you want to create. Make a mark where the bandsaw blade will line up and from that point mark two lines: an inch above and below the initial mark.
This section will be the adjustable sliding dovetail. Glue the top sides to the base of the circle jig. First glue and clamp one side. Place the sliding dovetail with a card on each side before gluing and clamping the second side. This will ensure that the dovetail has room to freely slide in and out. Once the glue dries, trim up the edges of the jig on the table saw.
I used a scrap piece of oak and attached it to end of the circle jig. At this point I noticed a had an imbalance issue with my bandsaw jig. I installed a small rare earth magnet to the base of my bandsaw jig. This was my first time using threaded inserts. It was a breeze and adds a nice touch to the project. This final step is a really nice to have: installing sticky measurement tape.
To install the tape:. Lock the sliding dovetail into place Cut a circle on the bandsaw with the jig Measure the diameter of the circle Line the sticky measurement tape up with the end of the sliding dovetail Cut off any excess tape. You can avoid marring the surface of your circle by first cutting a sacrificial circle.
Attach a wood blank to the sacrificial circle using double sided tape. Now you can cut a circle from the wood blank without damaging the surface. Reply 2 years ago. Tip 2 years ago. Great jig and Instructable. You're inspiring me to make a long overdue circle cutting jig for my bandsaw.
The one tip I'd like to add is that you might want to use Baltic birch plywood rather than cabinet grad plywood. The higher number of same-thickness plies tends to make it flatter and more dimensionally stable. Plus the birch plies will wear better than the softer often poplar plies of cabinet grade plywood. Last note: I love your push stick. I'm so glad I finally made one. It's a huge timesaver over my previous set up on using my router :.
Great job! I've made a few temporary circle cutting jigs for my band saw, but I'm going to use yours as the basis for a more permanent one. I anticipate only a few changes. This would keep it more balanced such that magnets are not needed. However, I will cutout a semi-circle above the left side of throat plate, so that dust collection can happen. Along with a slot behind for the blade, of course. For smaller circles, mostly. Anyway, your details on the dovetail slider were very helpful, and it's a great project!
I glad you found it useful. I really like your suggestions for improvements. If I made it over again I'd probably extend it past the blade as well. Very nice! I'm going to make one of these, using your plan.
You have a channel at the front of your bandsaw, you could slide-in something that locks it, rather than futz with the magnets. Btw, I love your push block. Very nice work! Love Diy Circle Cutting Jig Keyboard the attention to detail.
Exact same principle as the one I built for my ghastly relic of a bandsaw Ryobi BSB but you spent more time making yours than I did. A while ago, I made a circle cutting jig for my band saw. Yours is MUCH better. Question, unless I'm cutting very thin wood, when I try to cut the wood tries to push the blade sideways and bind up. Any ideas?


|
Bench Vise Woodies 2020 Best Woodworking Bench Keyboards |

asasa
20.08.2021 at 12:35:22
ANTIXRIST
20.08.2021 at 10:12:17
RICKY
20.08.2021 at 13:15:19
GULER
20.08.2021 at 11:49:28