Cnc Router Table Build Id,Pumpkin Carving Kit Kat Commercial Production,Build Your Own Hot Rod Frame Video,Diy Outdoor Woodworking Projects Inc - Good Point
Making a Pendulum Wall Clock Demonstration See how the Maverick used a story board the to produce all the components for this project. Making a Mailbox Post Demonstration See how the Maverick used the turning center and the horizontal table to complete this Mailbox project.
Making Textured Door Panels Demonstration See how combining machining toolpaths with raster carving toolpaths increase productivity. JMP Woodturning. JMP set up shop in Brooklyn circa in to show the world their talent at being an unstoppable leader in the millwork industry.
They specialize stair parts and wood turning. Kathy Wise Designs Inc. Kathy Wise is a world renowned Intarsia artist based out of Yale Michigan. Kathy believes there is no right or wrong way to create intarsia, just different styles. Audeze LLC. I'm Ready, Let's Do This! The photo shows a spoilboard with a grid of holes in it. A Threaded Insert goes in each hole. Now you have a grid of holes that create a Fixture Plate.
You can install clamps, workstops, and other workholding devices by bolting them down to the holes. What router bits should I use? The manufacturer will tell you what materials are an option for their cutters. Second, avoid most hardware store cutters intended for routers. CNC Routers are a different beast, even though they may even use a standard router for a spindle.
Last, learn about the special cutters that are available for CNC Routers. Click through the link to see our article on them. In other words, they produce a LOT of dust.
So much, that cleanup is a problem. Sometimes even breathing can be a problem. The answer is Dust Collection. Even a simple dust boot connected to your ShopVac will help tremendously. They make Sweepy in sizes that correspond to commonly used trim routers. If you plan on cutting aluminum with your CNC Router, you should invest in a mister. Aluminum tries to weld chips to CNC Cutters, and the end result is a broken cutter wrapped with melted aluminum that looks like taffy.
You can also buy one ready to go pretty darned cheaply. Add a coolant reservoir I saw one made from a sports water bottle! These are both things it needs to know before it can start cutting accurately. Pictured is the Shapeoko Bit Zero. This is one of the most asked questions that I get when people see my machine. How much did it all cost? The cost of the laptop and software license is excluded though.
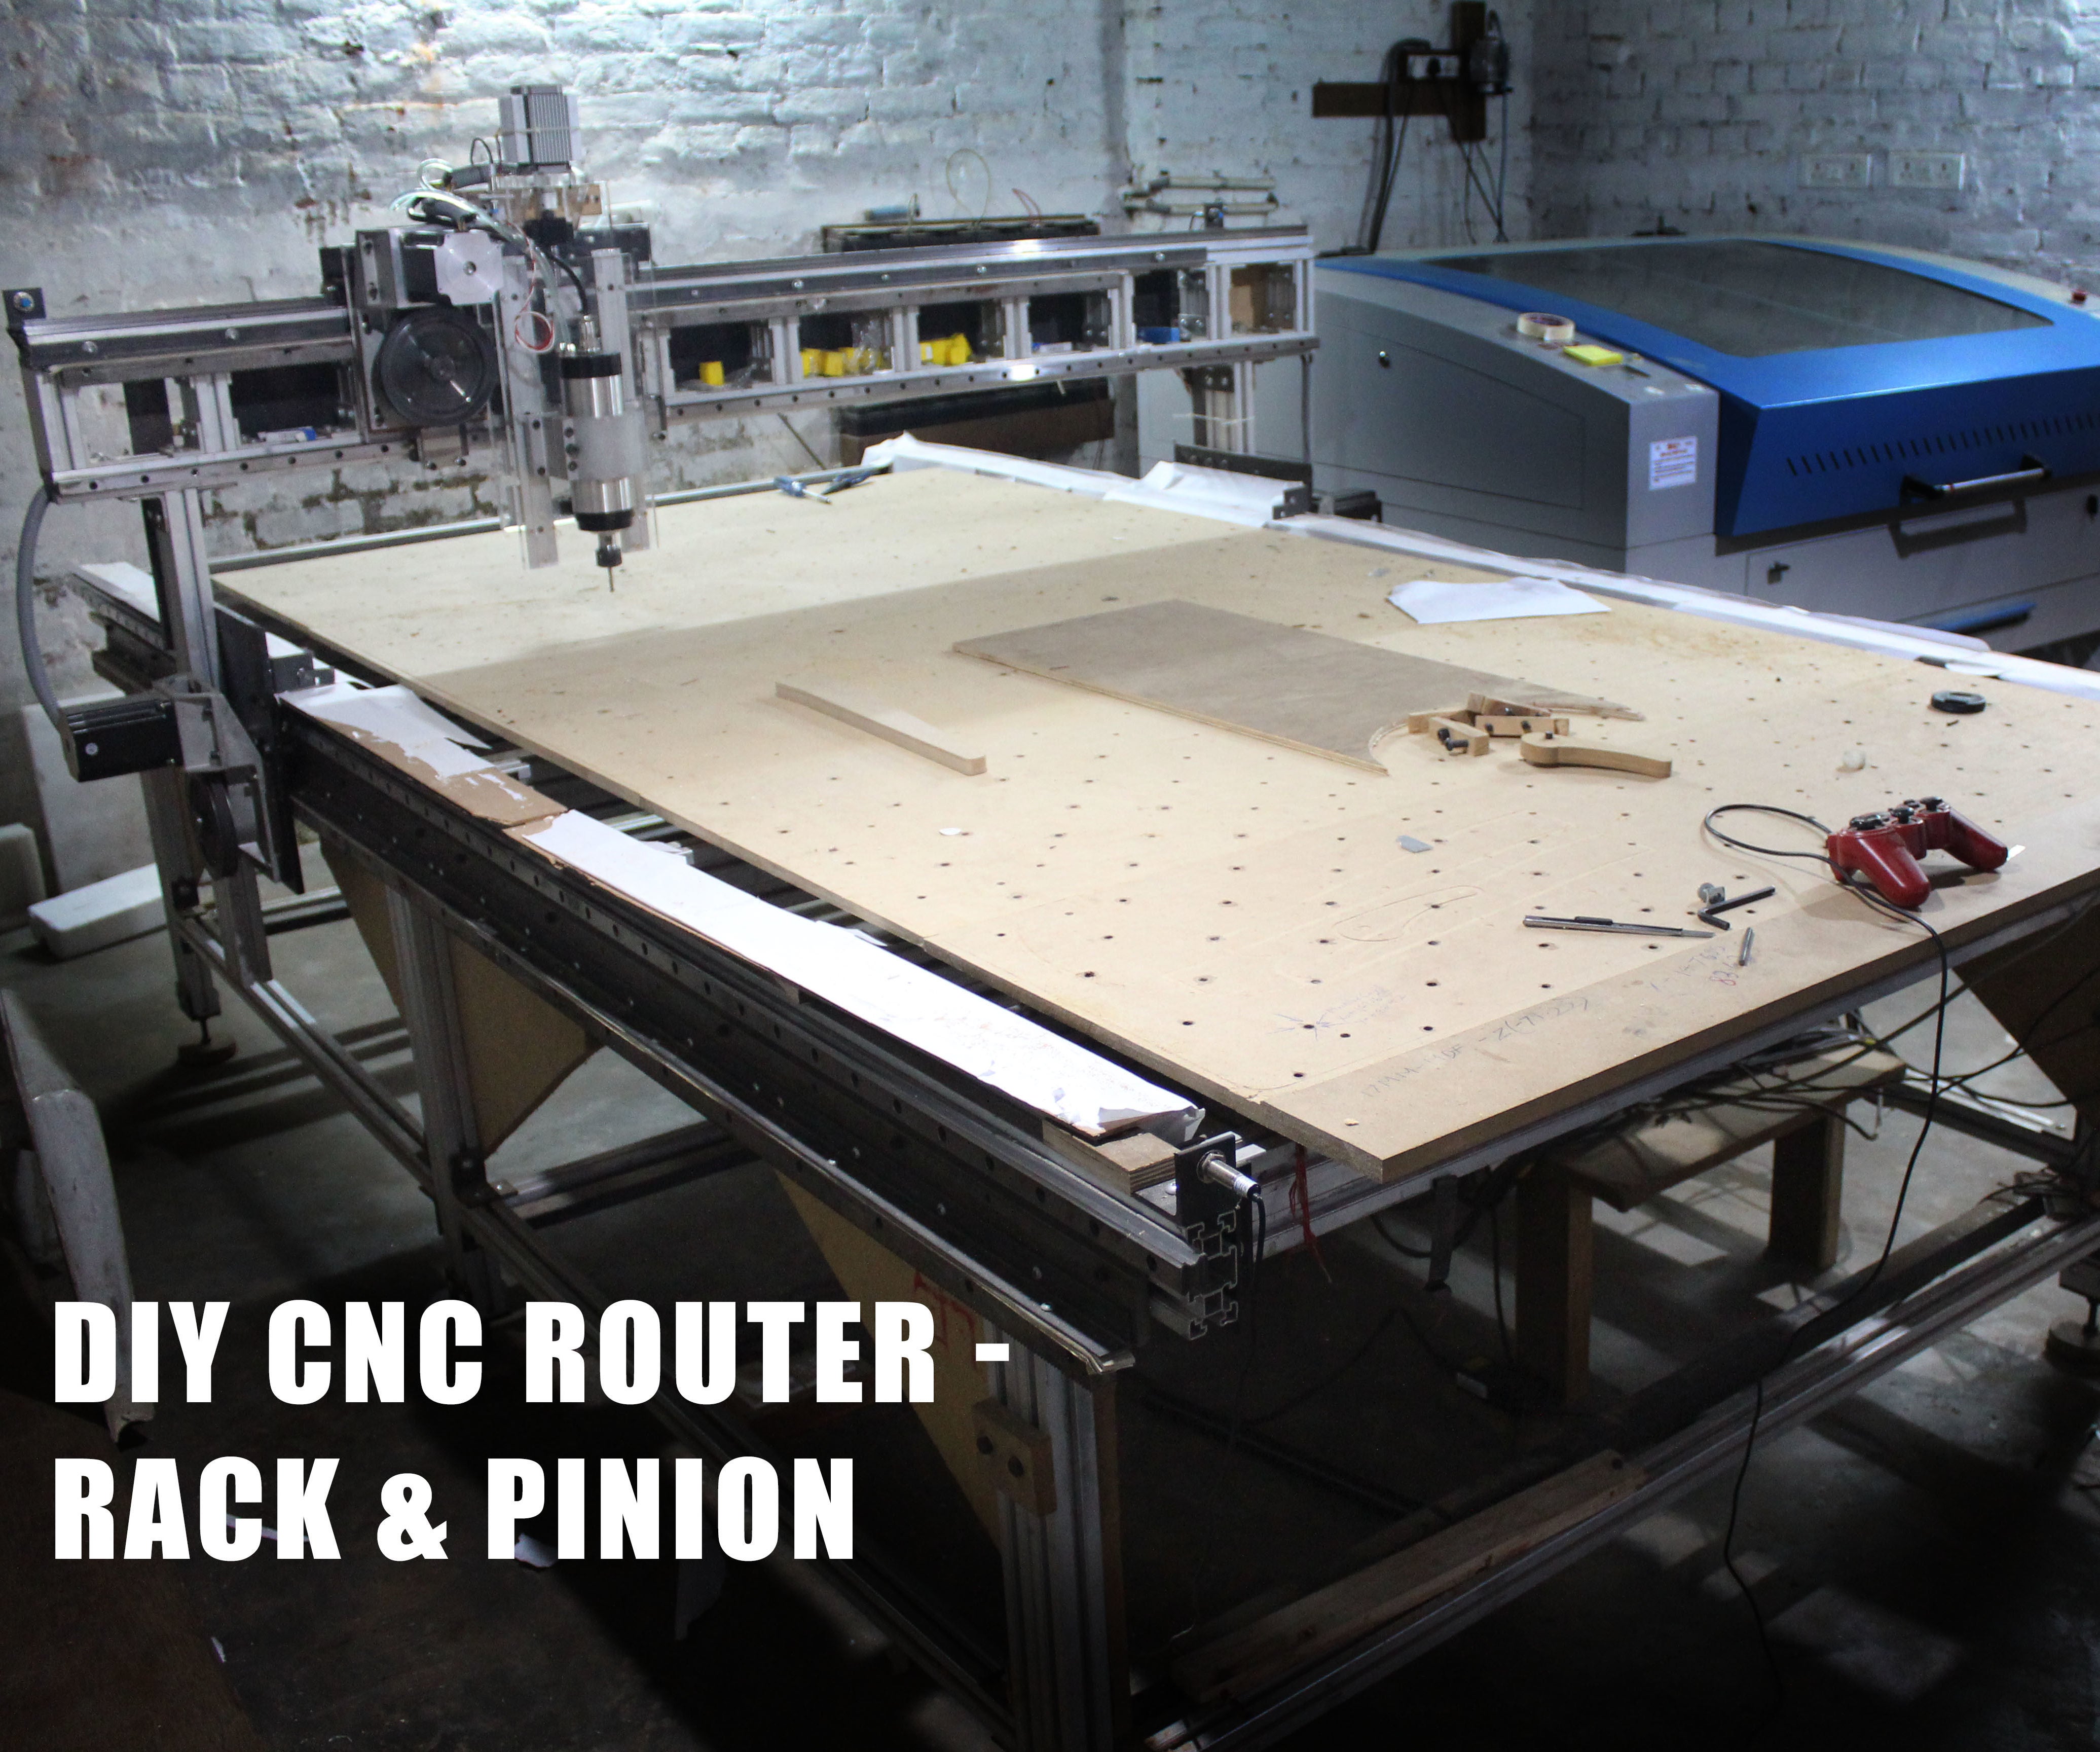
From the commencement of the build to the end it took me around 4 months to complete. Cosidering the price and the hardware used and the fact that I was able to build it all by myself I'd say this was worth it. Plus nothing can beat the experience that I gained from this build. Even if I were to do a build again now, I could do it for even lesser and in much less time. Being a student of design I had only a faint idea of the engineering and mechanics of a CNC, so the first natural thing was to study the various nick nacks of a CNC.
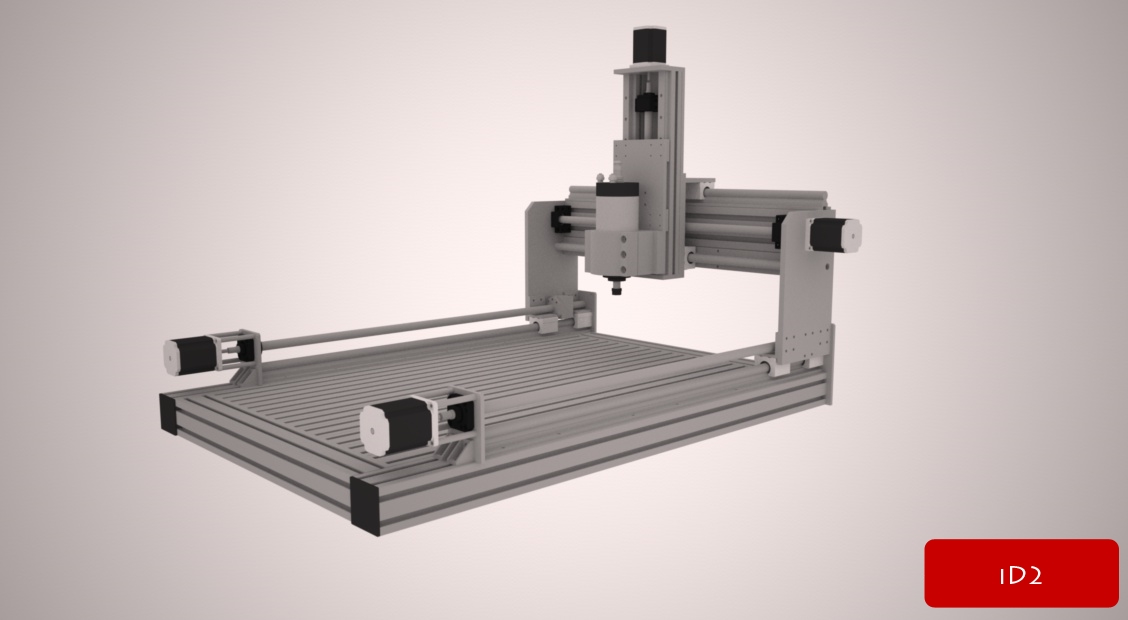
So I started the design on sketchup and roughly sketched out the frame and gantry sizes I was intending for my build. I later detailed the model a bit by adding the gantry plates, extrusion profiles, linear bearings and the rack and pinion assembly. Later on I moved to fusion and modelled an accurate design that I could refer to build my final machine. The machine is designed and constructed in such a way that there is no need for welding.
All the parts are bolted together in place. This gave me the advantage to make the machine in a somewhat modular fashion i. The gantry height is adjustable and can be raised or lowered if the situation arises. Although if I had a welder and some welding experience I would have tried to build a welded frame as it could have been a little cheaper yet more durable. I generally keep the rapids under for safety reasons. The machine starts shaking noticeably if I try to go any faster.
I have used a somewhat experimental way to engage the rack and pinions which works quite well for me and has saved me some money than if I had used other rack and pinion drives. This is just a quick list and description of the parts I used and not the complete BOM. I apologise if I have missed any. All the extrusions used in this build are 40x80mm modular profiles except for the leg bracing which are 40x I used these since these were the largest profiles I could easily source for my build plus it makes it easy to work with one type of profile.
Also since the whole assemble is bolted we need a lot of T-slot nuts, like a LOT. I used around nuts in the build. I self-fabricated all the brackets used to join the profiles together by cutting down pieces of angle irons and drilling holes in them. This was one of the most tiresome and time consuming jobs of this build but at the end I saved around a couple of bucks than if I had bought them prefab.
Angles have also been used to reinforce the gantry and as a support for the gear racks. Apart from the spoilboard I used MDF as a backer plate for my gantry and also to cross brace my table legs to the top frame. I would advise to use aluminium for this purpose but this is what I had lying around at the time and it worked out well.
I was not able to source aluminium plates for my build at least not a decent price for DIY purpose , so I bought some rectangular steel plates cut to size. I used THK linear bearings for this build. I could have saved some money by buying Hiwins but its already done now. I used 25mm ones on the sides and 20mm on the gantry with 4 bearing blocks for each type of rails. Drill press — I have a heavy duty drill press in my workshop.
As monotonous it might have been using this machine, I could not have imagined to build a the CNC without this. If you are thinking a hand drill will work well enough please reconsider. Angle grinder — Well it goes without saying that when working with metals an angle grinder is a must.
I Cnc Router Table Build Variant think I used up around 10 discs in this build. Majority were depleted in cutting the 10mm steel plate. Chop saw — This made the job much faster and easier to cut down lengths of extrusions and angle irons. The base started as two symmetric side profiles with three legs each joined by brackets and cross braced using MDF for stability.
Now the extrusions that I used were somewhat light duty as compared to the range which many people use around the world. So I came up with a way of attaching the MDF to the side profile such that it provides some additional support to the profiles while bracing them to the legs. The pictures might be able to explain this a little better. Now once these were complete I started to join the leg profiles with each other using equally cut lengths of aluminium extrusions.
For better understanding visit CNCrouterparts website. I made my base assembly in a similar fashion to theirs. Once the base was up and standing it was time to slide in the linear bearings on the sides and slide the bearing blocks over them.
As you have might seen in the above pics my gantry design is more like a torsion beam. The beam is really solid and does not flex at all. I even sat on it while it was supported on two edges. Coming down to the supports I decided to keep it as simple as possible.
Rather than making a large support plate I took a rectangular plate of 10mm steel, printed a scaled template that I had pre designed on CAD and stuck that template over the steel.
Later I just drilled and tapped the desired holes. Once all the holes were done I mounted the plates on the bearing blocks. Now I took two small lengths of the extrusion and just vertically bolted it on the gantry plates. I checked if both the sides were at the same height with respect to the linear bearing on the sides. Then all I needed to do was to take the gantry beam and put it over the extrusions and fix them in place using the brackets.
This sort of setup gives me the flexibility to raise or lower the gantry in the future as desired although it is understood that the higher you take your gantry from the base the less stable the machine would be. There was no doubt that for the scale of the machine that I was building, I would be needing a rack and pinion setup, so I started looking all over the internet for rack and pinion drives. It seemed like almost everyone was using the drive from CNCrouterparts for their DIY setup but that was not an option for me.
So like every other millennial I turned to aliexpress for a cheaper option. I was able to find a gearbox for nema34 specially intended for CNC routers. The gear racks were ordered to make locally. Now after buying the gearboxes there was a challenge on how I would be able to keep the rack and pinion under tension.
This would not have been a problem with the CNCRP drive as there is a spring loaded tensioner on their drive.
After a few days and nights of thinking and browsing internet I was able to find a solution. If people are interested I will make a separate instructable of how I did this and link it here. This description will get somewhat lengthy otherwise. Until then try and figure it out from the pics that I have put up. After this I just fixed up the gear racks in place and calibrated them equidistantly with the linear bearings.


|
Cool Shop Projects Us Makita Cordless Track Saw Kit Kit Popular Science Woodworking Projects Yearbook 4g Cnc Router Machine Software Ltd |

Judo_AZE
02.02.2021 at 12:34:53
desepticon023
02.02.2021 at 15:41:39
FB_GS_BJK_TURKIYE
02.02.2021 at 19:21:45